

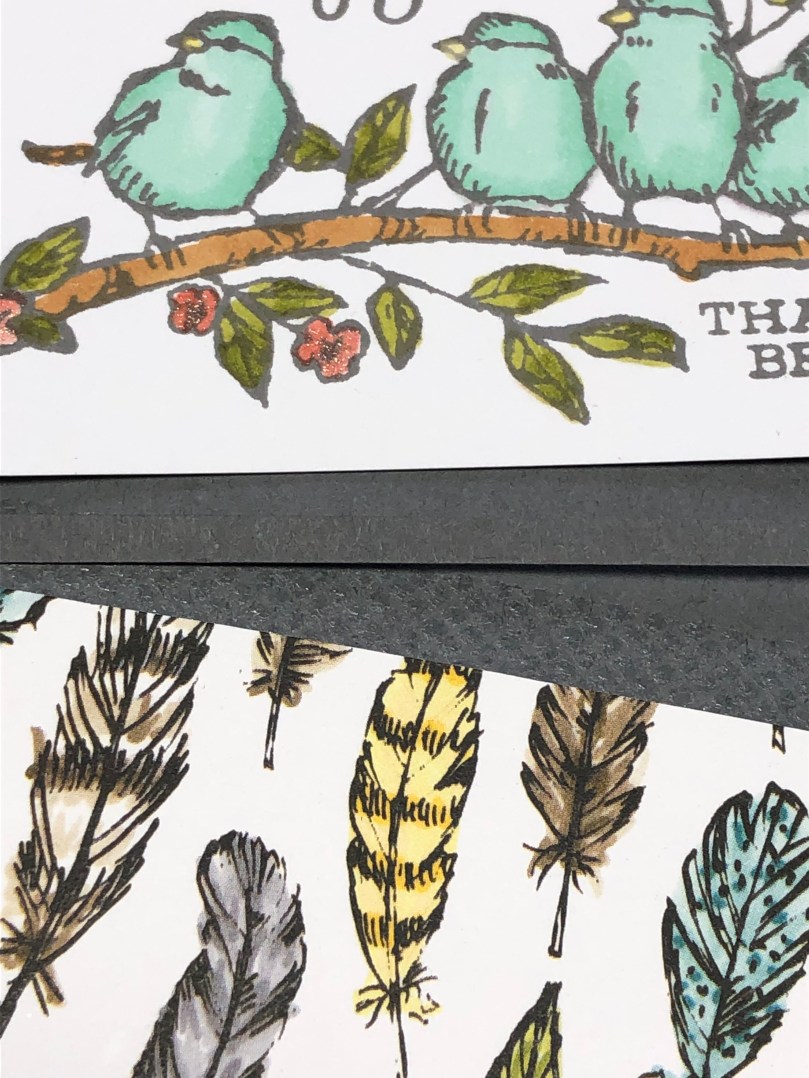
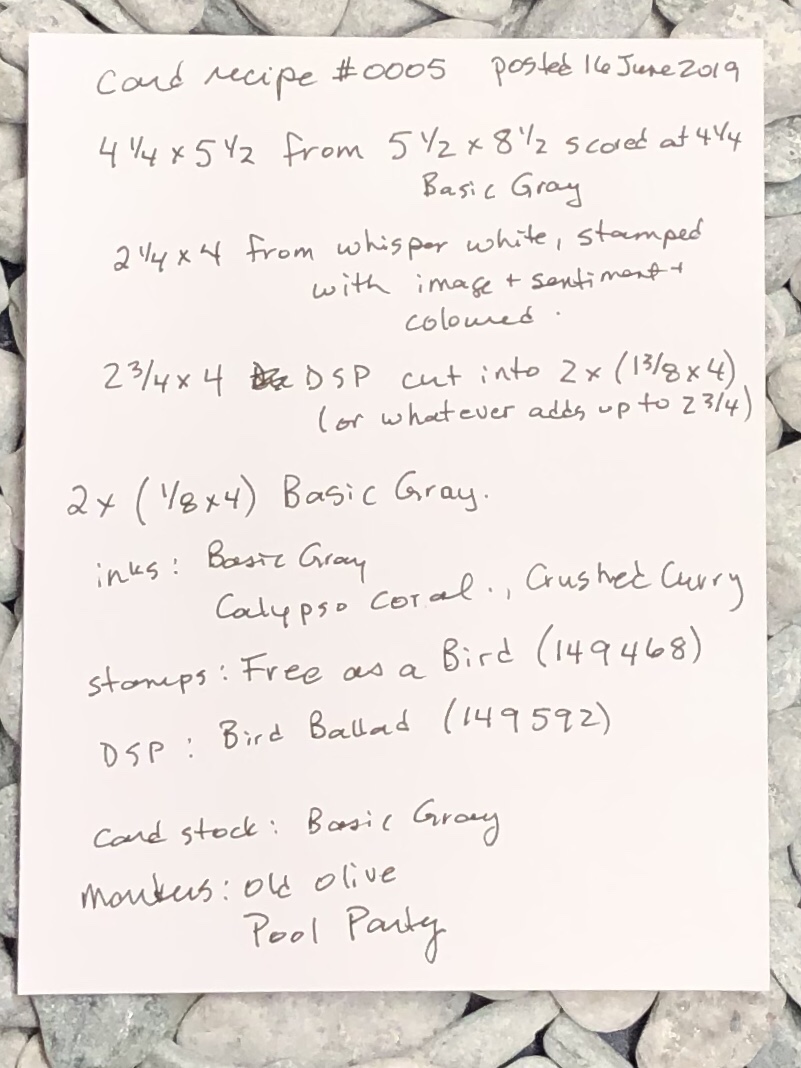
This layout is becoming a favourite go-to design. A stamped image in the centre with some Designer Series Paper (DSP) strips at the top and bottom with onset strips of the card base colour between the stamped image and the DSP.

These are the pieces ready to be assembled. Since the base is 4-1/4×5-1/2, I wanted the rest of the pieces put together to be 4×5-1/4. The math is below. The stamped image piece is 2-1/4 high which subtracted from the 5-1/4 total I wanted left 3 inches for the DSP and spacers in total. The two 1/8 ‘spacer’ strips take a total of 1/4″ which left 2-3/4 for the total height of the 2 DSP pieces. I kept it simple and simply cut them in half to a height of 1-3/8″ each. But you can mix it up and have the top piece thinner or thicker than the bottom piece.
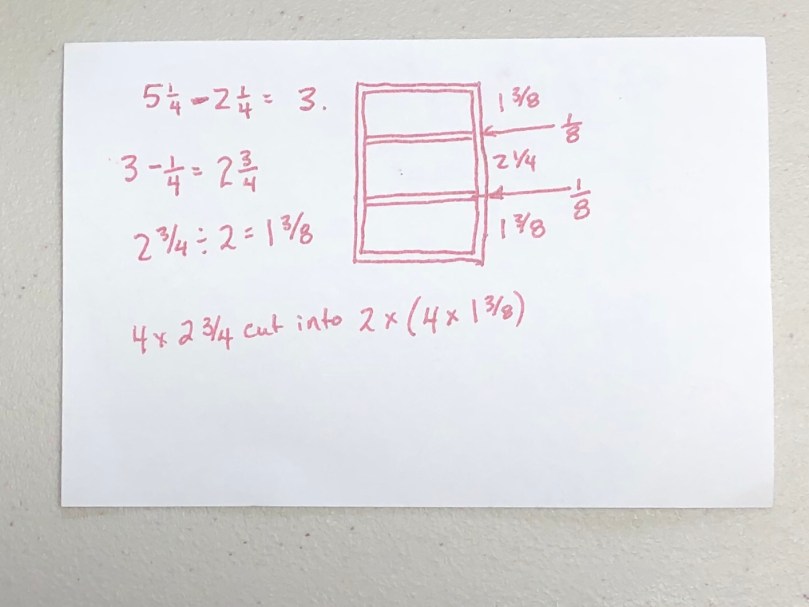
The best way to create the 1/8″ inset strips is to start with a wider piece of paper and just cut of the 1/8″ strips. Try to make sure to keep them to 1/8″ (or at least make sure that the 2 you use total to 1/4″ total so that you have the right spacing on your matting once assembled.
The easiest way I have found to stick down the inset pieces is the put down some tape runner onto the card base just under the top edge of the bottom piece and again just under the top edge of the stamped image piece.
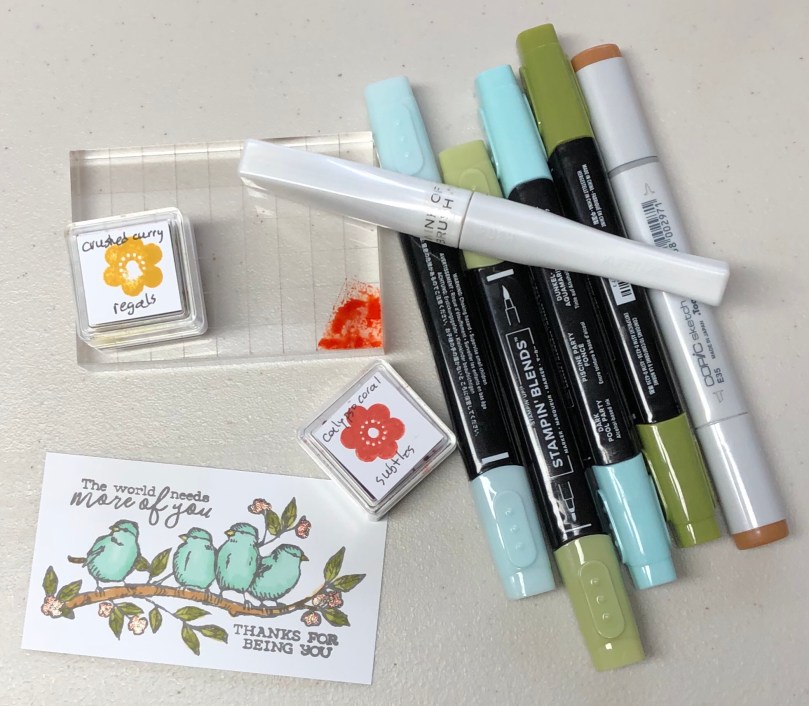
I actually coloured the image piece before adhering the card together.
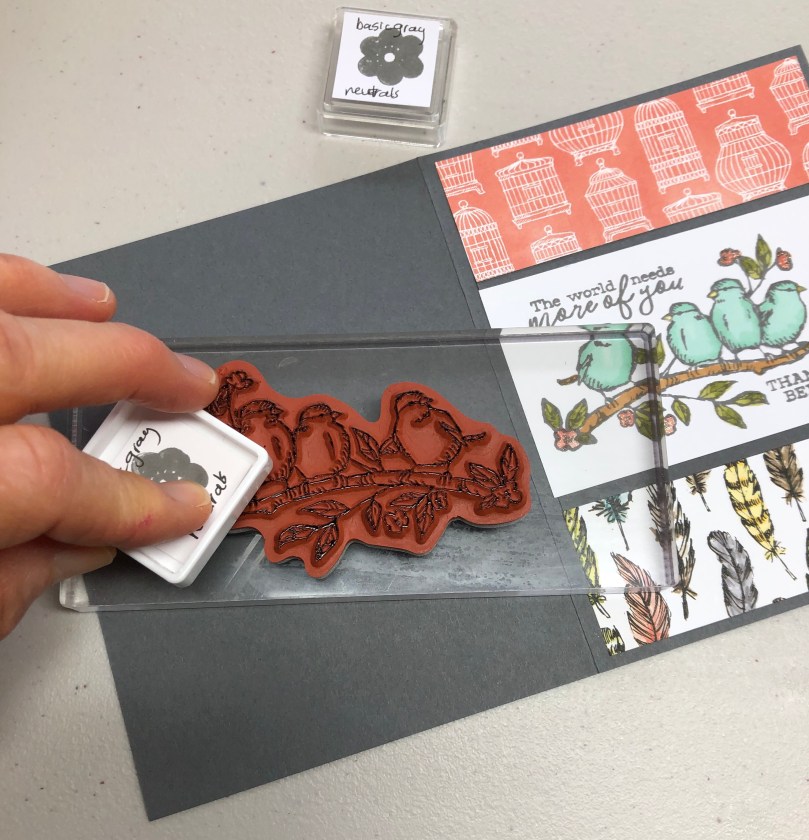 Then I stamped the image onto the back of the card, at the bottom of the the inside insert as well as on the envelope flap and top left corner.
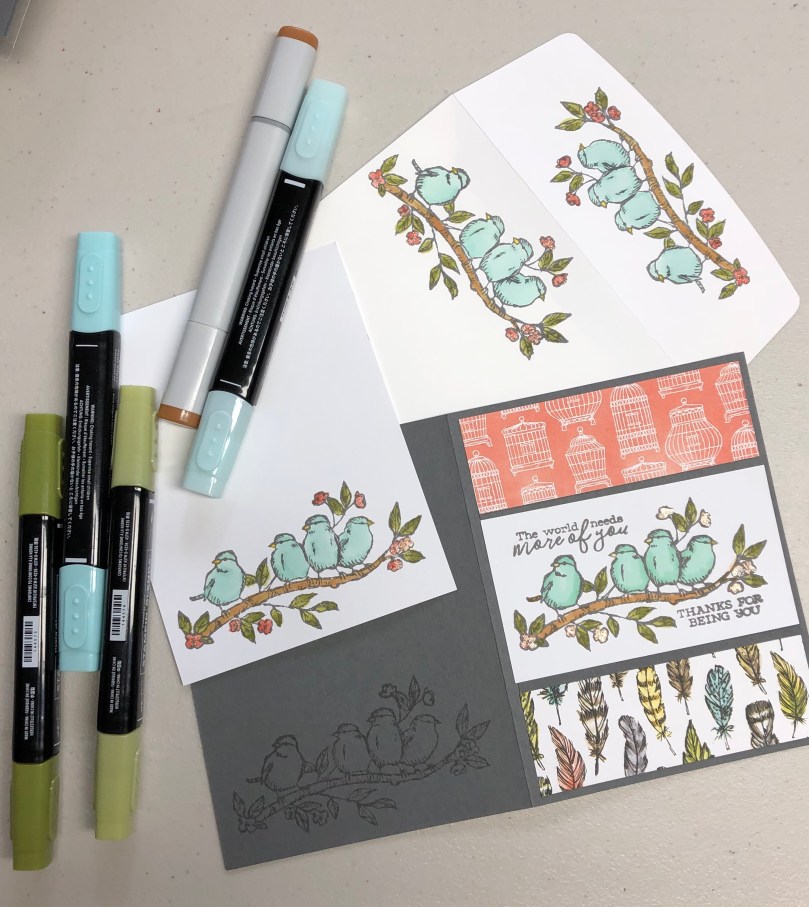
Colouring them was the next step. Like on the main card image, I mostly used Stampin’ Blends markers. So far I only have two colours (Old Olive and plus an old Copic brown marker. So I used a Wink of Stella brush to pick up the Calypso Coral ink from a block for the flowers and the same process for the Crushed Curry for the beaks. That added bonus of that method is that it adds a bit of glimmer.
Now it’s your turn;
Create. Treat. Repeat
