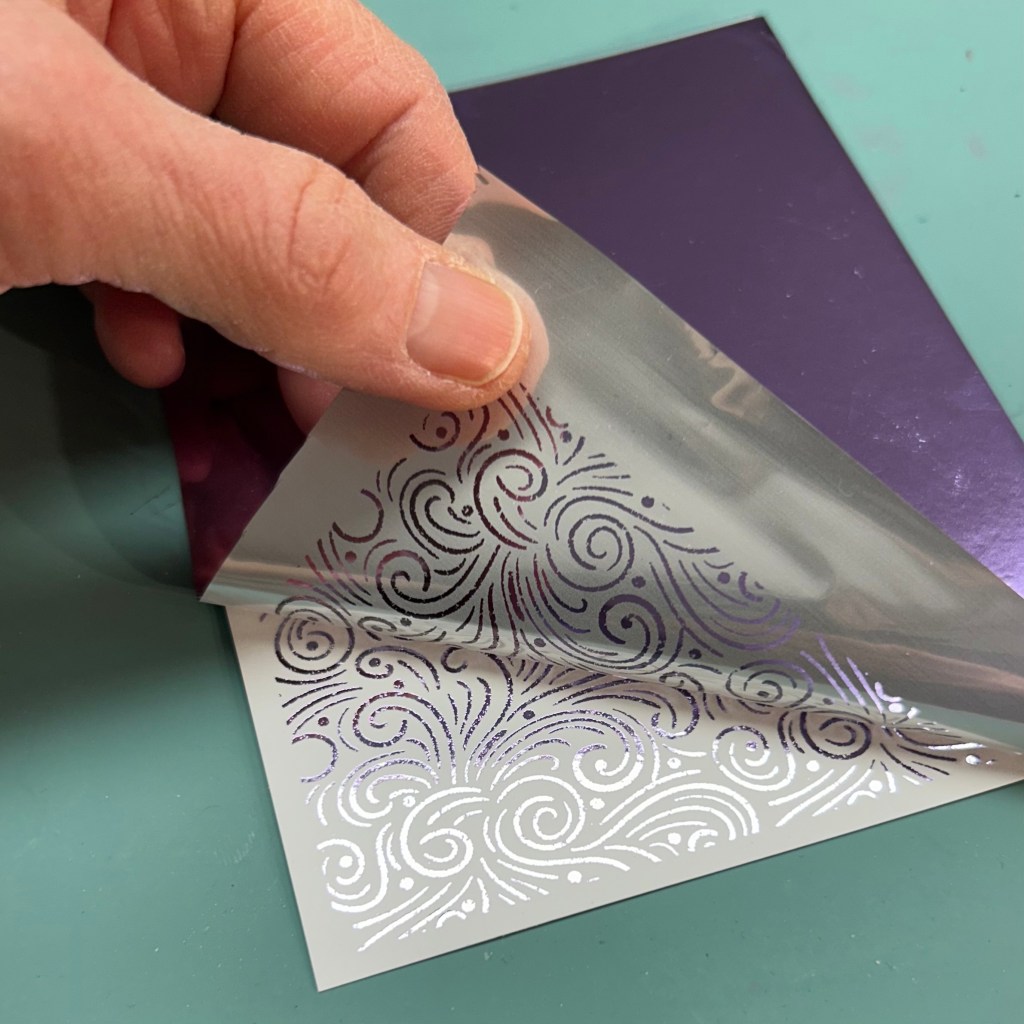
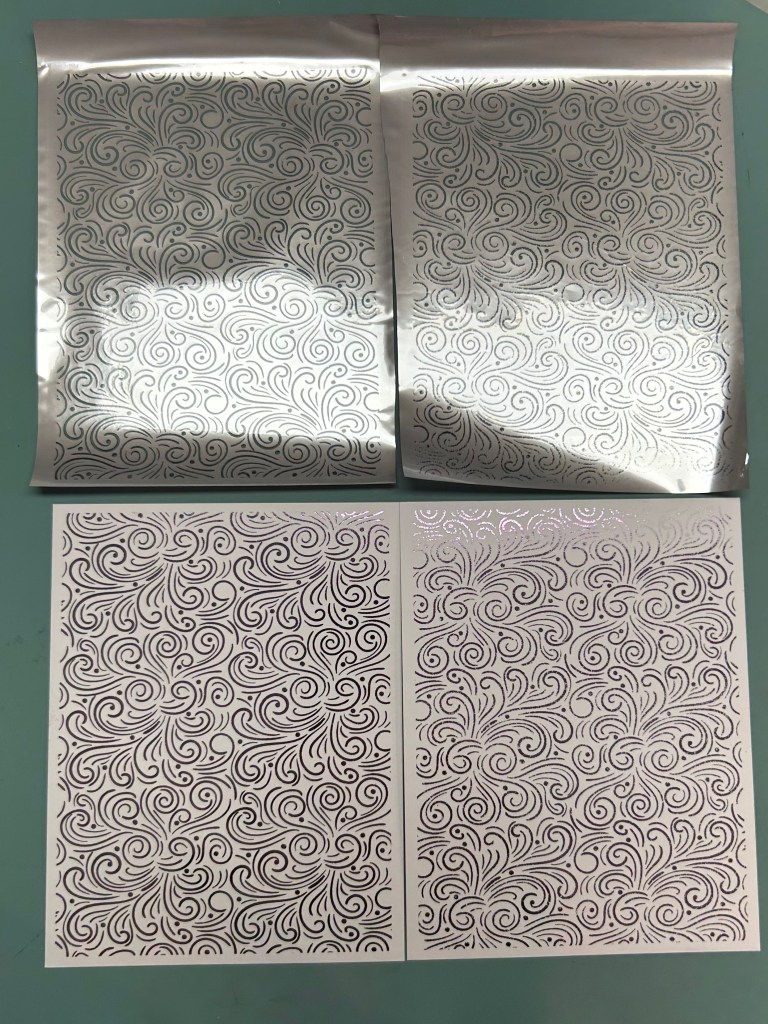
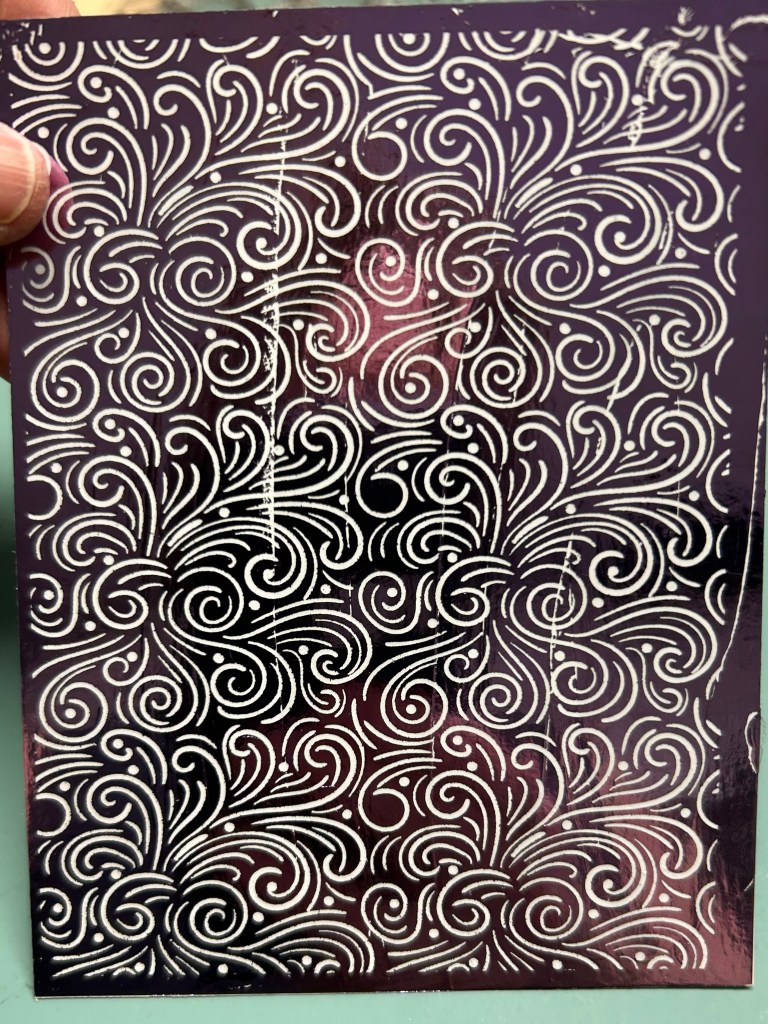
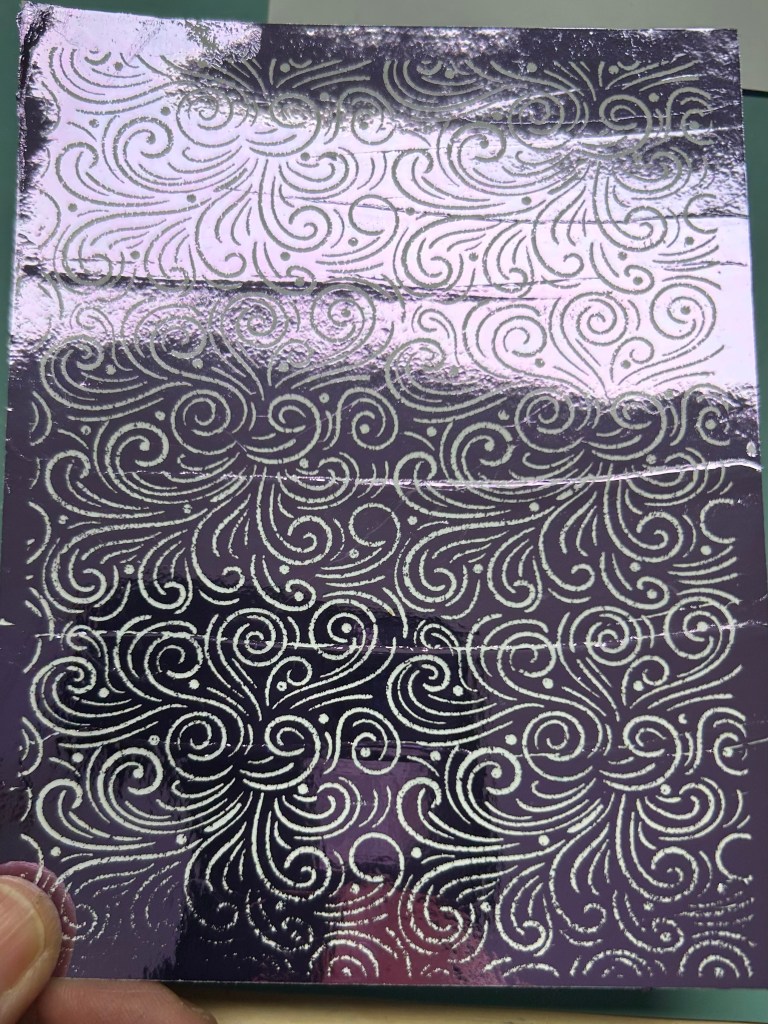
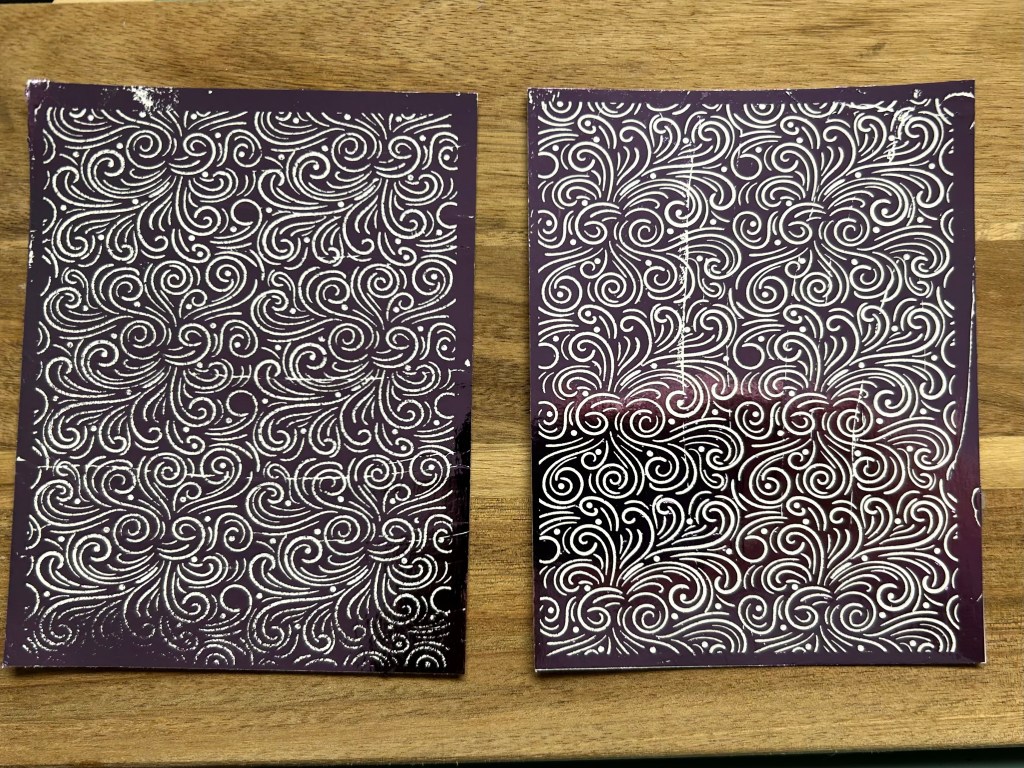
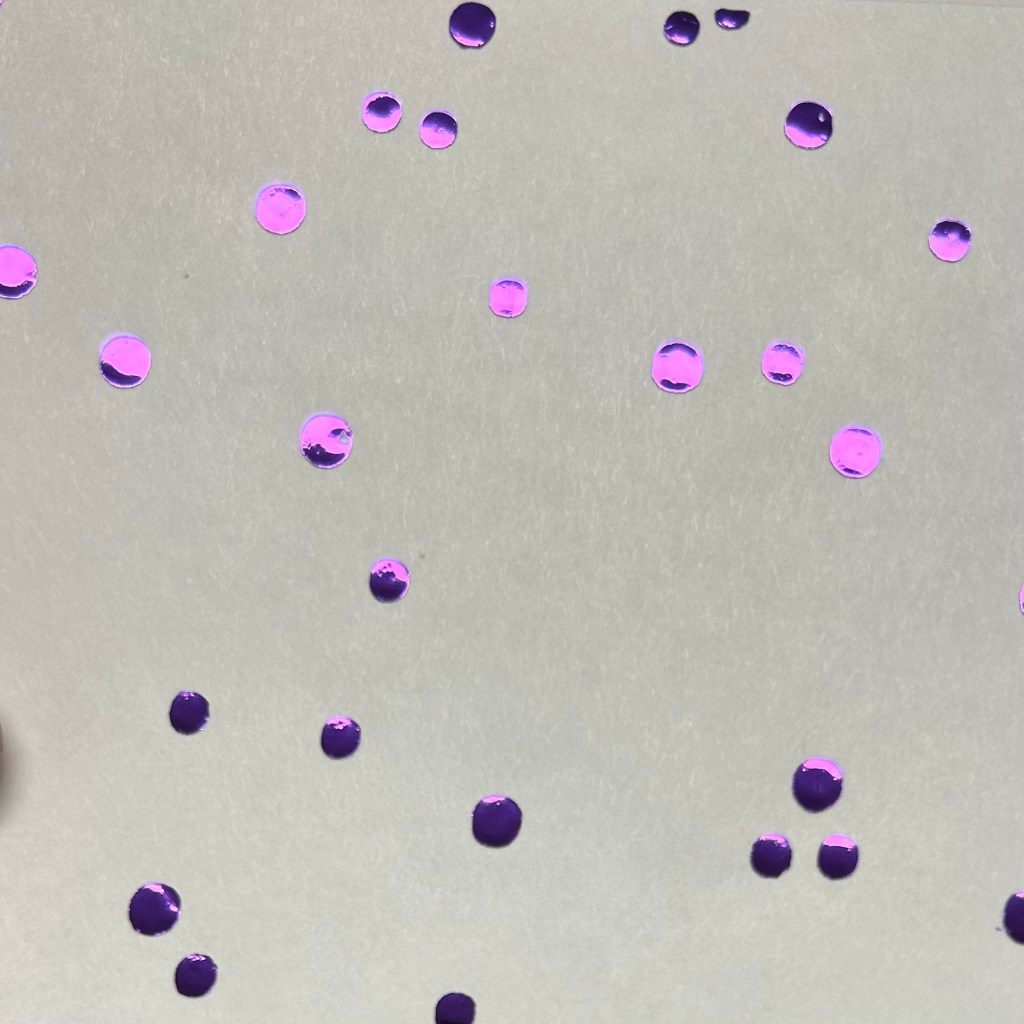
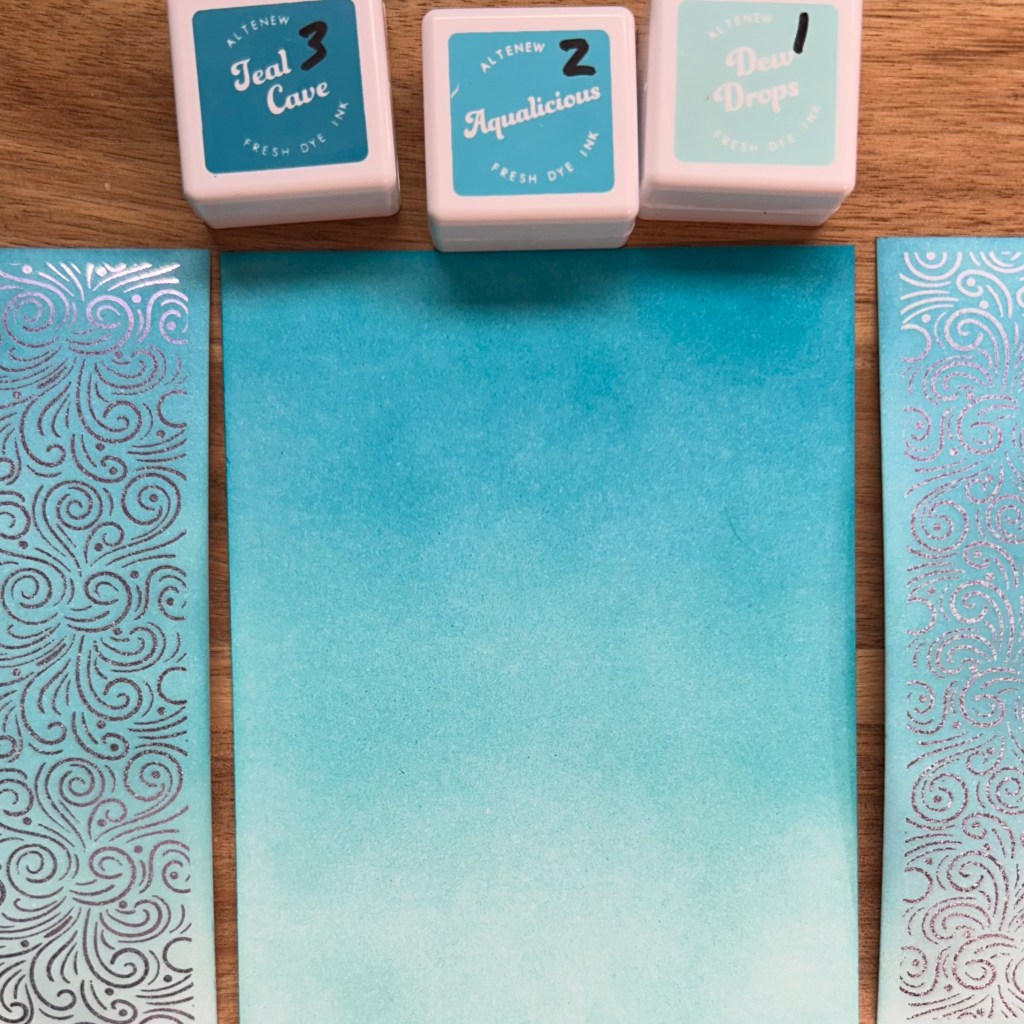
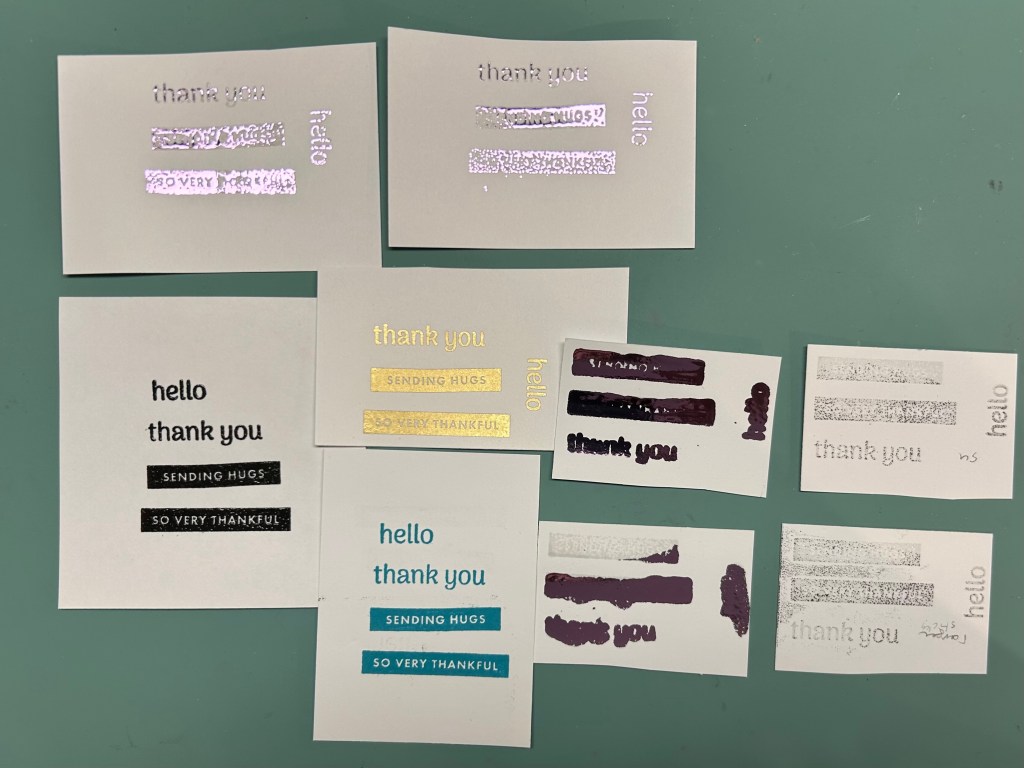
I finally used my foiling machine. I started with the easiest way: using a polyglaze sheet that already had a pattern on it. I ran two of those through and they worked out well, particularly the one that I used heat setting 4 rather than 3 for. I then tried to create some full cardfront panels covered with DecoFoil Due transfer gel. Once it dried I ran it through with the remaining foil to create the opposite pattern. I also created a few card fronts with polka dots stenciled with the transfer gel. Those came out very well. I’m going to create some more card front panels fully covered with the transfer gel tomorrow – ideally once I find my brayers – because I found that it was difficult to get a smooth layer of transfer gel when using a palette knife to spread the transfer gel. The resulting ridges show up because the foil didn’t always transfer quite correctly along the ridges, and even where it did, you can notice the ridges when you angle the card front in a certain way. I did some ink blending on the 2 swirled card fronts which turned out well. I meant to try to ink blend on a full card front before applying the transfer gel but forgot until after I had already cleaned off my tools and worksurface so I’ll try that tomorrow when a few friends are coming over for lunch and a crafternoon. I will also try ink blending on the dotted cardfronts. And will also try to run the opposite patterned ones through with another colour of foil – because that looked like an interesting technique when I watched a foiling video several months ago.
Heat setting 4 worked better than heat setting 3
I also tried using a few different types of embossing powder (Ranger clear as well as two types of sticky embossing powder – one Stampin’ Up! and the other Ranger) with a few different types of sentiments. I’m not thrilled with the results so far but will do some more experimenting tomorrow. My first attempt with the clear embossing powder didn’t work, perhaps because I double stamped the versamark which perhaps resulted in too much adhesive so too much foil stuck. Maybe I used too hot of a heat setting? The sticky embossing powder didn’t seem to get adequate coverage and too little foil transferred. I can’t remember if I used put down 2 layers of versamark first or not. Maybe the heat wasn’t hot enough? I do want to try stamping with the transfer gel as well – I think having an even coat of transfer gel using a brayer will lead to a better impression of the stamped image. So hopefully I can find those wayward brayers.
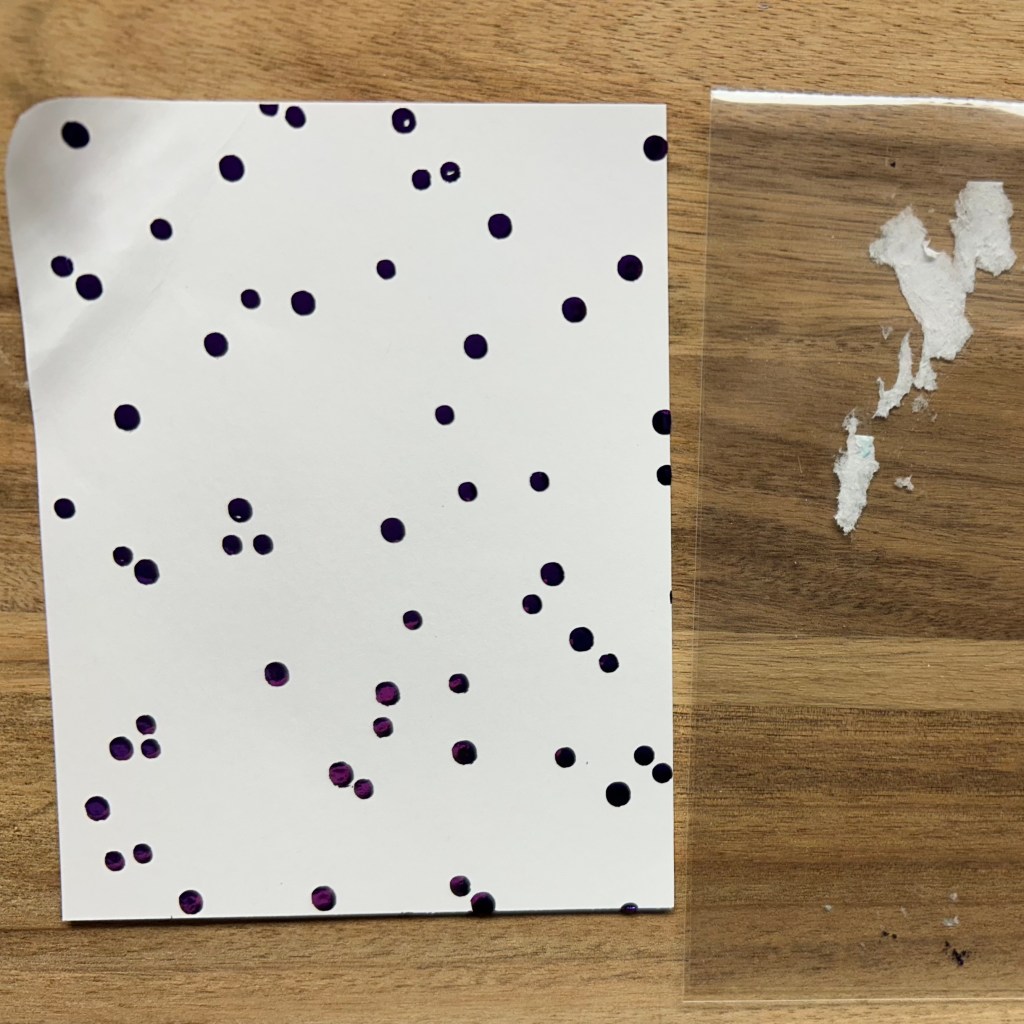
I got some transfer gel onto the back of my card fronts which ended up sticking onto my carrier sheet.You can see the how the foil didn’t transfer as well where the ridges in the transfer gel formed when I tried to spread it over the full surface of the card front using a palette knife. I think using a brayer may give more even coverage.In this photo you can see how the ridges show up when the light hits the foil in a certain way.The two cardfront will definitely be usable even if there are a few spots where the foil didn’t transfer. Some ridges it still transferred fine (but you can see the ridges at certain angles of light) and some others the foil didn’t transfer.The polka dots transferred the foil very well. I’m looking foward to seeing how it looks once I’ve ink blended.
Clearly I need to do some more experimenting. And recording what works so that I will remember it when I come back to these techniques in the future.
You can see how some of the cardstock stuck to my carrier sheet because I got some of the transfer gel onto the back of the card stock when I was stenciling the gel onto the card front. Perhaps I should have put a bit of parchment paper behind. I’ll try to see if I can clean off the carrier sheet with some soap and water. I’ll definitely have to buy some extra carrier sheets to have on hand when I wreck some other carrier sheets with wayward transfer gel.
There was definitely some wayward foil in my foiling experimentation today. And some wayward transfer gel. And I expect there will be some more in my continued experimentation tomorrow.
Card 17 (partial)
I ink blended onto the cardfronts after foiling the swirls. I also created a ink blended card front which I haven’t yet put transfer gel onto but I will try that tomorrow. And I will try to turn at least one of these foiled card fronts into an actual card!
But I won’t experiment too much because I want to move onto getting at least one card finished tomorrow for my Card 17 for The Foiling Metallic Details class which is lesson 3 of the Clean and Simple Boutique Cards course.
Some of my samples of trying foiling using clear embossing powder as well as some sticky embossing powder. Tomorrow I will label them and make some notes about what worked and what didn’t to keep for future reference and future experimentation. I also made a few samples which turned out fine just using clear and gold embossing powder (not foiling on top of it) so that you can see the sentiments more clearly for comparison purposes.
Wayward Wednesday
Just when we were almost back home my theme for today came to me: wayward. This was because the Canada Geese overhead (a sure sign of spring) seemed to be heading more east than north so not exactly the direction that I was expecting. But I was happy to hear their honking regardless of their somewhat sloppy formation and wayward direction.
I skipped Pickleball today. Roland wasn’t going since his Achilles has been bothering him. I opted to stay home and tackle the huge mess that is on my desk in the family room. That desk seems to be the spot that so many of my wayward items accumulate. Which makes the desk completely unusable and means that my wayward items spread onto the kitchen table and counter and dining room table. So spending some time to try to reign in my wayward items and redirect them to more appropriate places in the house seemed like a better use of my time this morning than playing Pickleball. Here’s to hoping the desk stays clear and usuable for a long time. I shall endevour to keep it clear of wayward items so I can use it to work on my laptop, to send out cards (a habit which will be much easier to implement if I have a dedicated, clutter-free (okay, let’s be real, a tolerably-cluttered) space) and to pick back up some Spanish studying (which will also be much more likely to happen if I have a dedicated spot to work on it – although I do need to figure out how to have some time to dedicate to it as well – it might have to wait until after I’m finished my 100DayProject.
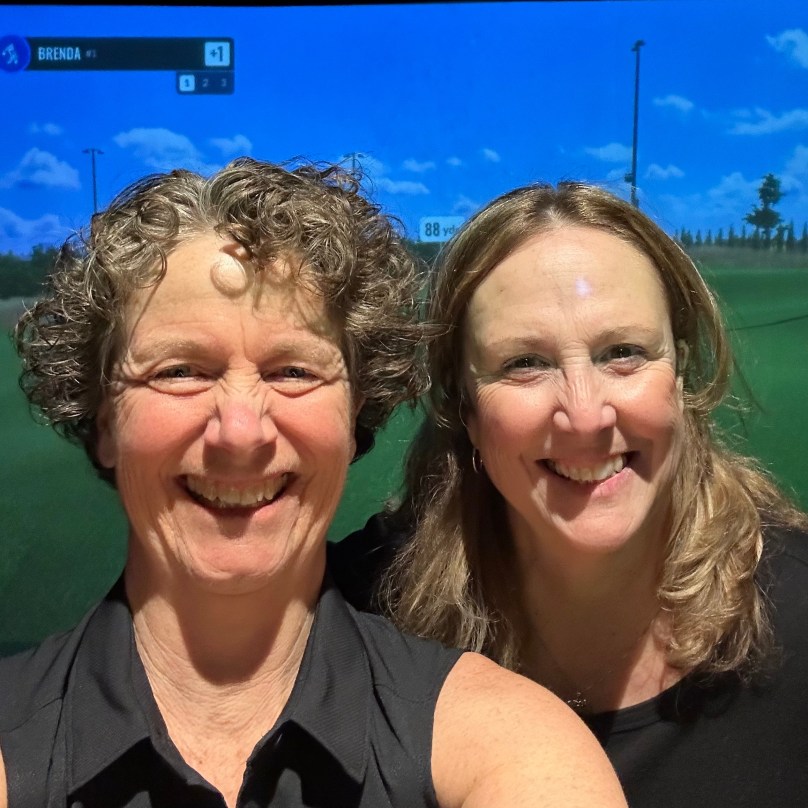
Kevin came over for lunch which was great. I also enjoyed an hour playing virtual golf at The Bunker with Louise. Definitely some wayward balls! A very fun evening out. We have another golf night with a larger group of ladies next Wednesday as well. Which reminds me that I need to send out a reminder email.
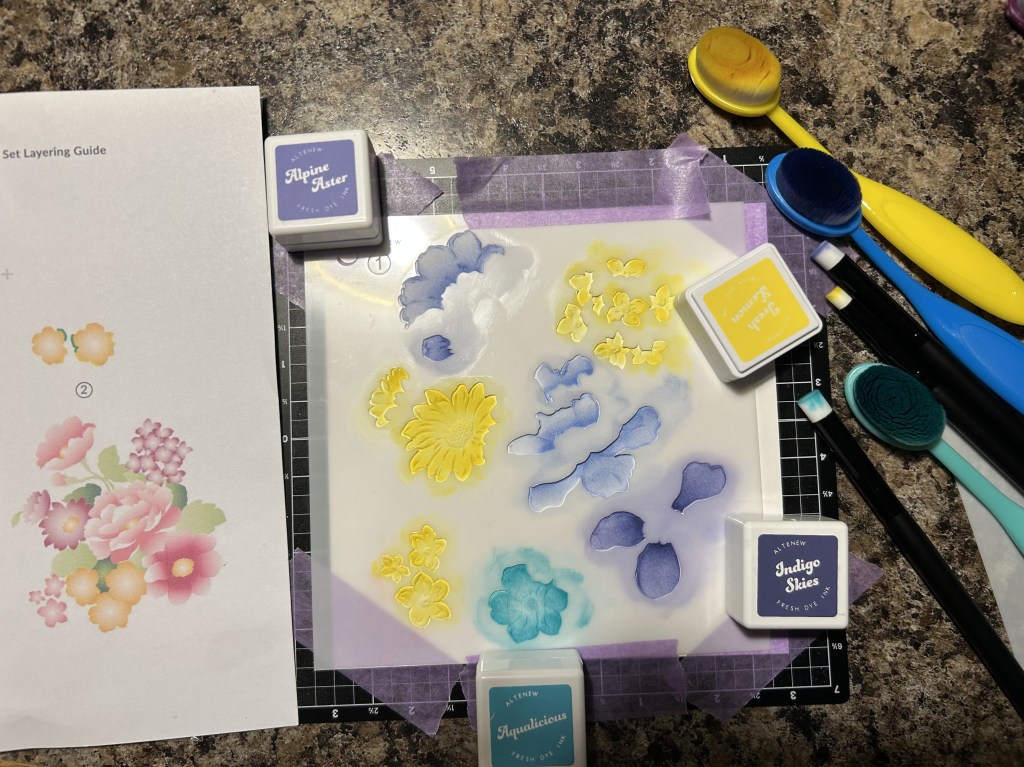
Card 8 in progress: I got one of three layers ink blended. I hope to finish this card tomorrow.
Creative Treats Club
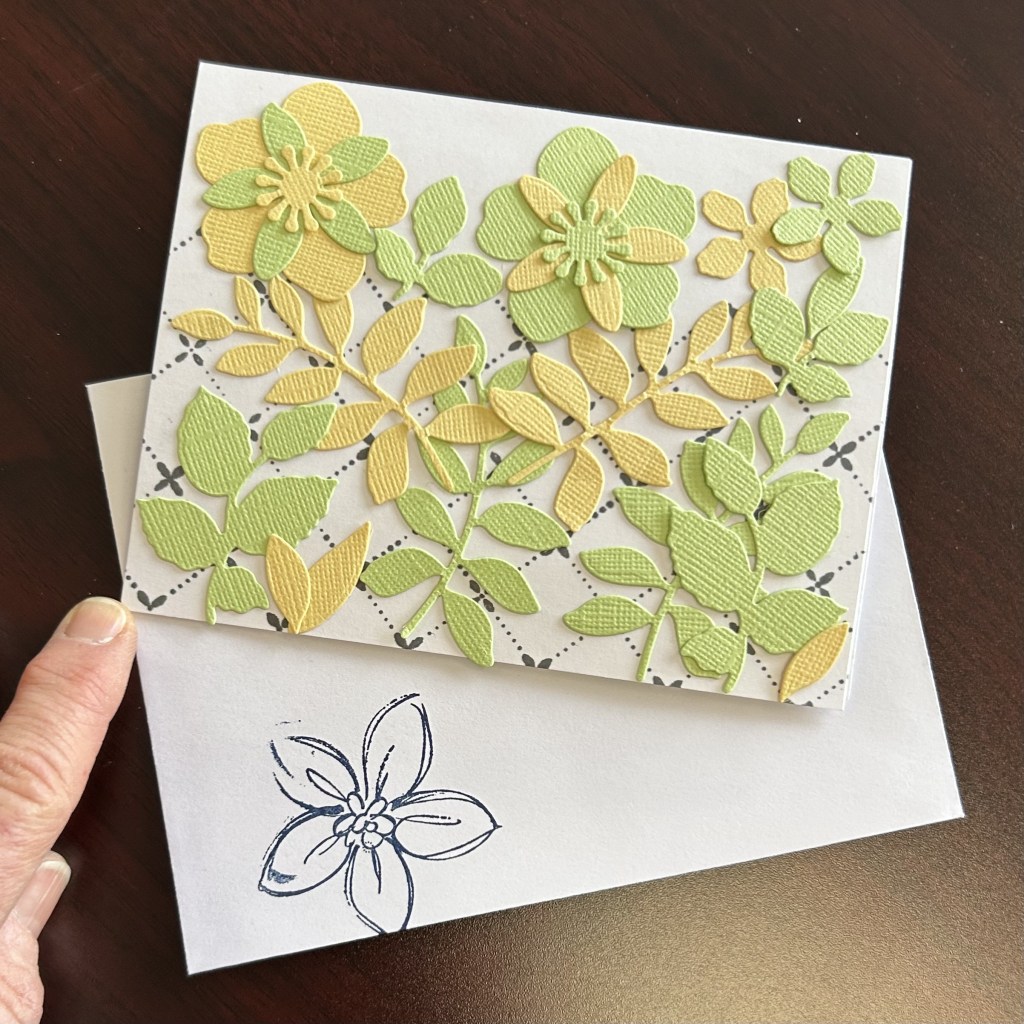
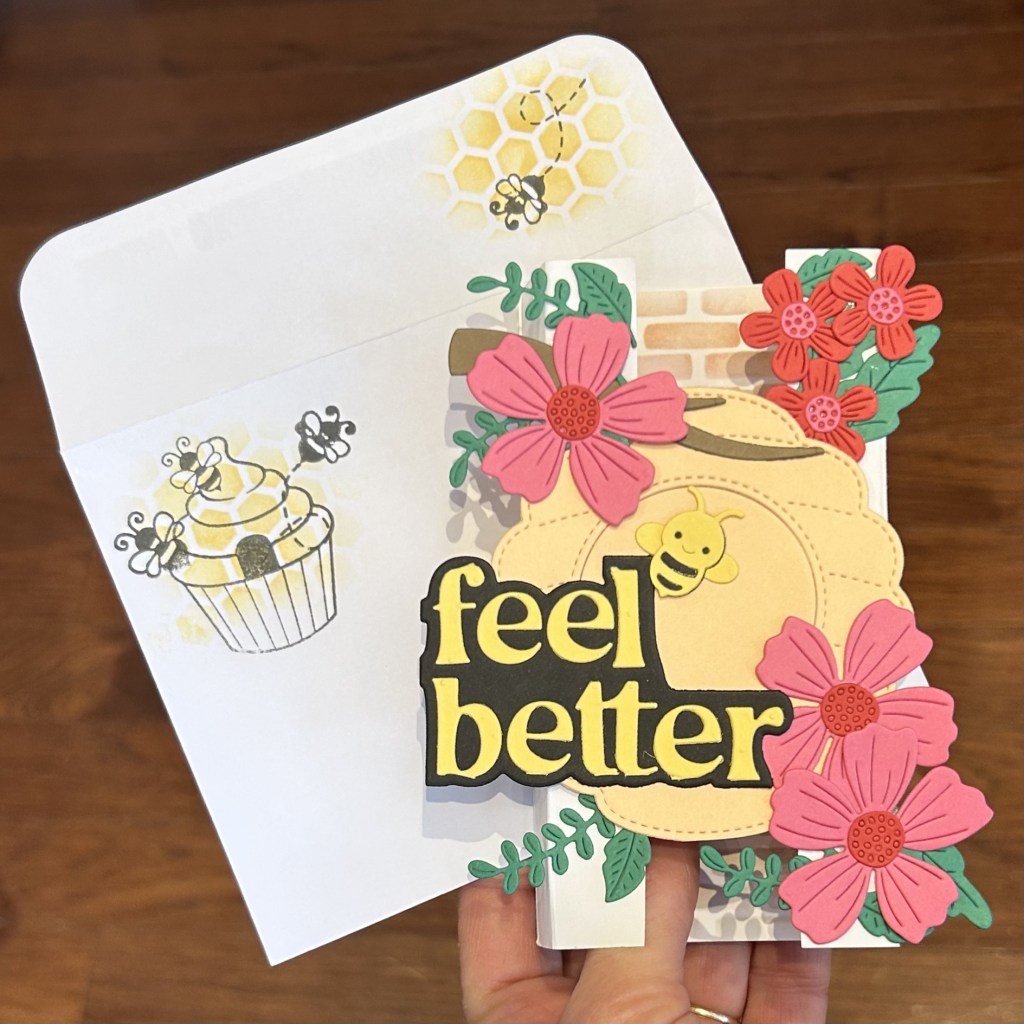
The card making at Card Crew went very well this afternoon. We had 3 ladies living with Dementia in attendance today plus a volunteer and a caregiver as well as the caregiver’s daughter who happens to be off on March Break. I’m including a sample of one of the cards that was made. I meant to take photos of all of the cards that they made but forgot. Other than the diecutting of the ‘zero waste’ flower/leaf die, the participants (with a bit of help from others) did all of the steps of making the cards themselves including stamping (using a MISTI) stamping platform, stamping using traditional wood-mounted rubber stamps, ink blending and cutting out sentiments. It was very helpful to have adhesive-backed cardstock to die cut – it made the cards much simpler to put together for the participants than if they had had to use glue. I am hoping to buy some more adhesive-backed cardstock since it is really a great option for participants living with Dementia. We peeled the backing off for them, but they were easily able to place their flowers and leaves. I had everyone use some wood-mounted alphabet stamps at the beginning of class to make name cards. I plan to do that every class to get the participants more familiar with the process of stamping. I think it is easier to have them use wood-mounted stamps rather than using acrylic blocks and photopolymer stamps.
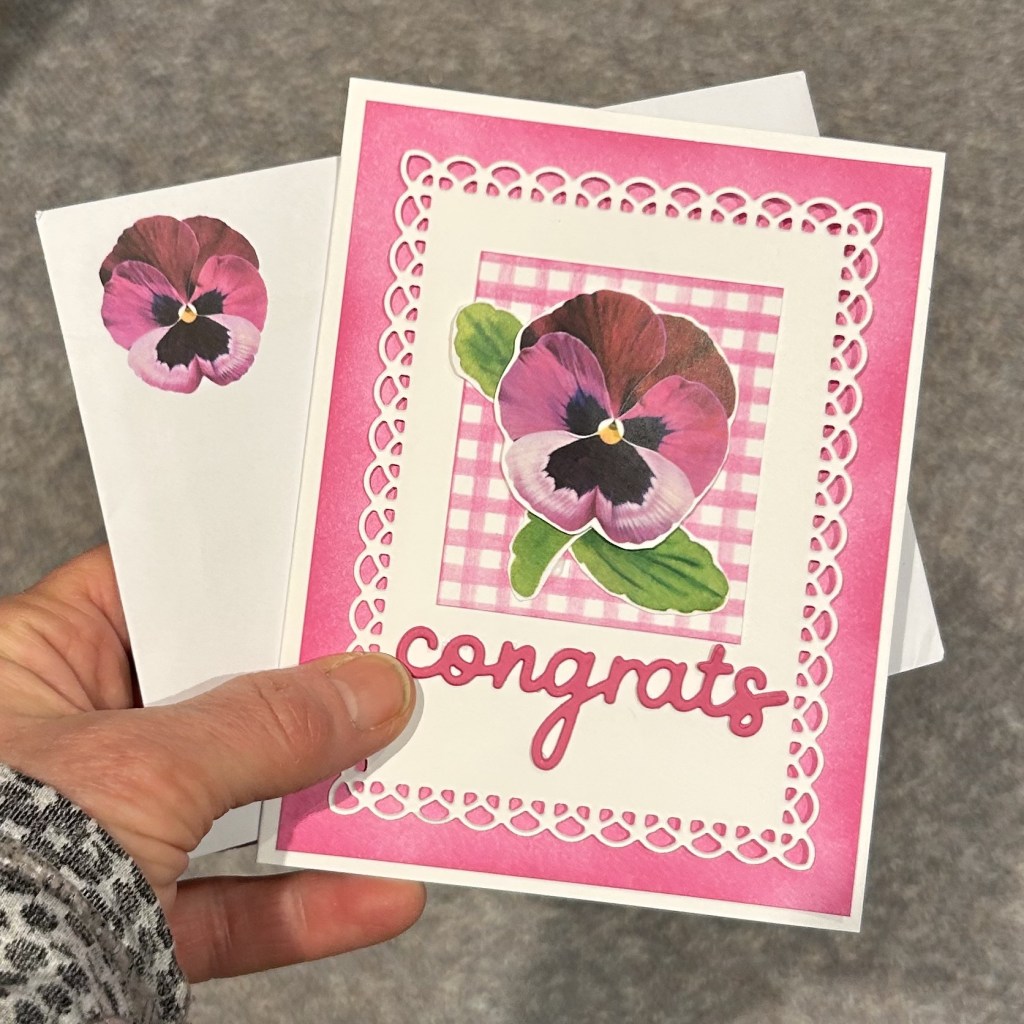
A few days ago I put together a card using a left over kit from a few years ago. Heidi had asked for a congrats card for a supply teacher who was leaving because she got a permanent job at another school. This one was from one of the kits that Vicki had put together. It’s such a nice card. In fact, Vicki has designed (and made kits for) so many great cards. I need to get all the old extras sorted out in a better way and dig out the instruction sheets for them so that I can bring them to future Card Crew classes so that the participants can assemble them. This one I’ll keep in my stash to eventually mail out because Heidi opted to use one of the 2 ‘adventure awaits’ cards that I made as part of my Spellbinders Advent Calendar project – I love how the cat is holding the suitcase by its tail while getting lifted up by a hot air balloon. I’ve included a photo of it in my Mail It Monday section because it is a card that got out of our house into the hands of a well-deserving recipient.
I made this for Heidi but she didn’t use it. I realized that I actually have to send a Congratulations card so I’ll actually consider this part of this week’s ‘Mail it Monday’ collection, too!I think this card that I made as part of the Spellbinders Advent Calendar project was a perfect ‘congratualtions’ card for Heidi to give to her supply teacher colleague that was leaving because she got a permanent position.
Mail It Monday
I am trying to get back into a routine of actually sending out the cards that I make rather than collecting them. So it seems appropriate for today to be a ‘Mail it Monday’. I will include some photos of the cards that I have mailed out recently. I haven’t yet written one for today. I am leaning more towards trying to work on my Card 8 than sending out a card.
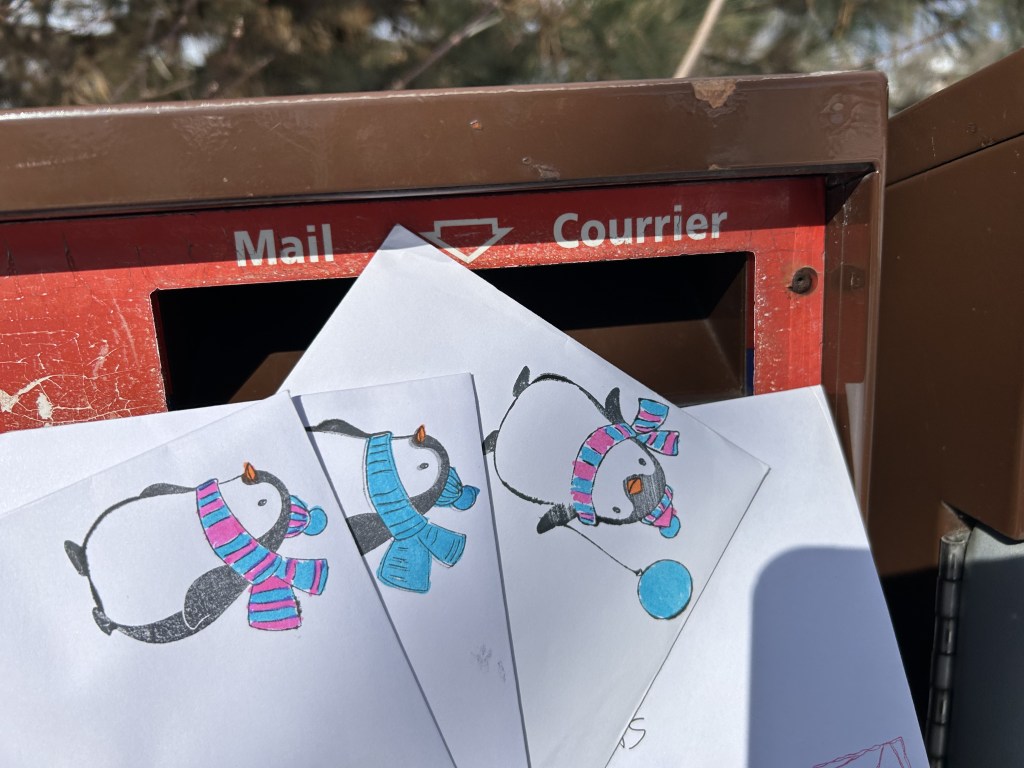
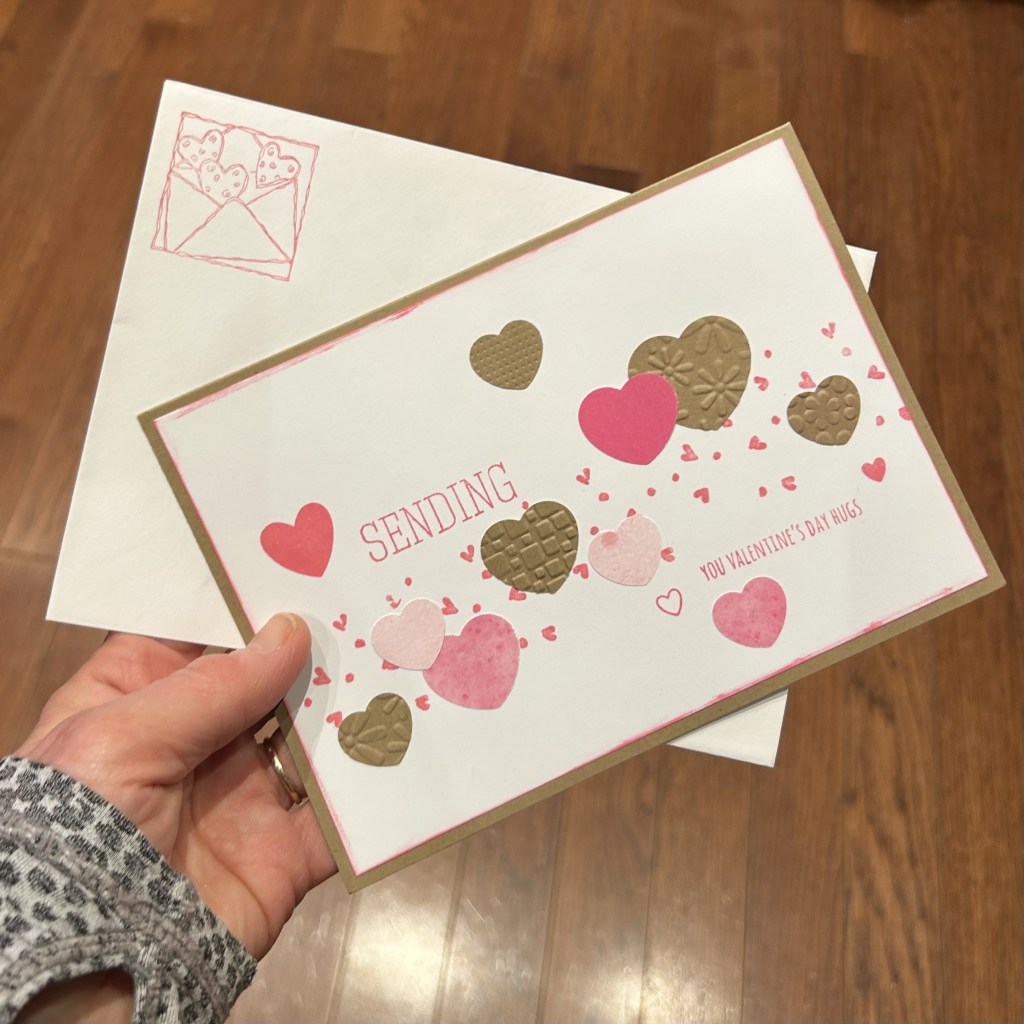
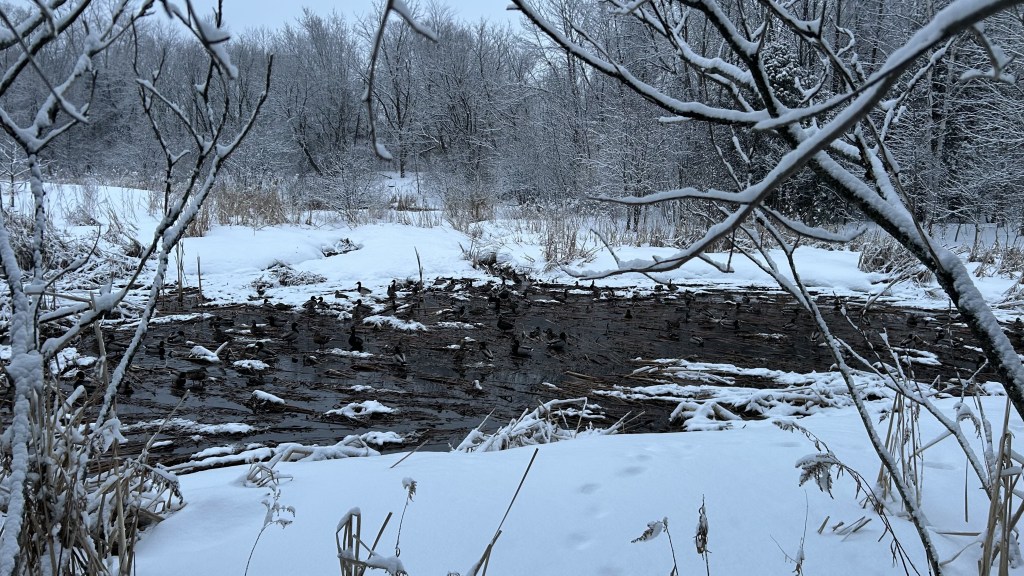
These were cards that we made last week in my Dementia Society card making classes. My Crafty Crew had helped me to put together these ktis and did the ink blending and penguin colouring. I also made this design in the Canadian Mental Health Association (CMHA) Arts for All class that I did in December; since it was an in-person class those participants did their own ink blending and colouring. And, the most fun of all, was making this card with six 10-year-olds at a Christmas party. They all did a great job ink blending the backgrounds and colouring in the penguins. I have quite a collection of these valentine’s cards to send out belatedly. One down, many to go! I made cards very similar to this design about a month ago in my Dementia Society Card Crew class. The participants had a lot of fun punching out a whole bunch of hearts as well as doing the stamping of some hearts and sentiment(s) before adhering the hearts.I really love how this card turned out. It was one that I designed for my card making classes with The Dementia Society.They are a bit hard to see amongst the dark water, but there are lots of ducks in this shallow part of the pond, perhaps nesting?
It was certainly a gorgeous morning to be out walking Luna in the forest. It was magical with all of the snow still stuck onto the trees. I am pretty sure that the ducks are trying to pick their nesting spots because there are a lot more of them hanging around the shallow section of the pond than their usual spot in a deeper section of the pond. I am so thankful to have a beautiful conservation area along the river so close to our house. And for having a dog to get me walking down there on a very regular basis.
I was thinking about calling it Windless Wednesday but there actually was a still a bit of wind as I went down to the lake to snowshoe. And there definitely had been wind yesterday since I had snowshoed. My tracks were once again almost completely covered with snow. A few weeks ago I had commented to a friend that it seems like there haven’t been nearly as many snowdrifts around as there were ‘back in the day’. Well, now that we have a winter with a lot of snow and wind, there has definitely been a lot of drifting snow. Be careful what you wish for.
But it was almost windless as I trudged through the snow, once again reestablishing a trail, following my barely discerable tracks from yesterday. But it was definitely easier going then yesterday. For one thing, when I managed to stay in the trail the snow was quite firm – the wind had done a good job of packing that freshly blown snow down into the trail. For another thing, I could hear the birds chirping. It was nice to have company on my morning trek, a cheering section of sorts. I’m not sure if they had been out on those other windy days and I just couldn’t hear them cheering me on, or if they had been wiser than me and had simply avoided being out on a cold and windy morning. But I was glad that they were there, and that I was paying attention to what was going on around me instead of being totally lost in my thoughts. It’s funny how much of the beauty around us we can miss when we’re lost in thought.
There was even a glimmer of sunshine when I slowed down to pay attention. It’s not yet a blue sky day, but it reminded me that the sun is always up there above the clouds. And we can choose to live each day as if it is a sunny day, because each day actually is a sunny day. And we can remember that our cheering section is nearby, whether or not we can hear their cheerful encouraging calls above the wind or not.
Just Saying Hello
Main product: Spellbinders Advent Calendar, door 10
I was pretty happy with how the card turned out. I have a few tips and ideas for what I could change.
Adhesive:
Because the flowered paper was so thin, I wanted to have adhesive behind the whole image and not just partially adhered as I might a thicker paper. I glued the thin paper directly onto the card front. The ‘spread’ end of the Tombow mono glue bottle worked very well to spread out the glue. I clean out and refill my Tombow bottles – I just remove the label to know that it is no longer the mono glue. I really like it as a dispenser with the versatility of both ends. Paint brushes and sponges are other ways to achieve a thin, even layer of glue over a complete surface. Another option would have been to adhere the flowers onto a sheet of double-sided adhesive paper before fussy cutting around them. There wouldn’t have been a need to deal with a wet adhesive with the potential mess of it as well as the tendancy that a wet adhesive can cause some wrinkles in thin paper.
I noticed that the cardstock does curl up a bit. Using double sided adhesive paper to adhere the flowers would have prevented that curl. Or it might be better to glue the flowers onto a front panel then adhere the panel onto the card base. Or to adhere the flowers with glue to a cardstock then fussy cut around them – that would give them more dimension rather than the look of the thin flowers being right against the card layer.
I may try to put the card in a heavy book for a while to flatten it out. Or to run it through my die cutting machine, with no die or embossing folder, the pressure of the plates can flatten cards.
It would have been easier to adhere the sentiment if I had cut them from adhesive-backed cardstock rather than needing to use liquid glue. I did use a fine tipped glue bottle which helps – you could also use a paint brush or sponge to apply a thin layer of glue rather than dots of glue behind the sentiment. I had some adhesive-backed cardstock at home but not with me at the cottage. You can create your own by running some two-sided tape or putting a piece of double-sided adhesive paper behind the cardstock before you run it through your die cutting machine.
Work Surface:
I use a thick mylar sheet as a work surface – it is easy to later wash off the glue and ink. These mylar sheets are great for transporting to my workshops. The mylar turned out to be too thick to cut on the Cricut to make stencils – but I will eventually learn how to use the City of Ottawa library laser cutting machine and will try that for making stencils. At home I have a glass work surface (a glass shelf from an old fridge). I also have a sheet of teflon both here at the cottage and at home.
Design:
To make it closer to a ‘one layer card’ it might have been nicer to stamp the sentiment rather than to use the die cut sentiment. Or, if I wanted to further emphasis the dimension of the sentiment, I could have cut it out a few extra times and stacked the layers.
I could have taken a bit more time to line up my sentiment so that the bottom and side margins were the same. To fix that problem I could have trimmed down the card front and adhered it to a new card base.
If you don’t have the correct colour of cardstock to make your sentiment, you can always ink blend a piece of cardstock before running it through your die cutter.
Adding a bit of bling using an odd number of clear dots or sequins would have been a nice finishing touch for this card. I’ll have to bring some of them up to the cottage.
Thanks
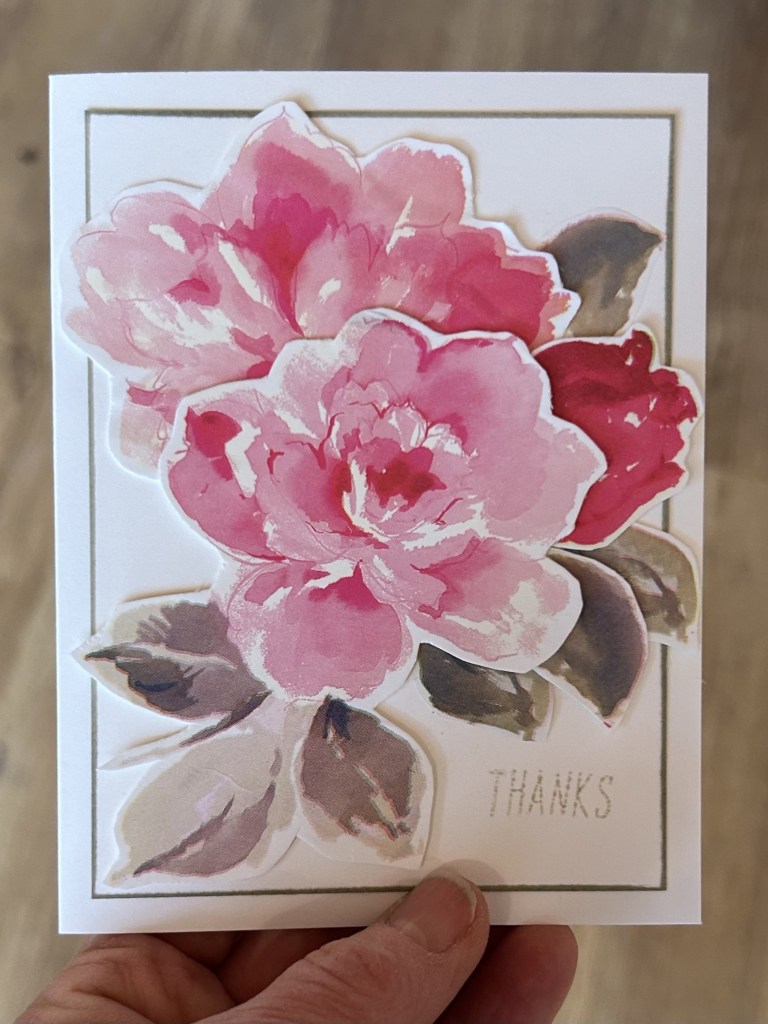
Main Product: Spellbinders Advent Calendar door 13
This time I adhered the thin floral paper to 110 lb cardstock before fussy cutting out the images. I really like the added dimension that it gives the layers of flowers and leaves.
I did use a thin layer of liquid glue to adhere the flowers to the cardstock. I notice that it is lifing up in a few spots. I could have been more careful to make sure I had a good but thin layer covering the whole flower. Or I could have adhered the thin paper to adhesive backed cardstock or used a double-sided adhesive sheet to adhere the thin paper to the thicker cardstock.
I inked the edges of my 3-3/4″ x 5″ layer to give it some added dimension. It might also have been nice to mat that layer with a layer of beige cardstock. A thin piece of craft foam or chipboard would have added some extra dimension.
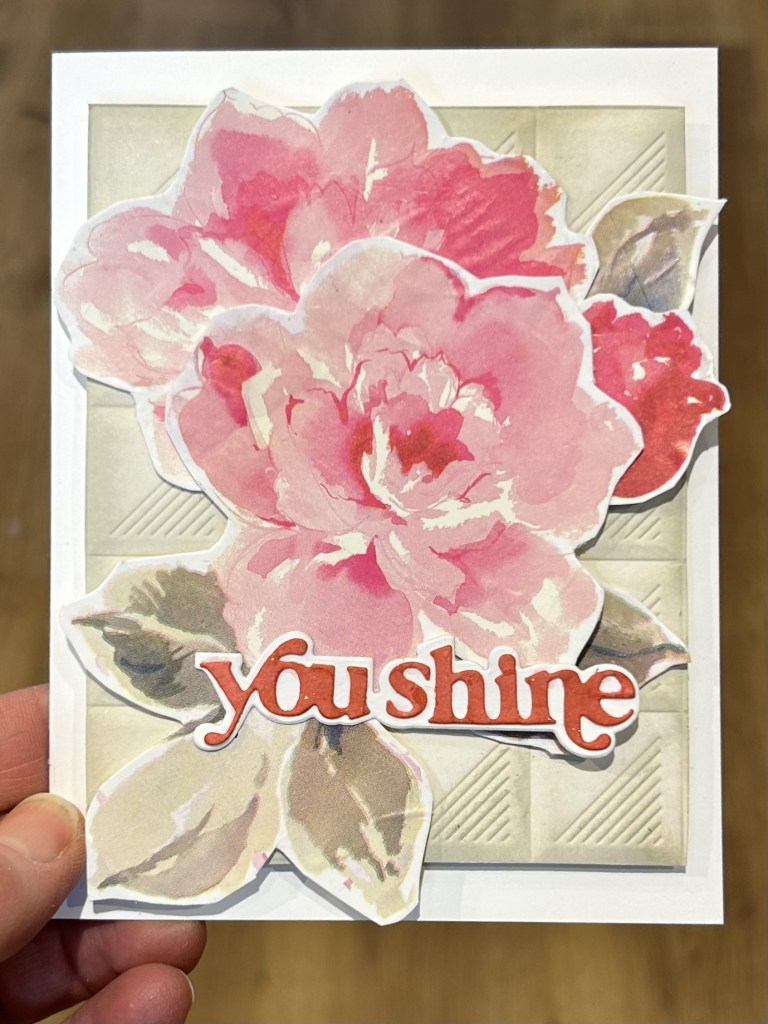
I might try to make a similar card using a beige 3-3/4″ x 5″ layer rather than a white layer; in which case I would use a white heat-embossed sentiment or a sentiment strip. Or a brighter red/pink ink for the sentiment. Or perhaps die cut the sentiment rather than using a stamp. See the image a bit further down for my attempt today at making such a card.
I don’t have a lot of inks up here with me at the cottage so I was thrilled to realize that the Altenew Pink Sand ink was a perfect match for the leaf colour. So it was a great colour for inking the edges of the front layer. I think it was a bit light for my ‘thanks’ sentiment. Next time I would try to the Crimson or Velvet colour from that Red Sunset ink set. I think a bolder colour would have added in a nice contrast and would have matched the red of the bud and the highlights in the gardenias.
Adding a bit of bling using an odd number of clear dots or sequins would have been a nice finishing touch for this card, too.
Hello
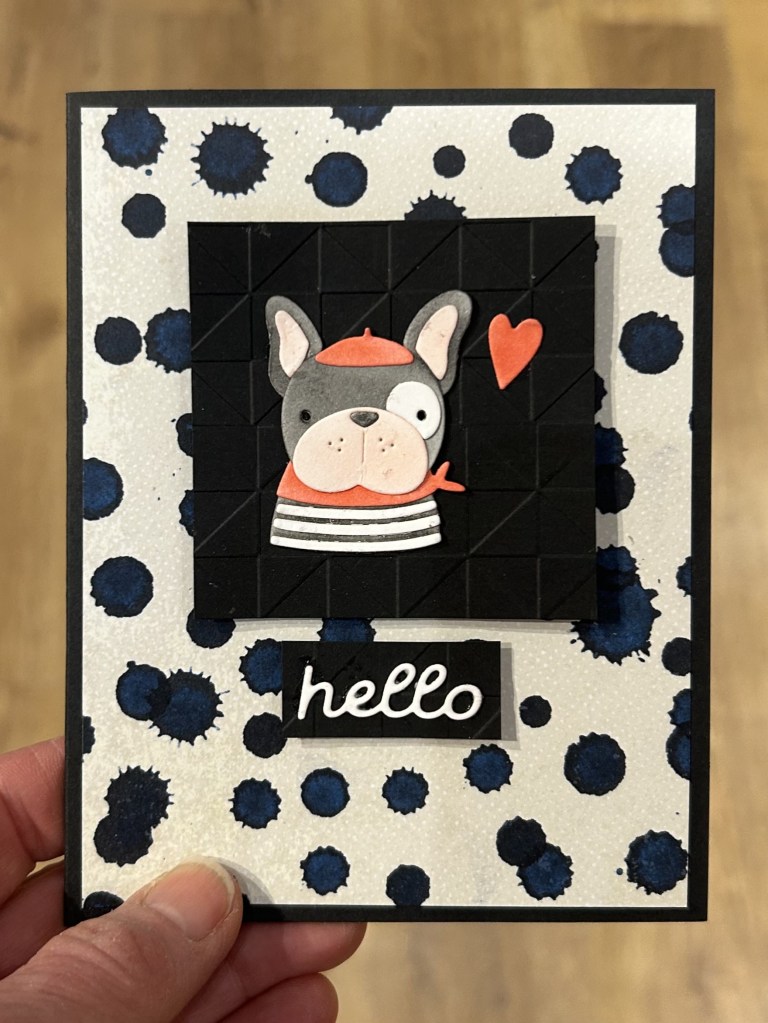
Main Product: Spellbinders Advent Calendar door 14, doggy die cut
Even though I don’t love putting together tiny die cut pieces, I do love how this cute fellow turned out. I do wish I had had some adhesive-backed cardstock on hand to make the assembly easier, but the fine-tipped glue bottle certainly helped. Rather than using coloured cardstock, I die cut all the pieces from white cardstock then ink blended them. I used black ink to make the grey colour as well as Altenew Blush for the pink and Crimson for the red. I used a black pen to colour in the eyes. I thought that the ink-splatted paper from an old Scrapbook and Cards Today (SCT) Crop and Create online class had the right amount of spunk to go with this saucy pup. I used the Spellbinders door 11 embossing folder on the black cardstock to give it some fun geometrical dimension.
If I was to make this card again I might try the hello in red, but there is already a nice trio of red elements which is why I opted to cut out a white hello rather than to use the red one I had ink blended. I might also centre the dog up a bit more rather than putting the combined dog and heart along the centre line. I might have tried to mat the black with another layer of white/beige and black. In an ideal world I would have had those white elements the same light beige as was in the ink-splattered patterned paper. I have some dog-themed stamps at home that I’ll use to stamp the front and back on an envelop as well as the white inner layer I put on the inside of my card. Maybe it would be nice to put the dog on a heart shape rather than on the square and to move the small heart down lower beside the hello. But, the other doors of my Advent calendar are calling so I will move on. And, I will soon be starting my 100 day project of working my way through my Altenew Educator Certification Program (AECP).
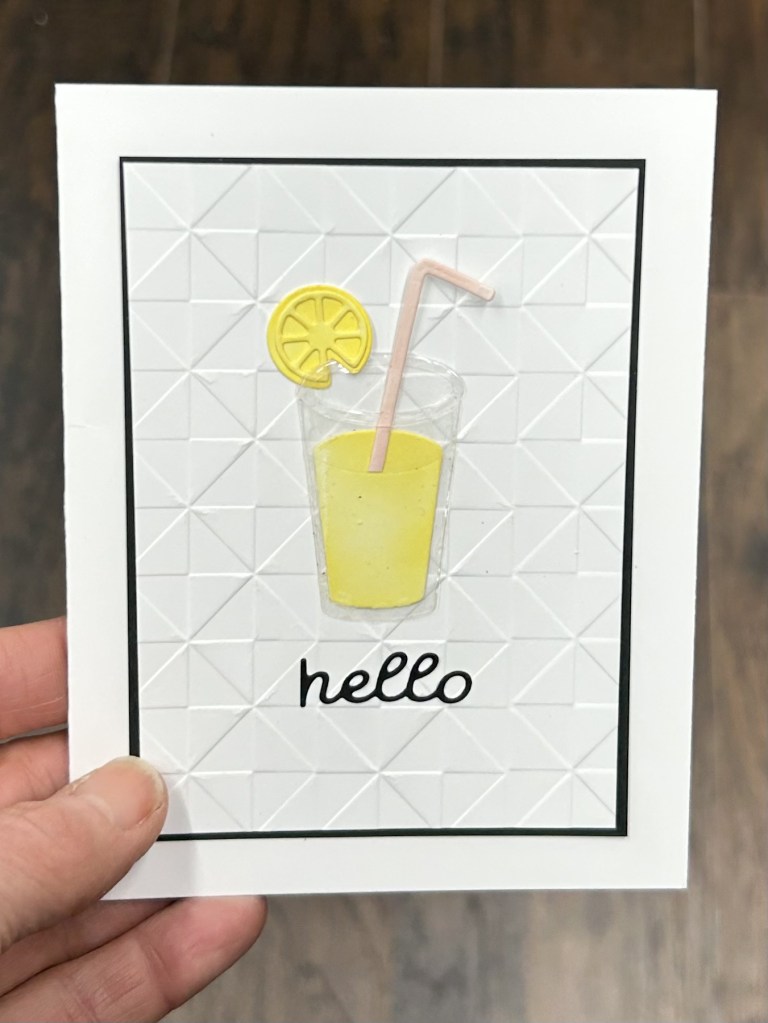
Hello Fruity Drink
Main Product: Spellbinders Advent Calendar – door 12
I am quite pleaseed with how this card turned out. It was a bit fussy getting the acetate die cut glass together. I was worried about the glue showing through, or not holding together, but it seems to be holding up fine.
I used the Spellbinders door 11 geometric embossing folder. I really like how the geometric pattern contrasts with the curved lines of the glass and lemon. Having the background in white allows there to be some texture while not drawing too much attention away from the focal point of the fruity drink. I might have tried to emphasize the curvy edge of the drink a bit more and could have cut the straw just a bit shorter so that it was in the centre of that oval at the top of the drink. I could have tried a pink or yellow hello instead of the bold black, perhaps I could have also added a few pink or yellow enamel dots or sequins for a bit of bling to step the card up just a bit. I’ll have to find some coordinating stamps to decorate the inside and back of the card as well as to make a coordinating envelope.