Apple Crisp

Background

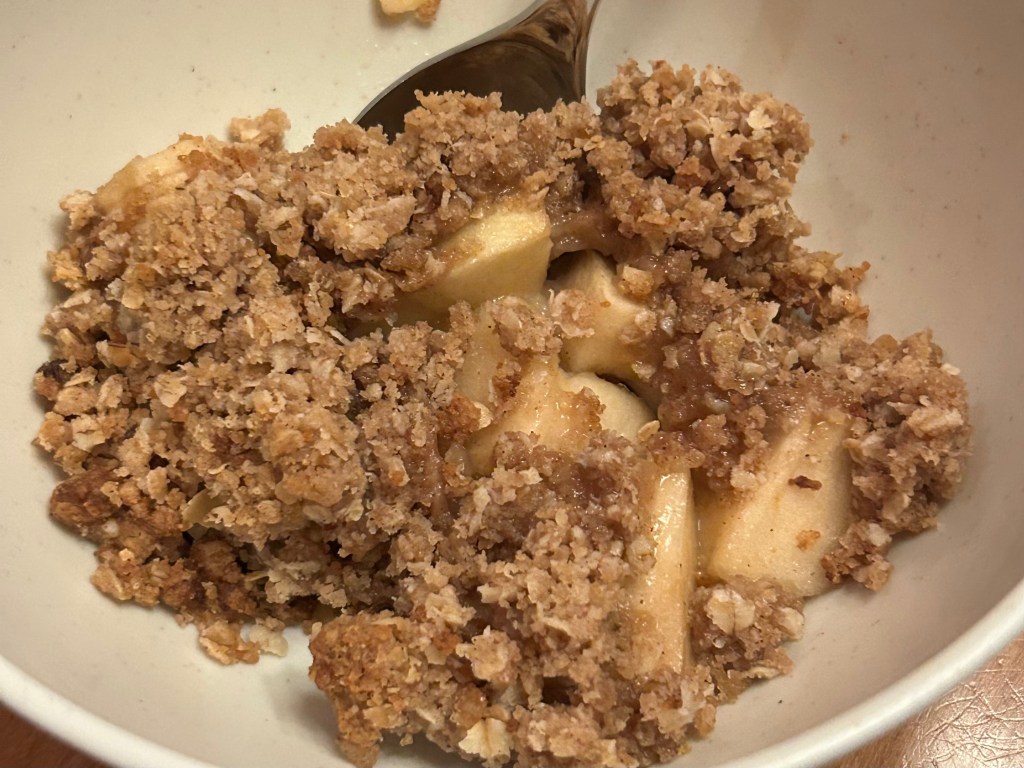
This has long been a family favourite. The recipe came from way back in high school and was in the first cookbook I ever bought which was by Betty Crocker. It’s high time I added the recipe to this blog. I did post it on my other blog way back in 2010. It’s handy to have it available electronically rather than just a paper copy. I do prefer using a paper copy, but I don’t yet have a paper copy of my favourite recipes up here at the cottage. Of course I had to have 2 servings. After I’d already eaten one serving, I decided that I should have a different photo for the featured image for this post than the photo at the top of the page. So, I had to serve up another portion. I figured that since the bowl was dirty I might as well enjoy eating the second serving rather than just putting it back into the bowl.

The featured image is from the original 2010 post. I really love that pie plate. I bought it many years ago when I was downtown on French language training and went with a few of my classmates down to Laura Secord ice cream and chocolate shop for a much needed afternoon break. Exactly why the shop was carrying ceramic pie plates I’m not sure (I guess for a nice fall display), but I came away with a pie plate as well as an ice cream cone that fall afternoon.

Ingredients

4 cups sliced tart apples (about 4 medium)

2/3 – 3/4 cup brown sugar (I use 2/3 cup)

1/2 cup flour (whole wheat is nice)

1/2 cups rolled oats (I use quick cooking)

1 tsp cinnamon

1/3 cup butter or margerine, softened

Method

Heat oven to 375′. Arrange apples in baking dish. Mix remaining ingredients (a pastry blender works well to combine the ingredients); sprinkle the ‘crisp’ mixture over the apples. Bake until topping is golden brown and apples are tender, about 30 minutes. Serve warm, optionally with ice-cream or whipping cream.

Notes

I really like using McIntosh apples for this recipe. They soften up very nicely by the time the crisp portion is crisp.

Source: Betty Crocker Cookbook

Cranberry Chocolate Granola Energy Balls

Inspiration

I have been wanting to try out a variety of energy ball recipes. While I love making and eating truffles, sometimes I want a quicker and healthier option. Like truffles, energy balls are a perfect treat to fit into TreatBoxes. To get us started on this energy ball adventure, I borrowed a book aptly titled Energy Balls by Christal Sczebel from my friend, Shelli, when I was recently out visiting her in Calgary. I asked my daughter, Heidi, which of the recipes appealed to her the most. This was one of them. Stay tuned for posts as I try out other recipes from this book such as Cocoa Crispy Rice, Apricot Coconut Seeds, Banana Chocolate Chip, Matcha Mint Chocolate, Toasted Coconut Fudge and Cookie Dough.

Ingredients

  • 1 cup (160g) pitted dates
  • 1 cup (140 g) raw almonds
  • 1/2 cup (60 g) dried unsweetened cranberries plus 2 tbsp chopped
  • 1 cup (110g) granola, divided (1/2 cup for ball mixture, 1/2 cup for ball coating; may need extra 1/4 cup for coating)
  • 1/4 cup (60 ml) unsweetened almond milk
  • 2 tbsp 70% dark chocolate

Method

  • In a food processor, combing dates, almonds, 1/2 cup (60 g) cranberries, 1/2 cup (55 g) granola. Process on low for about 30 seconds, then on high for another 30 seconds until well chopped and combined.
  • Add almond milk while processing on low and continue processing until a sticky mass forms.
  • Transfer mixture to a bowl and mix in the dried cranberries and chopped dark chocolate.
  • Using teaspoons (or a size 100 scooper) drop (approximate size of 2 tsp) onto a plate or pan. Shape into balls. I made 36 balls, the original recipe indicated it would make 14 golf-ball sized balls.
  • Place 1/2 cup granola into a bowl then roll each ball into the granola, pressing to set the granola into the ball. Since I made 36 small balls, I needed 3/4 cup rather than 1/2 cup of granola to coat.
  • Place balls in freezer to set (approximately 30 minutes). Store in an airtight container in fridge or store at room temperature if you prefer a softer consistency.

Recipe Notes

  • Made 36 balls using a size 100 scooper (2 tsp)
  • Goji berry granola – replace 1/2 cup (60 g) dried cranberries with 1/2 cup (55 g) dried goji berries. You may want to soak goji berries in hot water, then drain before adding into recipe.
  • The texture and taste of these balls was great, although it was a bit on the sweet side. Adding cocoa powder could make them more chocolatey and reduce sweetness but may require a bit more liquid to be added to preserve consistency.
  • I added mini chocolate chips rather than chopped 70% chocolate which may have contributed to the sweetness.
  • Cocoa nibs (which would help cut the sweetness) could be added instead of chopped chocolate or mini chocolate chips.
  • I used sweetened cranberries since that was what I had on hand. I will look for some unsweetened ones to use in this (and other recipes) in the future.
  • I may try chopping the granola for coating next time; if so, I will probably add some un-chopped granola along with the chopped cranberries and chocolate before forming into balls.
  • Adding some orange flavour (zest, extract or a juice reduction) would be a nice addition to this recipe. Depending on how you add that flavour you may need to adjust quantity of almond milk to preserve the consistency. This may reduce the sweetness a bit if you are adding orange zest.
  • I may try adding some unsweetened coconut. This too could lessen the overall sweetness while complementing the existing flavours. It may make the dough a bit drier so you may need to adjust the quantity of almond milk.

Packaging Ideas

You can store the whole batch in a jewelry-style box made from two 8-1/2″ x 11″ pieces of cardstock. Score the bottom at 1-1/4″ on each side. To score the top, shift the paper 1/16″ to the right before scoring each of the 4 sides at 1-1/4″. Alternatively you could cut the bottom down to 8-3/8″ x 10-7/8″ before scoring at 1-1/4″ in which case you don’t need to shift the top 1/16″ to the right before scoring.

Pumpkin Spice Semi-Sweet Chocolate Truffles

Photo by Valeriia Miller on Pexels.com

Inspiration

When Daniel and I initially started making and creatively packaging truffles together, we began with some recipes such as basic chocolate truffles as well as peanut butter chocolate truffles. Of course, when Pumpkin Spice Latte season arose, I had to ask Daniel for the best way to make pumpkin spice truffles. He said “take the recipe I gave you for Peanut Butter Truffles and replace the peanut butter with pumpkin puree and add pumpkin spices”. Sounds easy enough. And sounds delicious for sure. My first attempt was with a rather moist puree, so my truffle ganache turned out a lot softer than I wanted. Daniel’s tip: warm up the ganache, add more chocolate , allow the ganache to set again then continue with the usual scooping, shaping and coating. Which is what I did. They turned out excellent. I coated them with chopped, roasted, salted pumpkin seeds; which was a bit too much coating given that the seeds were salted. Next time I will simply garnish the chocolate-dipped truffles with a few whole, roasted pumpkin seeds. Adding chopped roasted pumpkin seeds enhances the texture of the truffle centres if you like a bit of crunch. Just don’t add too many if you are using salted seeds. Over time I will continue to make further adjustments to this recipe and encourage you to do the same. I am also going to make some simple spiced truffles (without the puree) by adding the pumpkin pie spices to the chocolate truffle recipe.

Ganache Ingredients

  • 2/3 cup heavy (35%) cream
  • 1 tsp ground cinnamon
  • 1/4 tsp ground nutmeg
  • 1/4 tsp ground ginger
  • 1/8 tsp ground cloves
  • 1/8 tsp salt
  • 8 oz ( g) semi sweet chocolate, finely chopped
  • 1 cup pumpkin puree
  • 1 tsp vanilla
  • 2 tbsp butter
  • chopped, roasted, salted pumpkin seeds (optional)

Coating and Garnish Ingredients

  • 8 oz. (500g) chocolate (milk, white, semi-sweet or dark), preferably tempered *see notes
  • whole or chopped roasted pumpkin seeds (garnish) (optional) *see notes

Ganache Mixing Instructions (option 1 – add chocolate to warmed cream)

  1. heat cream with spices and salt until boiling in bowl (microwave or oven) or pot (stove top)
  2. let heated cream sit a few minutes before next step
  3. add chopped chocolate to the bowl/pot in which you have warmed cream
  4. gently move the chocolate so the warmed cream covers it, do not stir yet
  5. let the chocolate and cream sit for a few minutes to warm the chocolate
  6. mix just until the chocolate is melted and the ganache is smooth
  7. add in vanilla, butter and pumpkin puree (and optional chopped pumpkin seeds)
  8. mix just until the ganache is smooth
  9. transfer to a container or leave in existing bowl/pot until the ganache has set

Ganache Setting Instructions

  1. time permitting, let ganache sit until reaches room temperature then cover with saran or bowl/pot lid
  2. time permitting, let ganache sit covered overnight at room temperature until completely set
  3. once the ganache has set you can store in fridge or freezer until you are ready to scoop and form truffle centres, this should not affect the ganache. Before scooping / forming truffle centres the ganache should be left at room temperature long enough so that it can be scooped.
  4. alternatively you can cover the ganache and cool immediately in fridge or freezer but it may affect texture a bit

Ganache Scooping Instructions

  1. scoop using size 100 (approximately 2 tsp) scoop onto parchment or waxed paper lined sheet
  2. gently shape scooped centres into spheres, remembering that truffles do not need to be perfectly round
  3. if the centres are quite soft, you may want to let them set a bit before you gently form into spheres and so that they are a bit easier to dip

Notes

Makes xx truffles using size 100 scoop

Trouble-shooting Tips

If the truffle ganache is too soft to scoop and dip, you can whip the ganache and let it sit again. Or you can warm up the ganache, add some more finely chopped chocolate, stirring until the additional chocolate is fully melted and incorporated then let the ganache re-set. Or you can chill or freeze the ganache before scooping and shaping into spheres. You can also coat the ganache centres in shifted cocoa powder before coating in tempered chocolate.

If the truffle ganache is too thick or is crumbly, you can warm up the ganache, add some warmed cream, stirring until the additional cream is fully incorporated then let the ganache re-set.

Other Recipes To Try

Pumpkin Spice Semi-Sweet Chocolate Truffles

Crunchy Peanut Butter Semi-Sweet Chocolate Truffles

Smooth Peanut Butter Semi-Sweet Chocolate Truffles

Crunchy Peanut Butter Milk Chocolate Truffles

Chocolate Chip Cookies

I have had several requests for my chocolate chip cookie recipe. I am happy to share. Enjoy!

Ingredients

  • 1 cup brown sugar
  • 1/2 cup white sugar
  • 1 cup shortening
  • 2 eggs
  • 2 tsp vanilla
  • 2 1/4 cups flour
  • 1 tsp salt
  • 1 tsp baking soda
  • semi-sweet chocolate chips
  • SkorBits (optional)
  • chopped pecans or walnuts (optional)

Instructions

  • preheat oven to 350 degrees F
  • mix together brown sugar, white sugar and shortening
  • add in eggs and vanilla
  • mix well
  • stir/sift together flour, salt and baking soda
  • add dry ingredients into batter
  • stir just until dough is formed
  • add chocolate chips (and optional nuts and/or SkorBits
  • drop by tablespoon onto parchment paper lined cookie sheets
  • bake 10-12 minutes until lightly golden just until no longer gooey in centre
  • share most of them with your family and friends
  • enjoy a few yourself