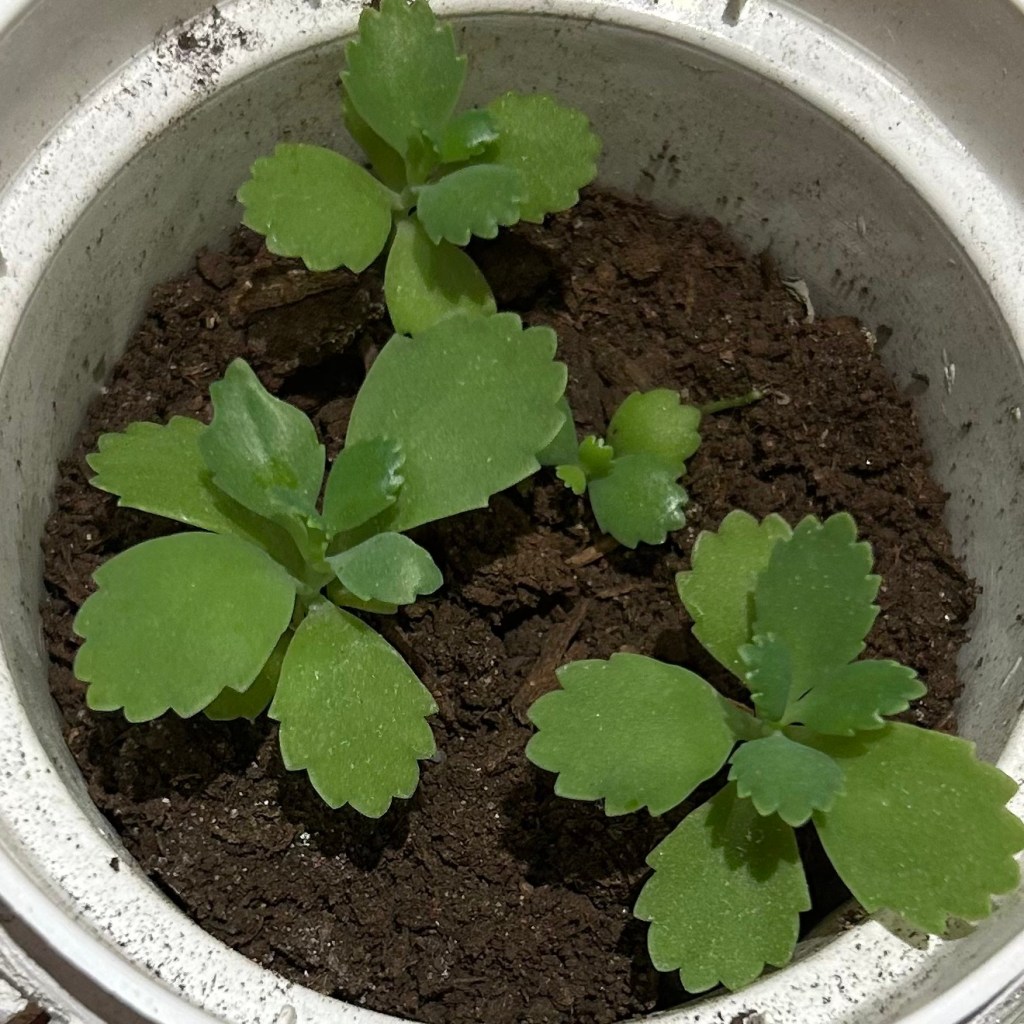
My mother of pearls? plant that Sheela gave me last summer is still alive! It’s growing slowly but surely.
100DayProject Day 33
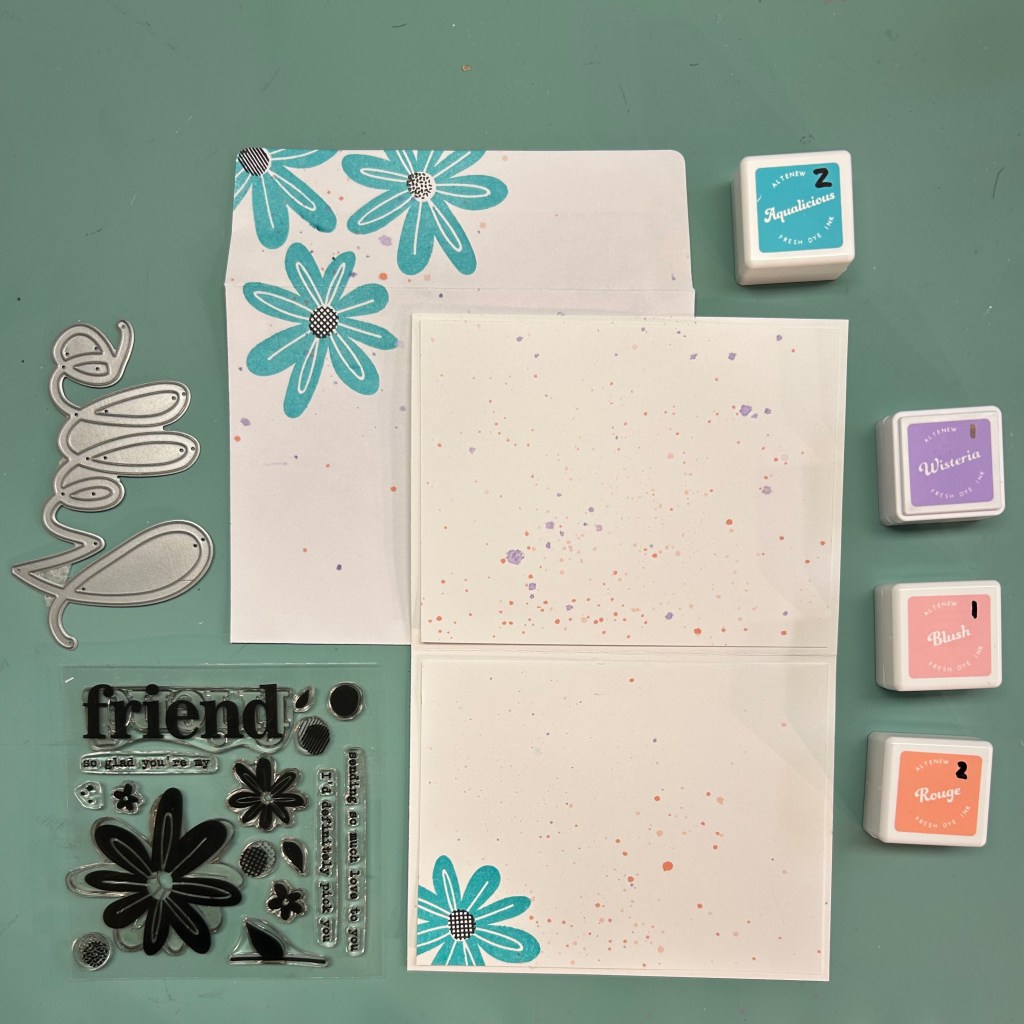
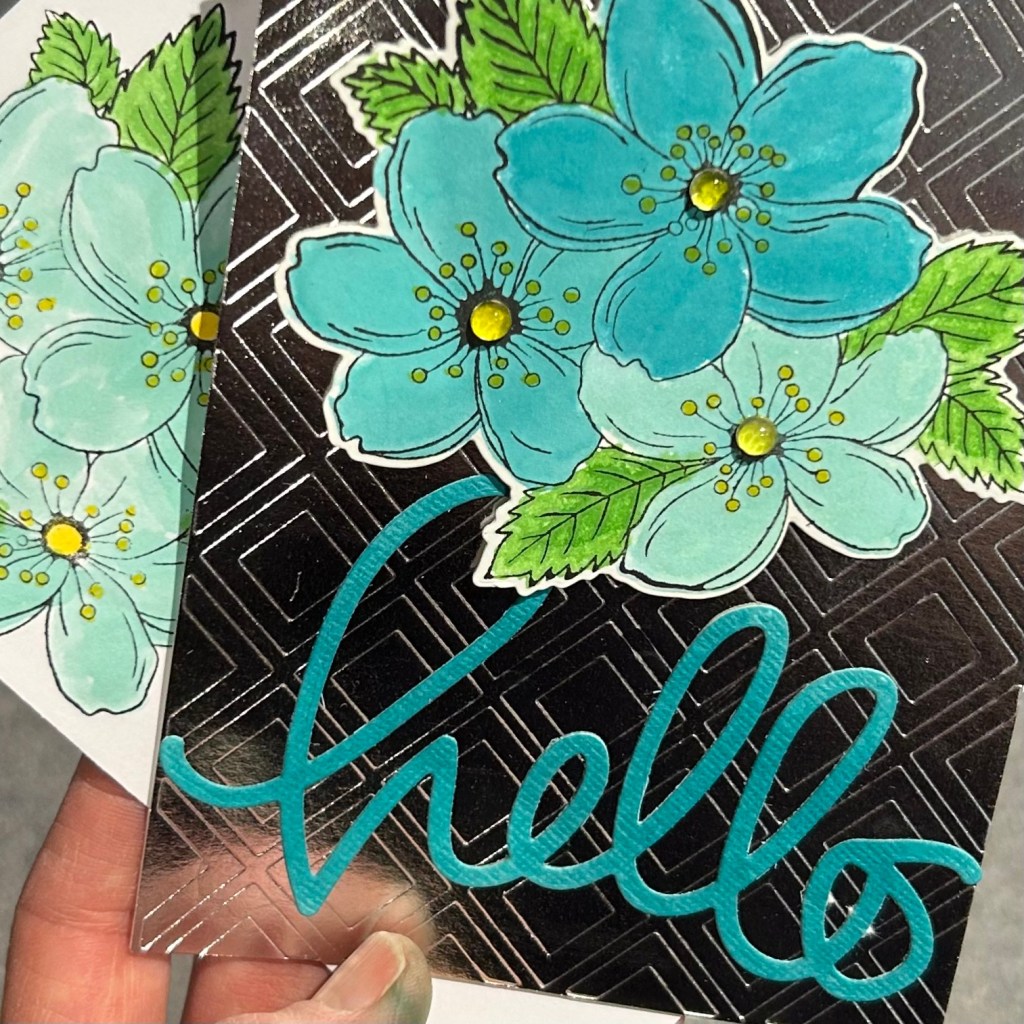
Happily I have made some progress on my 100DayProject. I finished Card 18 (and made a second slight variation of it) as well as started and finished Card 19. I’ll have 3 days up here at the cottage so I think I should be able to make some pretty good progress on some of my project.
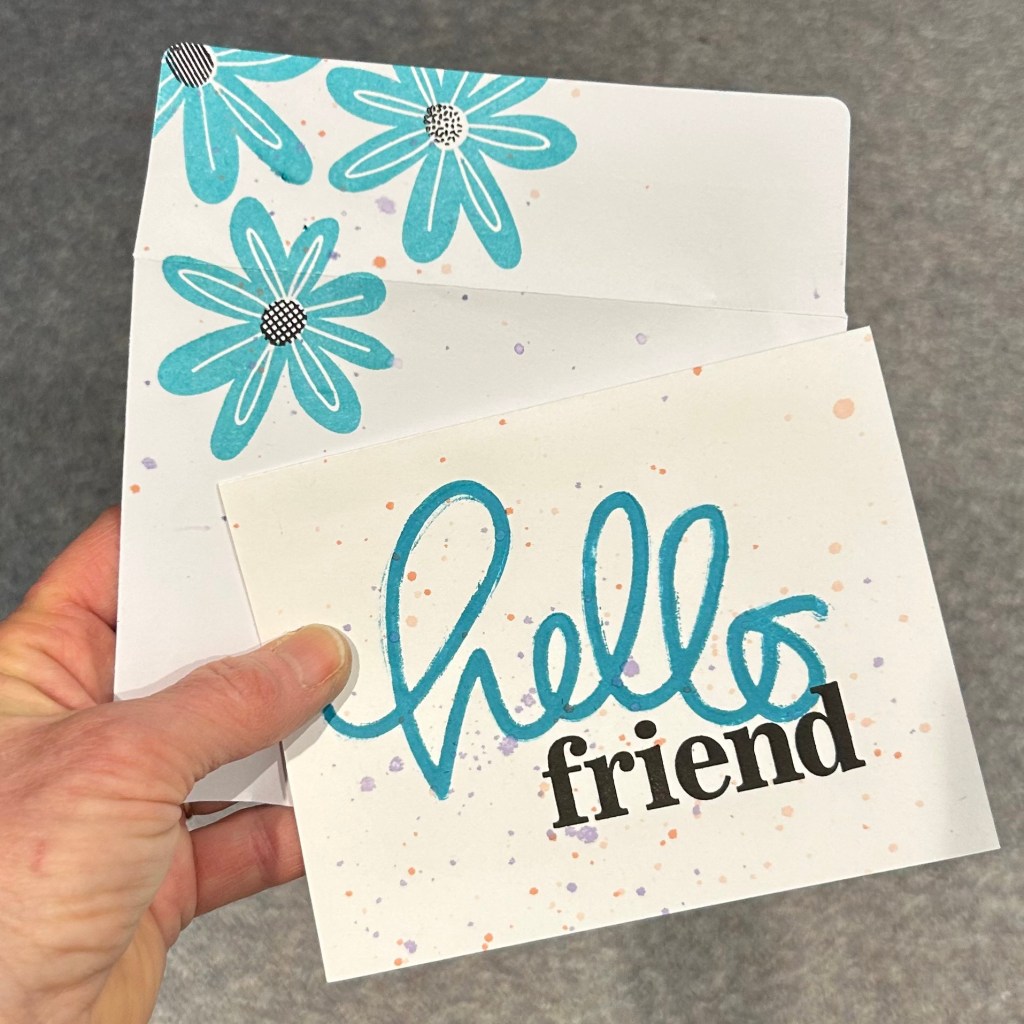
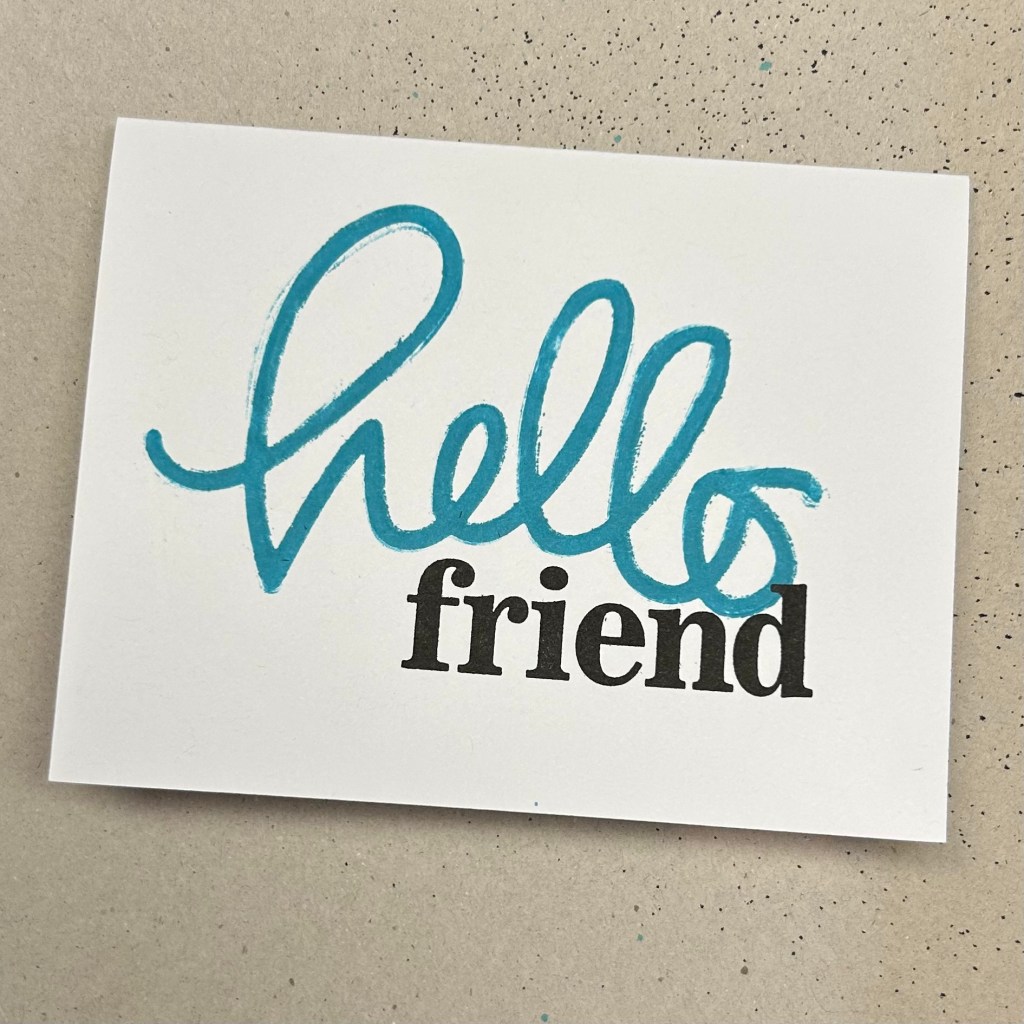
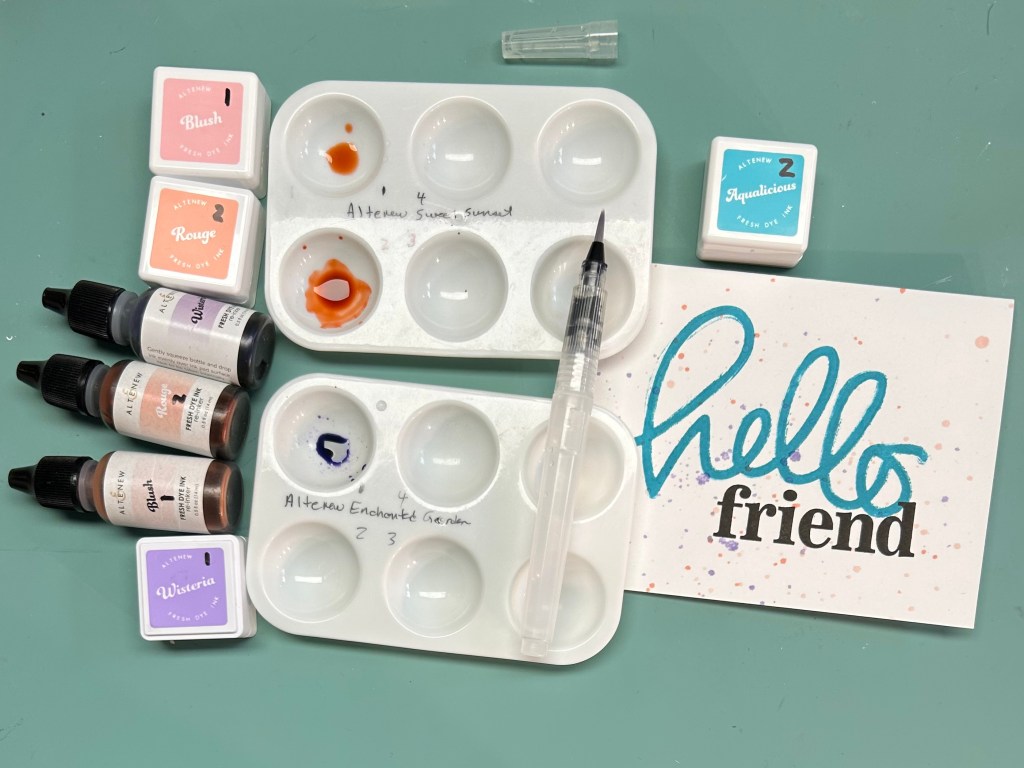
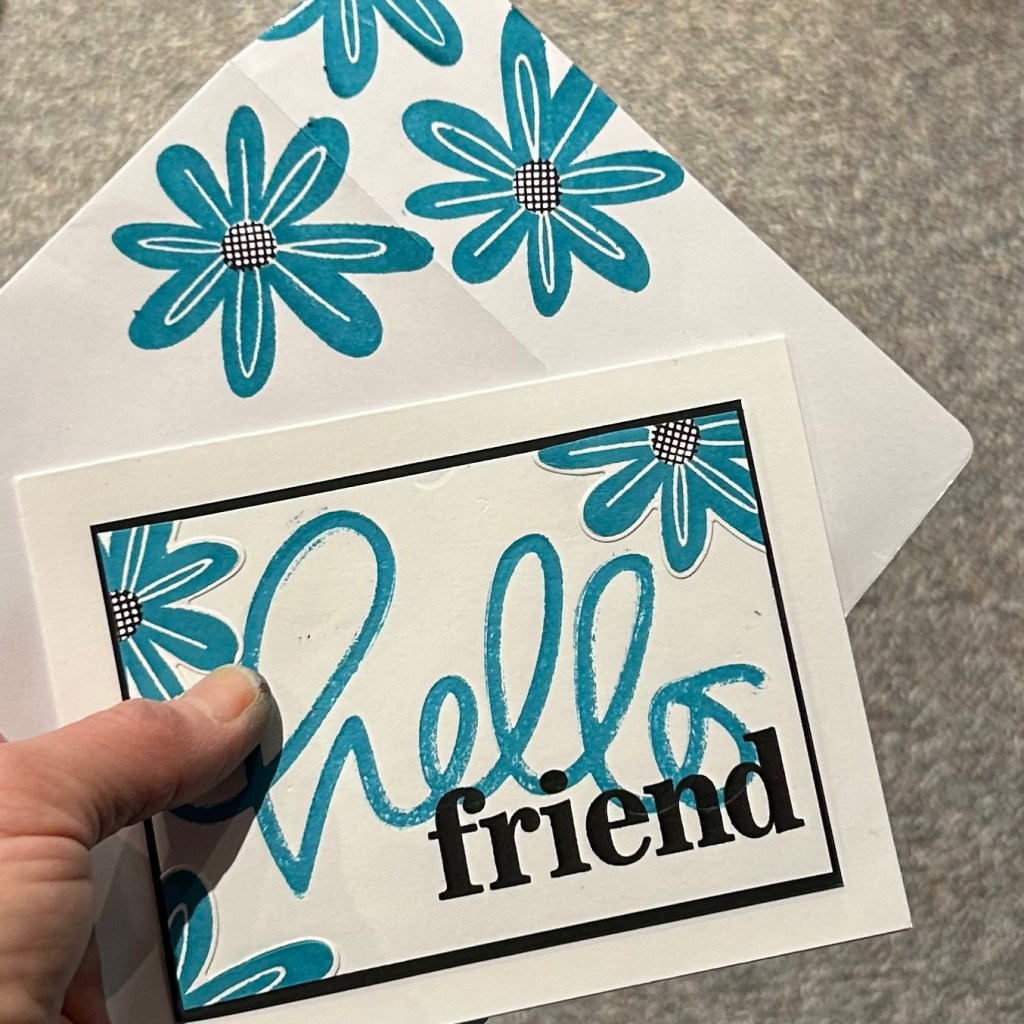
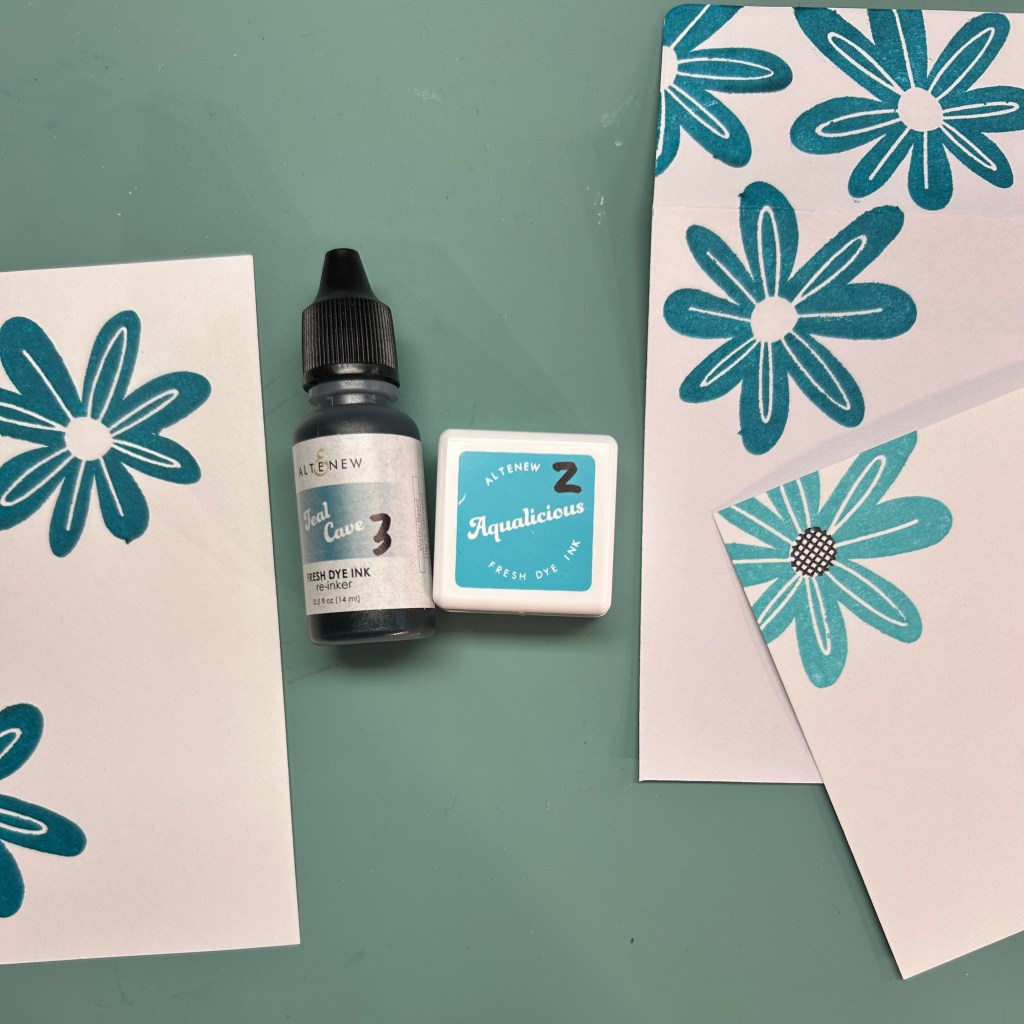
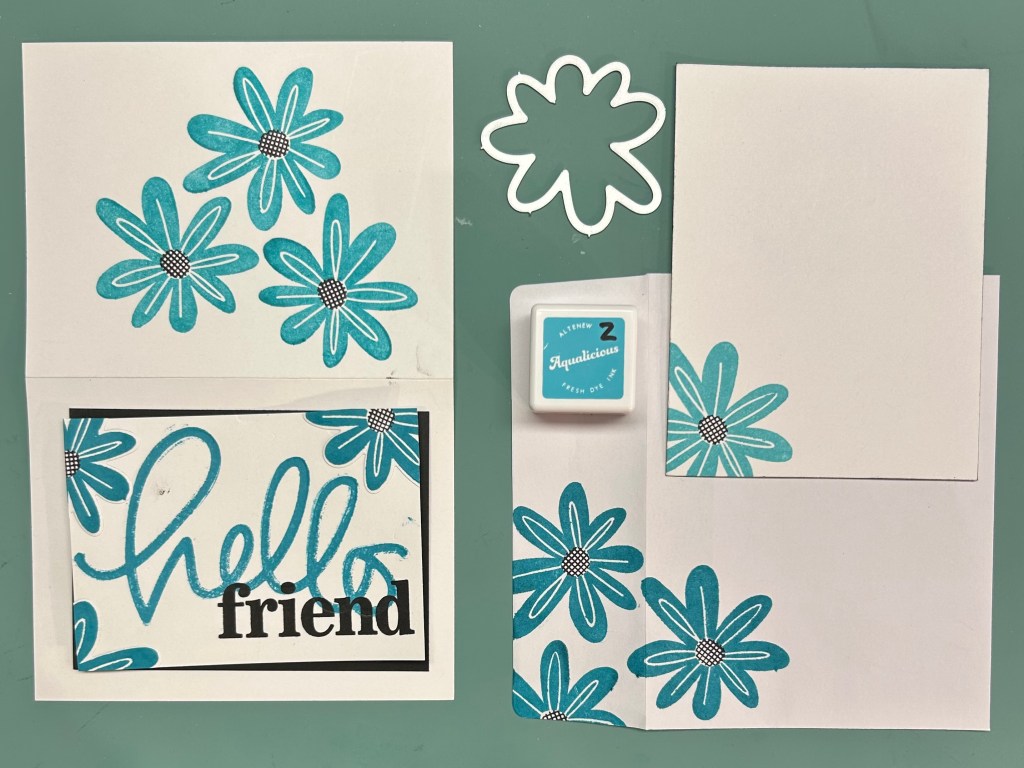
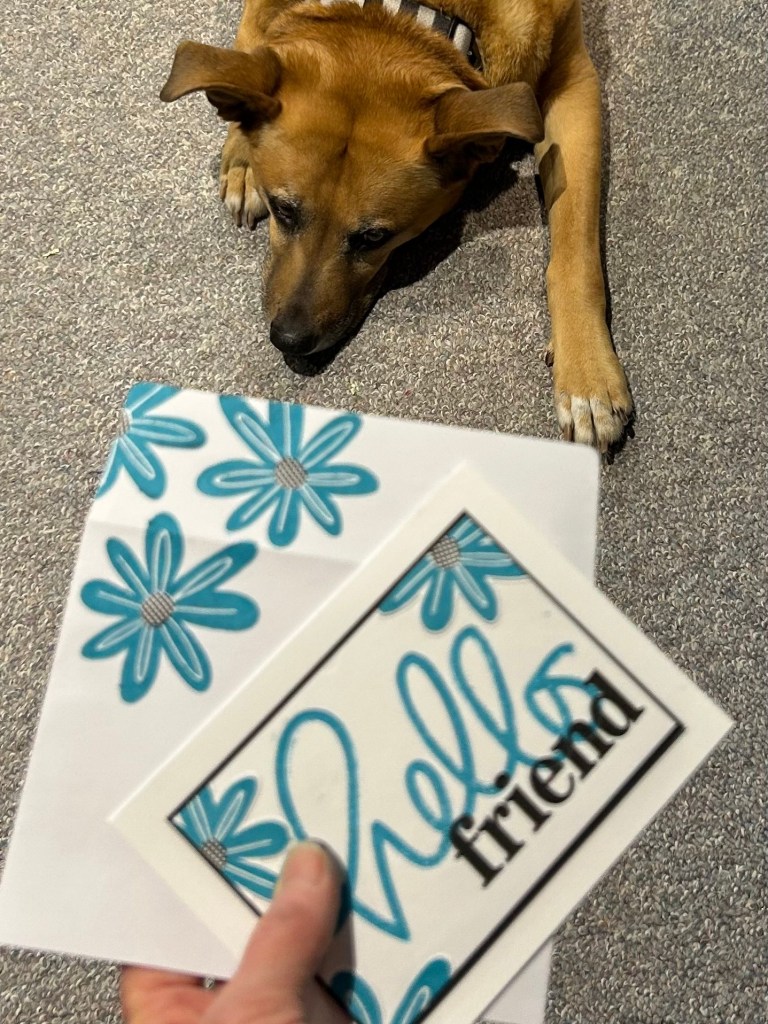
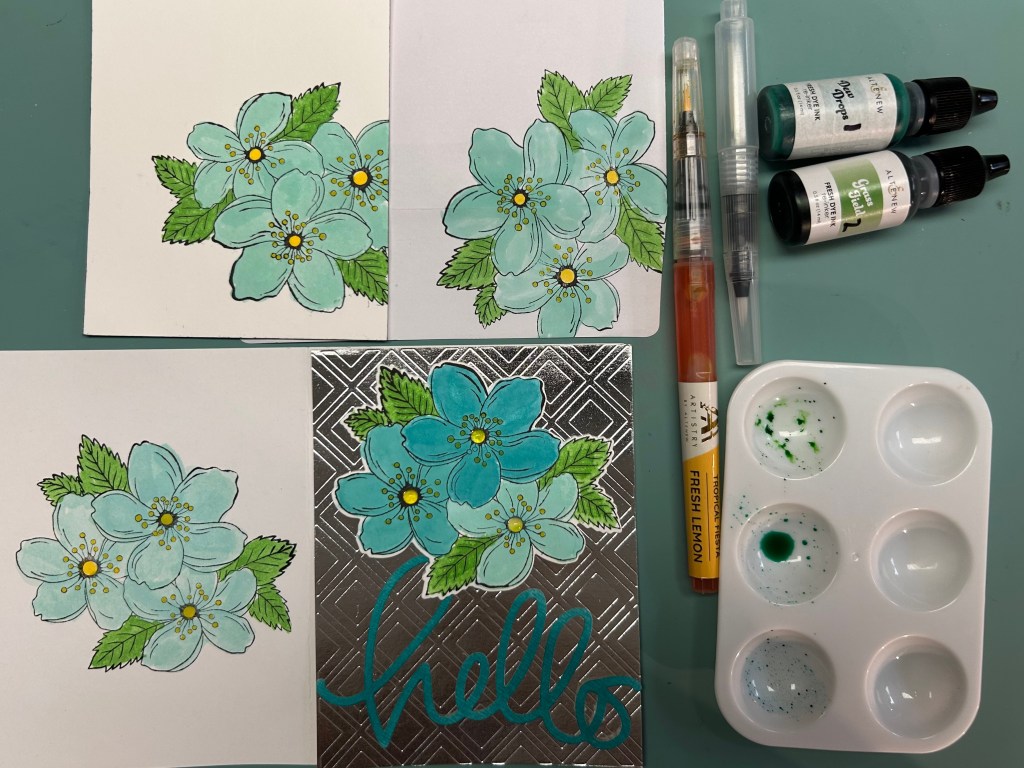
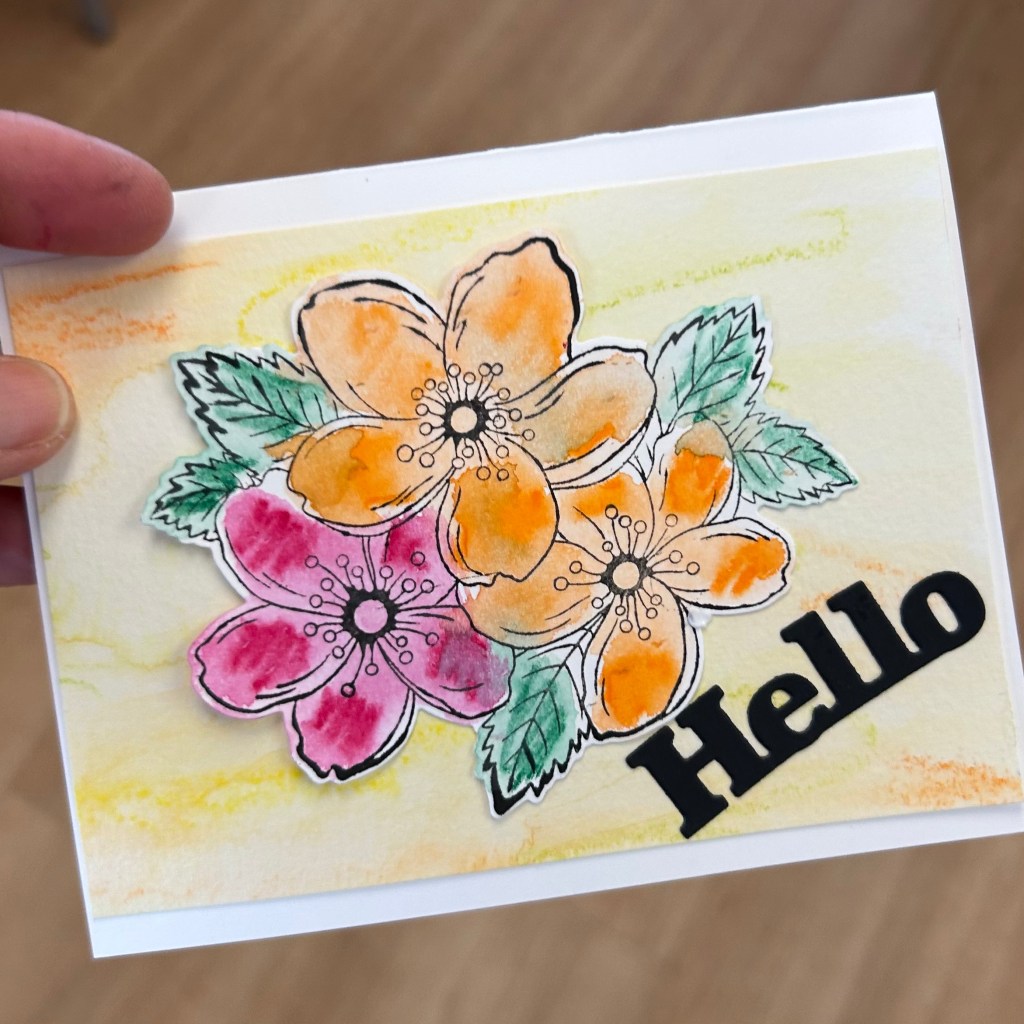
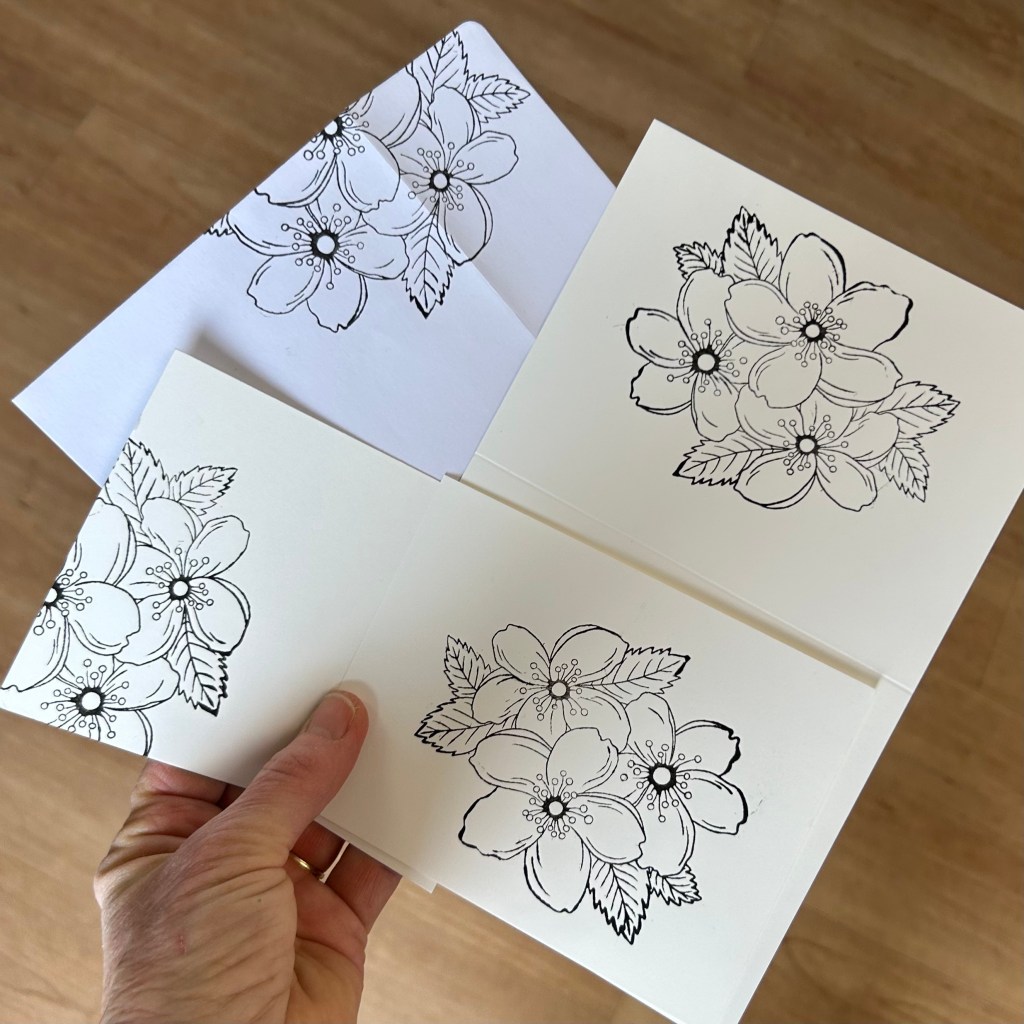
That addition of the black inked Friend is a really nice contrast to the teal faux-letterpress Hello that I created and wrote about several days ago. I put the card into my ‘spray box’ to add some splatter as they had done in the sample card.I’m starting to like the splatter process. This time I put a few drops of ink along with a few drops of water from a watercolour brush for 3 colours of ink in my mini palettes. Then I tapped on the brush to splatter the ink onto the card front. I like working with ink directly from a reinker rather than pressing the ink from a stamp pad out onto a block but that’s a great option if you don’t have reinkers.Because my ‘hello’ faux-letterpressing was visible from the inside of the card, I added a card insert into both sides of the inside of the card. I just added a floral stamped image on the back of the card. I added splatter to both inner card panels. I like how the black centre of the flowers adds a nice contrast. The stamp set is from an old SCT class or kit of some type (I am pretty sure).I adjusted the design slightly for the 2nd card that I made from my my trial ‘hello’ faux-letterpress impression. My sample cardstock scrap of paper had to be trimmed down smaller than a full cardfront and had an uninked faux-letterpress impression in the top right hand corner that I needed to cover up with some flowers. I quite like how this card came out, too. You can’t really notice in the photo, but this trial ‘hello’ impression actually had better indentation than the one I made into my first card. You can sort of see it where the ‘friend’ black ink overlaps with the teal ‘hello’ impression. You may also notice that I was able to get rid of most of the teal ink above the end of the ‘o’ in hello and the black ink in the middle of the ‘h’ using a very fine sandpaper from Roland’s stash. I’ll definitely be keeping some sandpaper around to remove future spots of ink that inevitably end up where you don’t want them. Apparently rubbing a pencil eraser after the sanding can help to smooth the cardstock.This was my original trial ‘hello’ faux-letterpress attempt. You can see that there is an extra impression near the top that I had to cover up. And because it was just done on a scrap of paper I had to trim it down. But I think it ended up working out well. You can really tell in this photo how much darker the envelope and the flowers I stamped to add to the card front were because I reinked my Aqualicious ink cube with Teal Cove ink. Oops!By mistake I reinked my Aqualicious ink pad with a darker colour of ink (Teal Cove) which I realized after I stamped the envelope. So, I tried to rub most of the ink out of the block onto paper towels (which I will try to convert into card fronts) then reinked again with the proper colour of ink. You can see that the colour of the flowers on the back of the cardbase is almost back to the Aqualicious colour that is on the single flower on the inner layer. These are all of the pieces of my second card. You’ll see how I die cut then trimmed the flowers to cover up that texture in the top right corner, then I added partial flowers in a few other spots as well. I tried to create a visual triangle with the black by having just two of the 3 black flower centres showing along with the black friend.Lots of ink came out of that ink cube that I mistakenly reinked with Teal Cove rather than Aqualicious ink. I think these will make interesting card fronts. I just need to do a bit of research about the best way to turn inked paper towels into card fronts. Perhaps a thinned out glue on the card front to adhere the paper towel to the cardstock as well as to covering the surface of the papertowel.Luna was lying on the floor in the usual spot that I use as my photo background when I am taking photos of my finished cards when I am in the basement. She’s so cute!
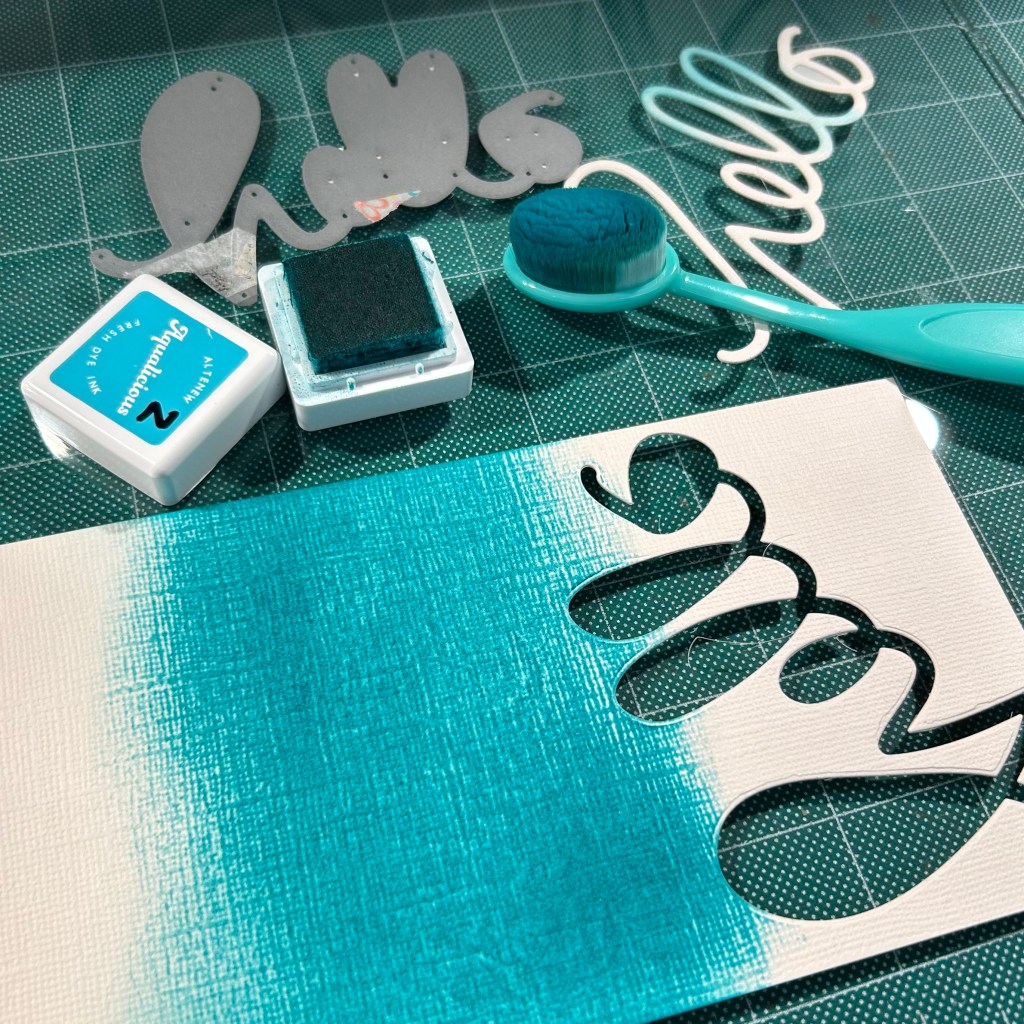
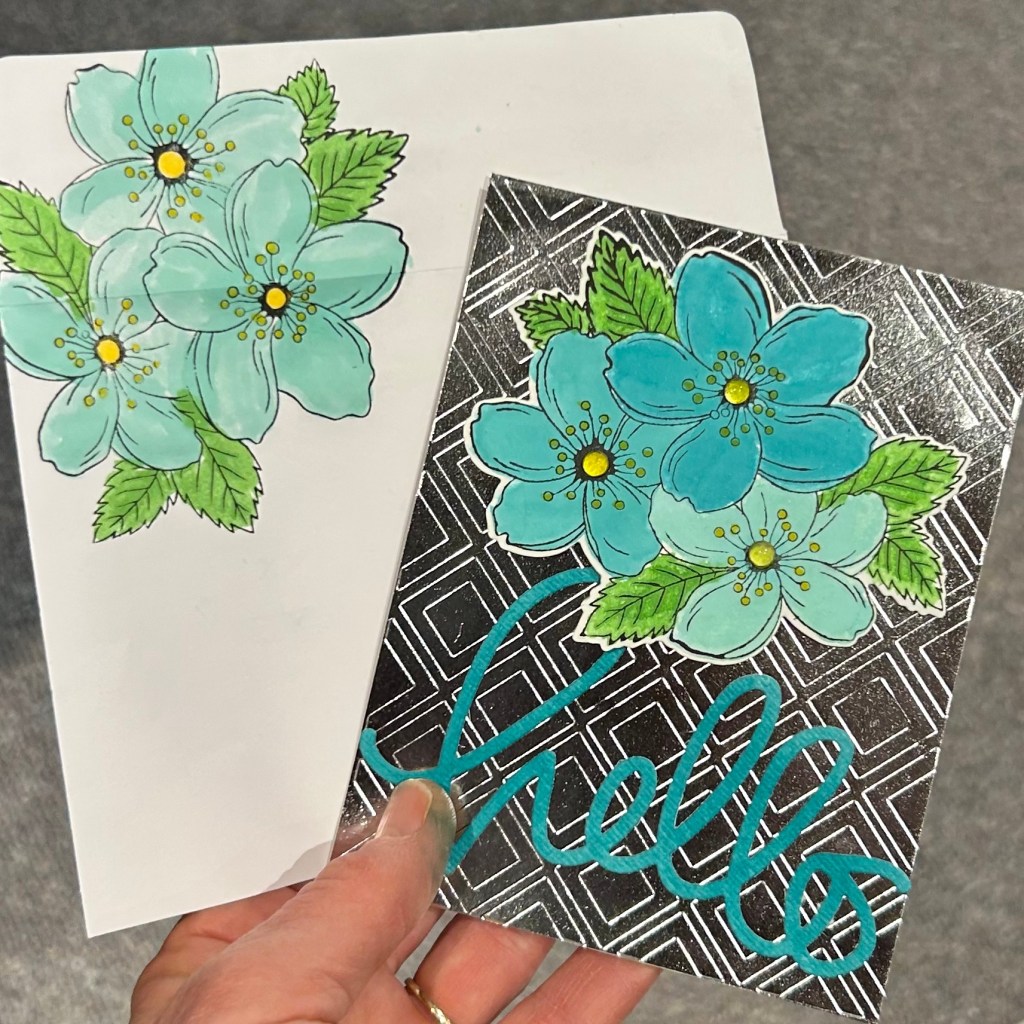
It was very slow going colouring in the already die cut hello (on beige adhesive backed paper) using my blending brush. So I opted to first try to ink blend the cardstock before die cutting which is easier. But even easier is to just rub the ink cube over the cardstock before die cutting!I was back to using my reinker ink with a bit of water to colour my images. For the card front, back of card, inner layer as well as the envelope. The diecut flowers I coloured yesterday but added the Fresh Yellow watercolour brush centres today.I am quite pleased with how the silver foil paper looks die cut with the coverplate that I got from a Scrapbook and Cards today kit.A closer up view of the card (and my blue thumb. Would a crafting session be complete without ink coloured fingers?And an even closer up view.
Throwback Thursday
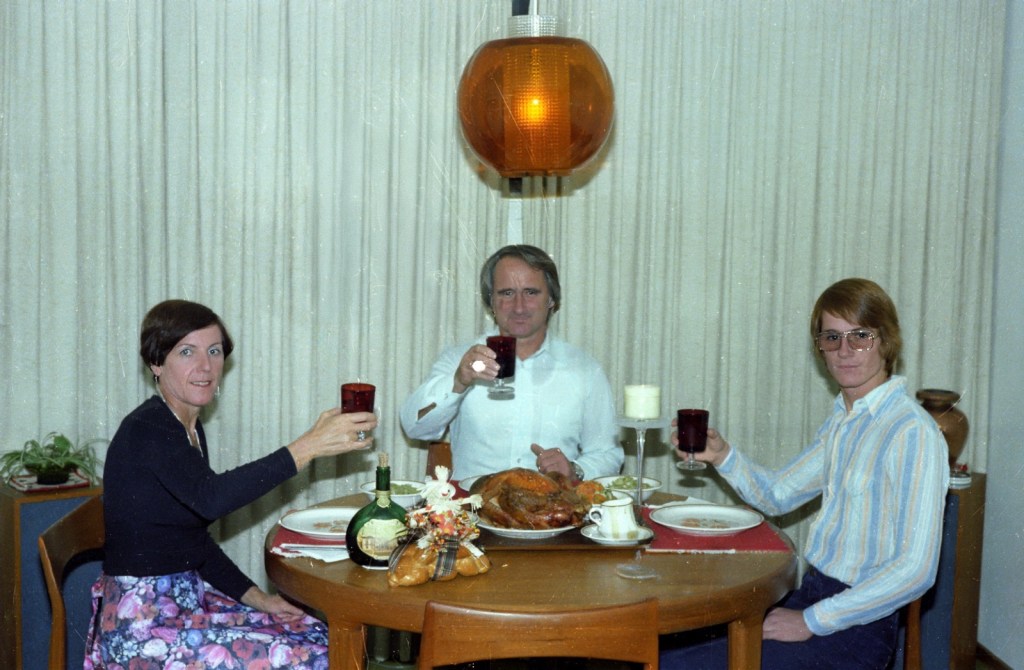
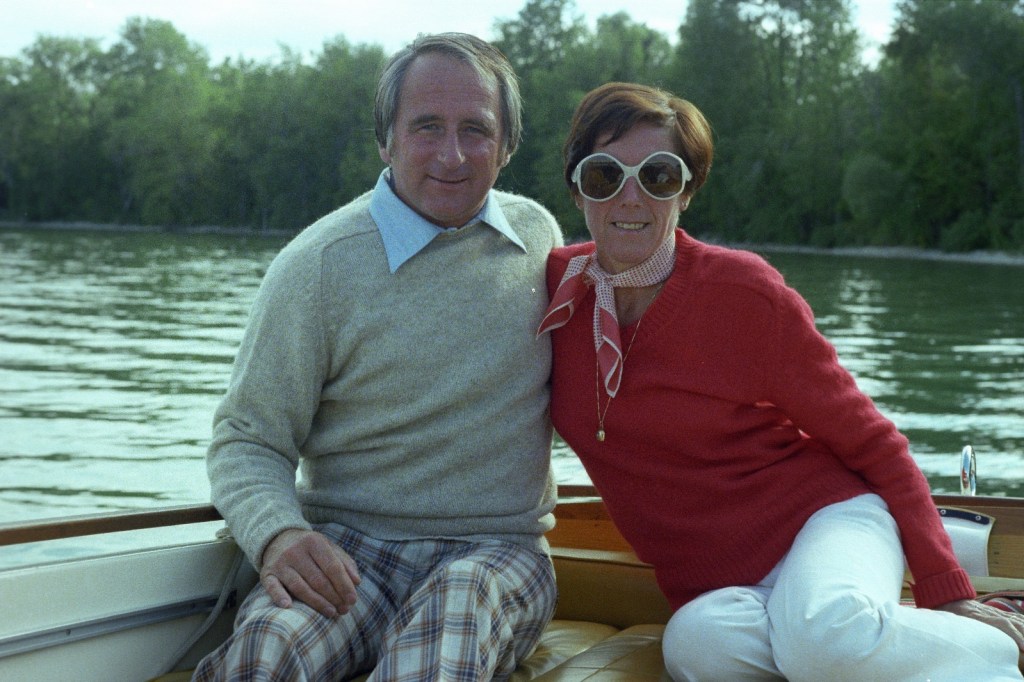
We’ll start with a few photos from the negatives that Roland has been scanning in. It’s so fun to see photos of him and his parents from way back when.
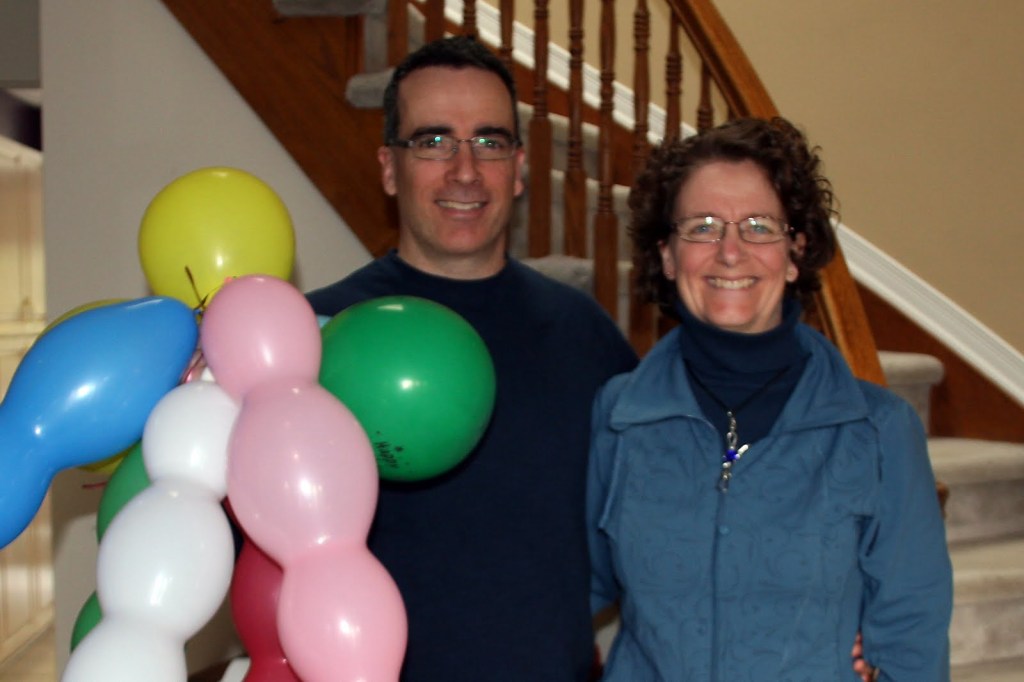
Saturday 27 March 2010 – Birthday Balloons Finally Delivered
Stefan had soccer tryouts in Gloucester at 9:00 so I took advantage and brought the birthday balloons that we didn’t deliver on Thursday over to Kevin’s (and had a nice, although somewhat short visit with Kevin and Lynne). I also dropped by the Scrapbox to pick up my ‘free’ magazine and (of course) couldn’t resist buying a few (not free) things. Roland and Heidi went out to Navan to volunteer at the CORA-run Bunnyfest ringette tournament after her 9-11 gym soccer tryout. I made some lemon squares and homemade turtles (yum!) to bring to Dulce’s and some chocolate macaroons (here) for Heidi to bring to Emily’s for her sleepover then I went for a bit of a run in the afternoon after walking Stefan over to the Foerster’s where he hung out with Andrew for the evening. Stefan had spent most of the day with Luka (first here playing Monopoly, then at Luka’s, likely playing video games). Roland dropped Heidi off with Emily and Emma after the Bunnyfest, send out emails for his first soccer tryout cuts (before tomorrow’s session), then joined me (who got a lift with Mark and Rosemary) over at Dulce’s. One of her friends had the thoughtful idea to put on a fundraising dinner (Dulce’s brother, a police officer in Mexico) was injured when he was shot in the leg several times while on duty; limited medical coverage makes it a very trying time financially for his family). It was fun to see some of the Mexican and paddling crowd. When we picked Stefan up on our way home, the girls were busy creating their Facebook accounts.
now for the 2025 thoughts on that post: I saw Kevin today for lunch. I wish I had looked up the Throwback Thursday post before he arrived and I would have thought to have some belated birthday balloons for him again this year! We did enjoy burgers for lunch. The Scrapbox store is long gone. And the other local brick and mortar papercrafting store, Multicraft, will also be gone at the end of April. But, I still enjoy the Scrapbook and Cards Today magazine. I have a paid subscription and really enjoy looking at current and past issues which are available free online. And I love all their events. Stefan still plays a bit of soccer but indoor co-ed adult instead of outdoor competitive youth soccer. Heidi was a teacher coach at her high school team’s ringette tournament yesterday so while she’s no longer coaching for the City of Ottawa Ringette league (which is what the Bunnies team she was coaching back in 2010 was), she’s still coaching ringette!
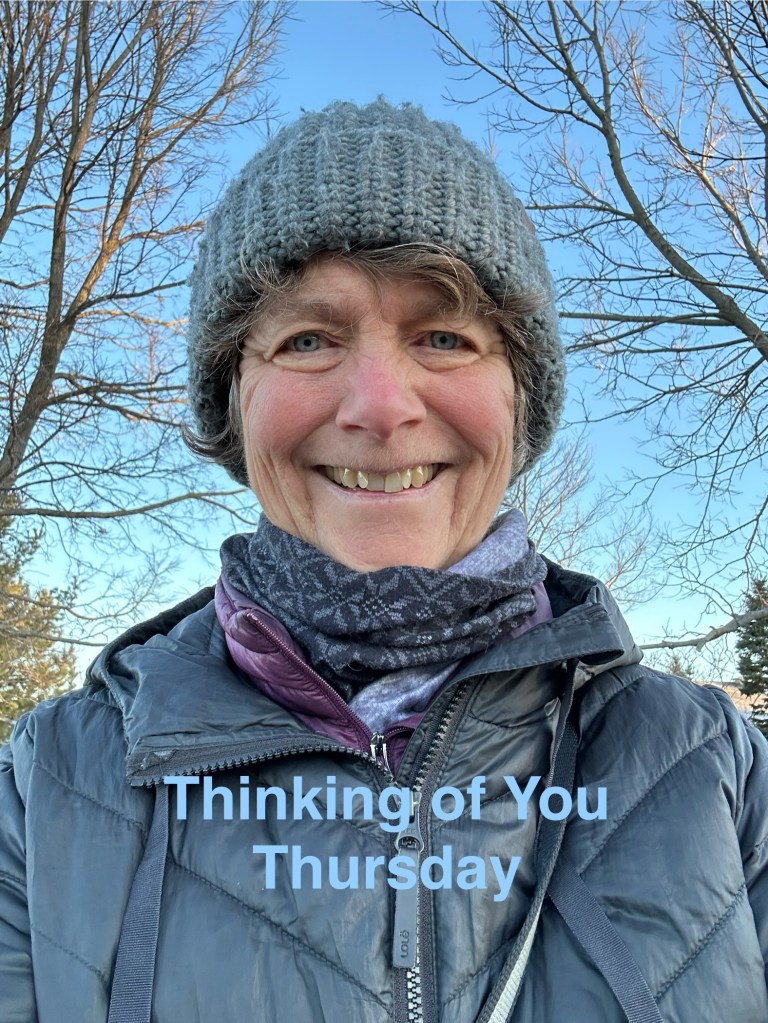
Thinking of You Thursday
It’s another Thinking of You Thursday. And yet, I did not get to sending out any thinking of you cards today. It’s 11:00 and I’m just starting to write some words and to get my blog post done. We had curling tonight and have just arrived up at the cottage afterwards. With Roland driving, of course I had a nap on the way up. It would have been better to just crawl into bed upon arrival, but here I am typing instead and will likely be well overtired and find it difficult to get to sleep when I do get to bed. I’m turning off my alarm while I think of it.
The particularly good news up here at the cottage is that the weather has finally been warm enough to thaw the pipe between our septic tank and the septic field to which we have to pump the liquid. It was a cold early winter with little snow and we weren’t the only ones who had this problem. Our interim solution was to ‘convert’ our septic tank into a holding tank and we simply had it pumped when it became full. This summer we’ll get a heating line installed that we can turn on when/if it ever happens to freeze again.
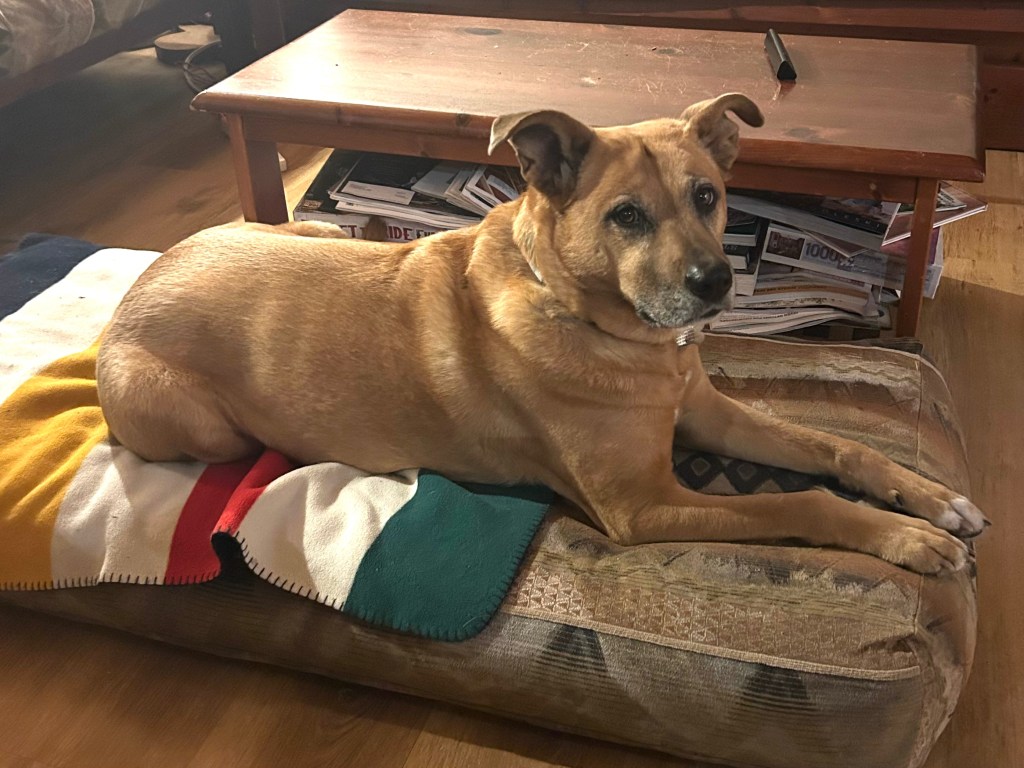
Luna’s hanging out with me while I finish up my blog post here at the cottage.
It’s now 12:50 so I’ve been up way too late working on this blog post (I did post it just before midnight but have been adding updates). And, since it was Thinking of You Thursday and I didn’t get any cards sent out, I did send out my Thinking of You Thursday photo to several friends as emails and texts. Did you reach out to anyone on Thinking of You Thursday?
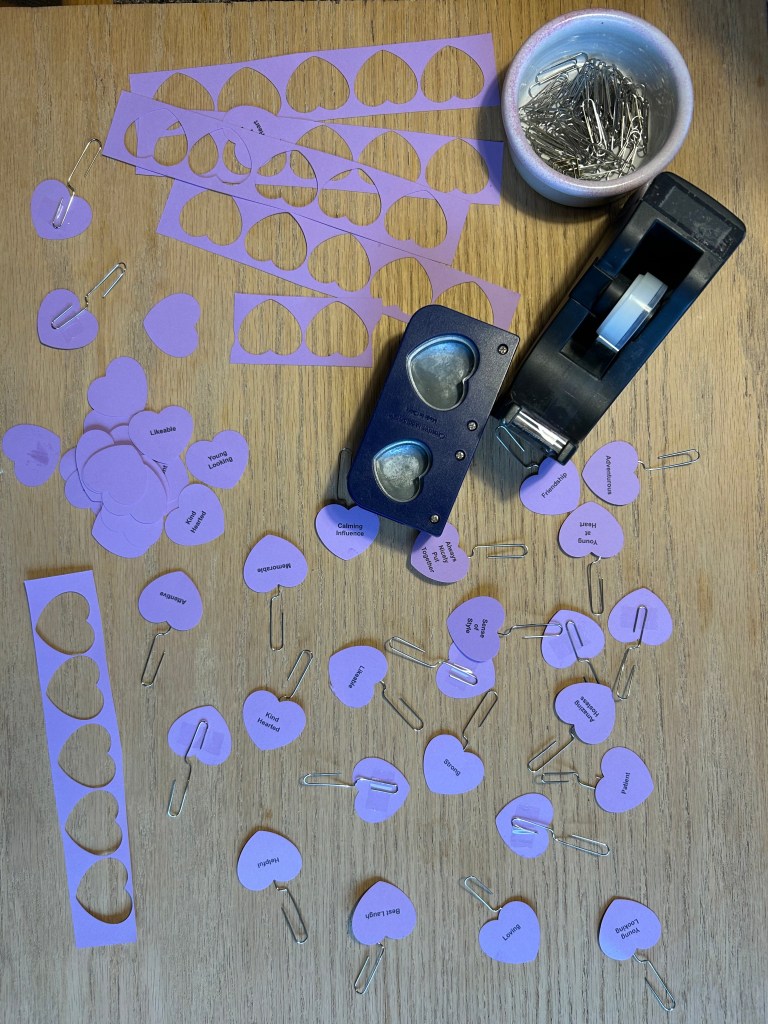
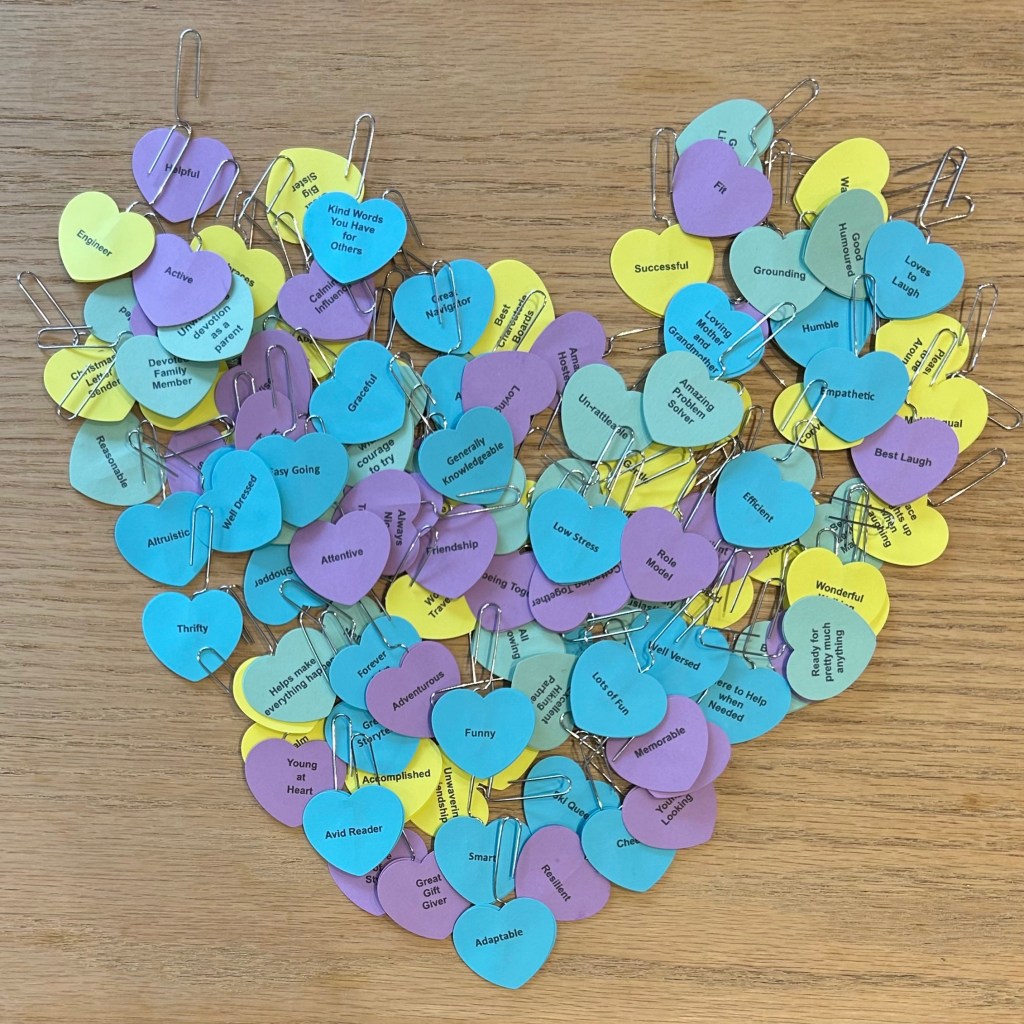
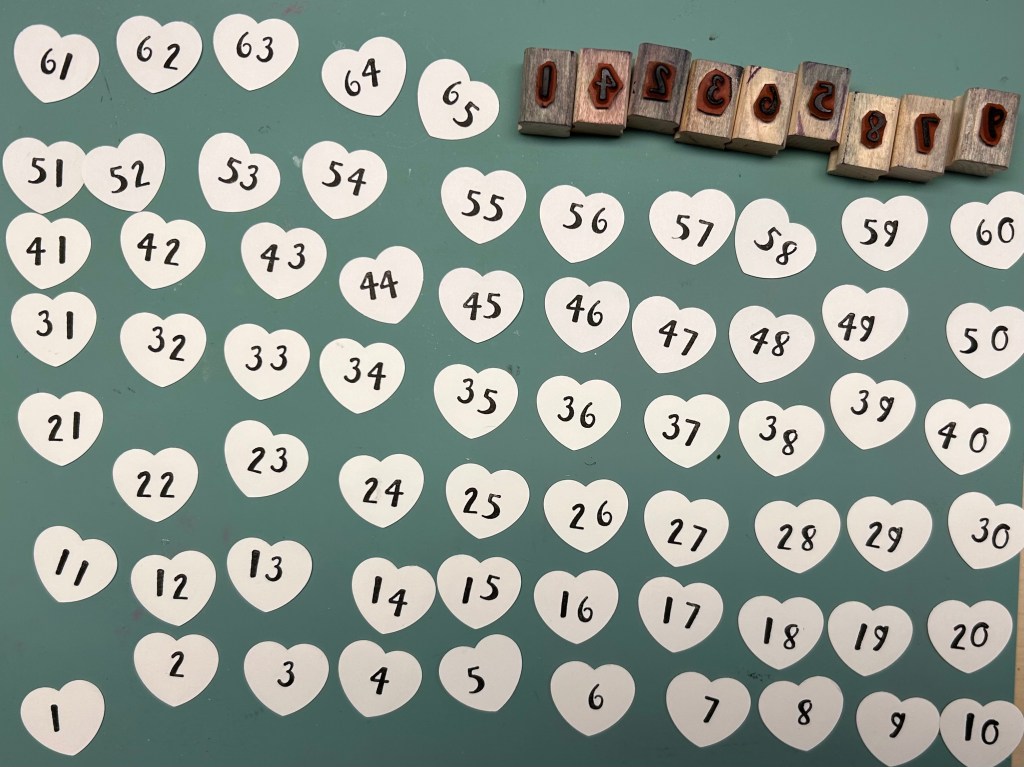
I printed out 2 copies of the words from a Google Docs file. I had them in 6 rows of 5 words on a page in a table with the line size set to zero. Then I punched them out into heart shapes. I used an opened paperclip to make a hook and used double-sided tape to adhere the 2 copies of each word together
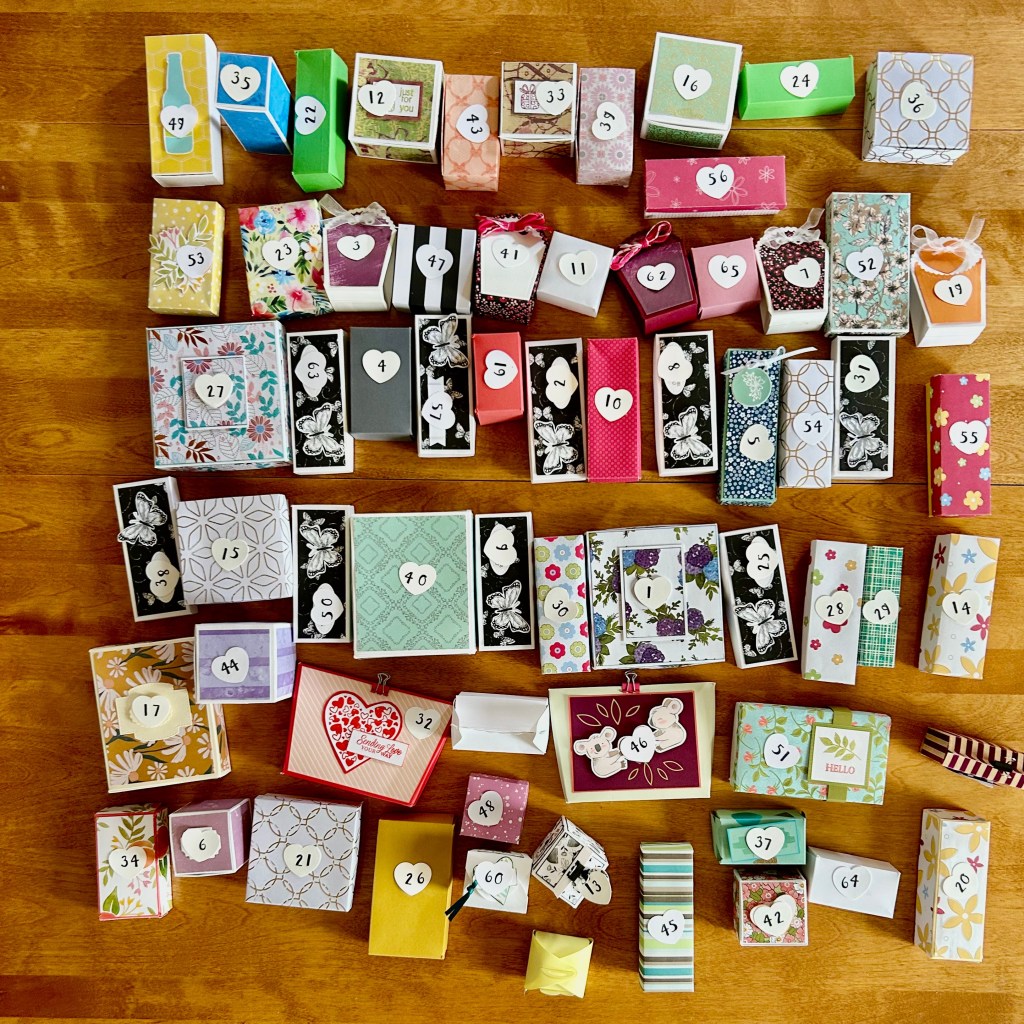
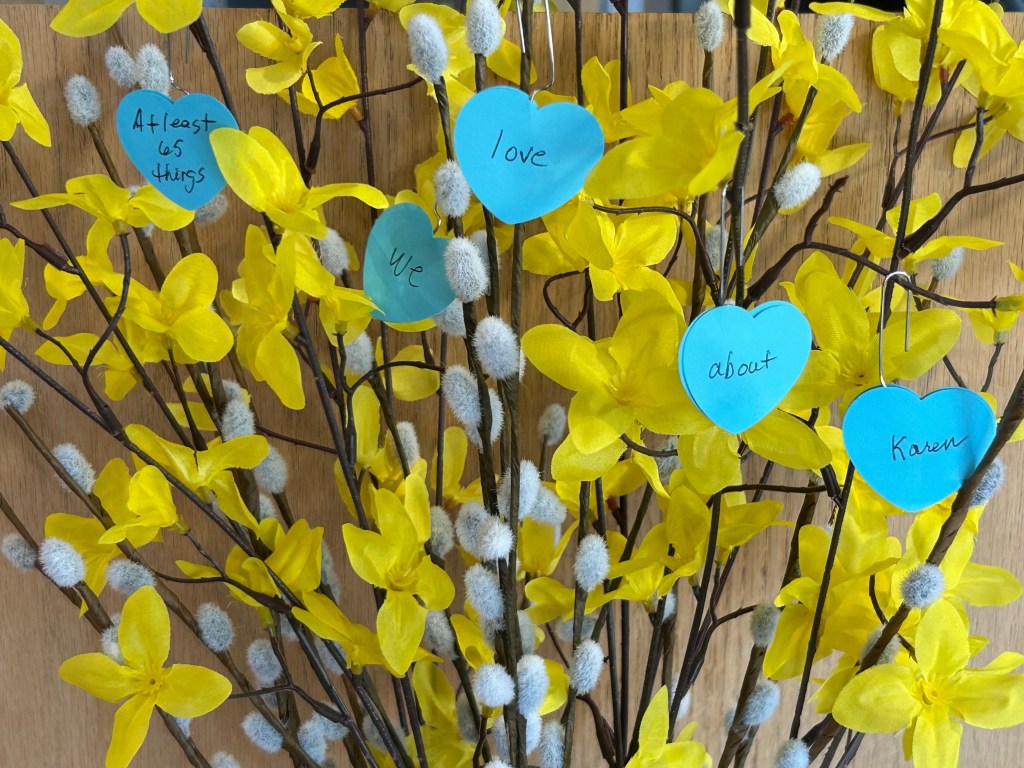
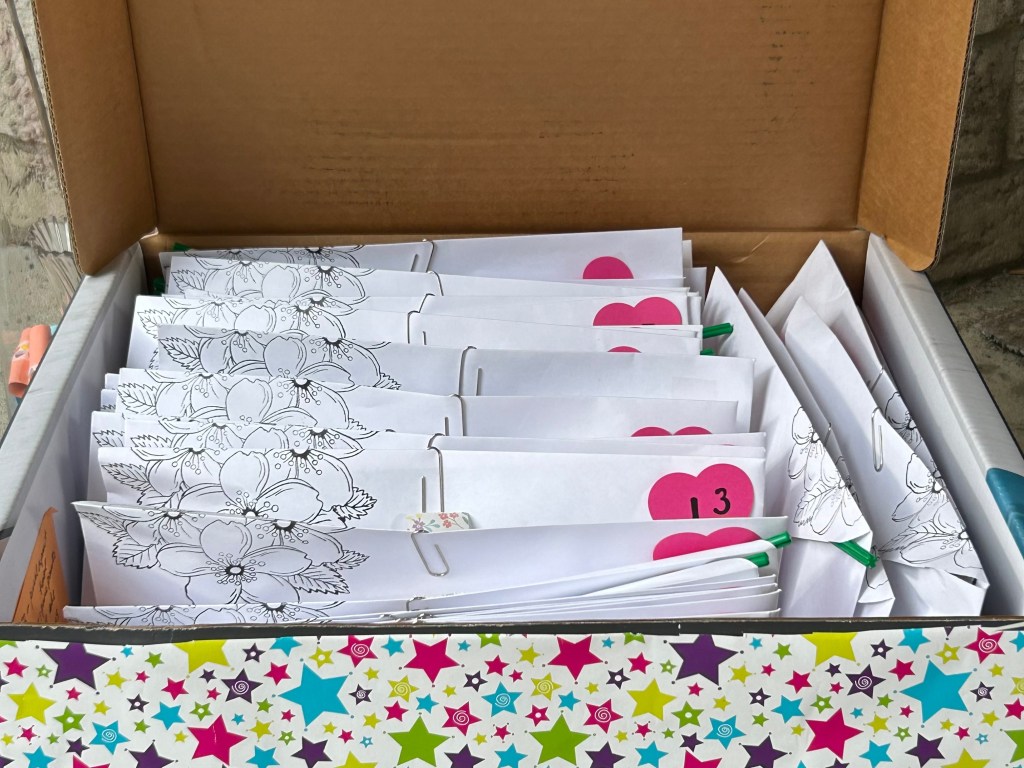
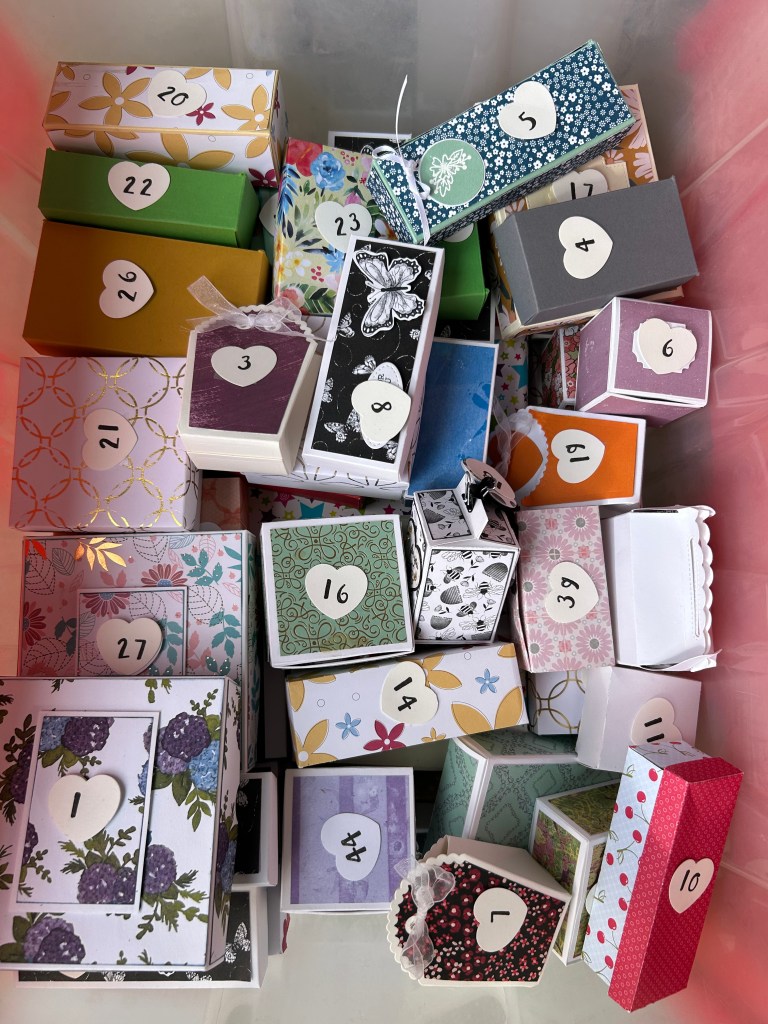
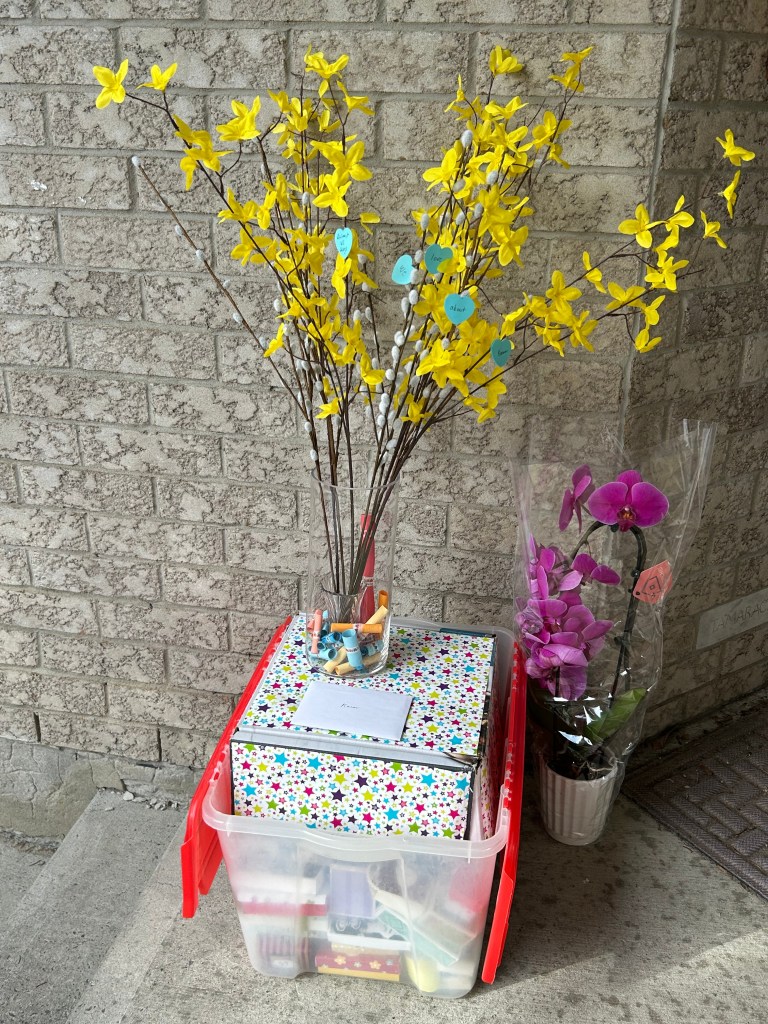
Today was the day I (with help from Flora) finished and delivered (with Stacey and Diana on our way to a virtual golf night – 10 of us playing tonight at Golf-o-Max) a 65th birthday gift for our friend, Karen. Taking inspiration from an idea that my friend Shelli’s husband had for her 60th birthday, I reached out to Karen’s friends and family to attempt to gather at least 65 things that we love about Karen. I compiled the messages for Karen to open and read one a day. And we assembled then disassembled into 65 chunks a 1000 piece puzzle and packaged them into small decorative boxes from my ever-growing box stash so that Karen can do a 15-16 piece portion of the puzzle every day for the next 65 days. And we portioned a Lego set into 65 envelopes for Karen to assemble a small portion of each day for the next 65 days. In each envelope we also included a word or two (typed onto heart shapes) for Karen to hang on the spring floral stems. So many great words describing all the things we love about Karen were compiled. Maybe you’ll take inspiration from the idea sometime in the future for a special birthday for a special friend or family member?
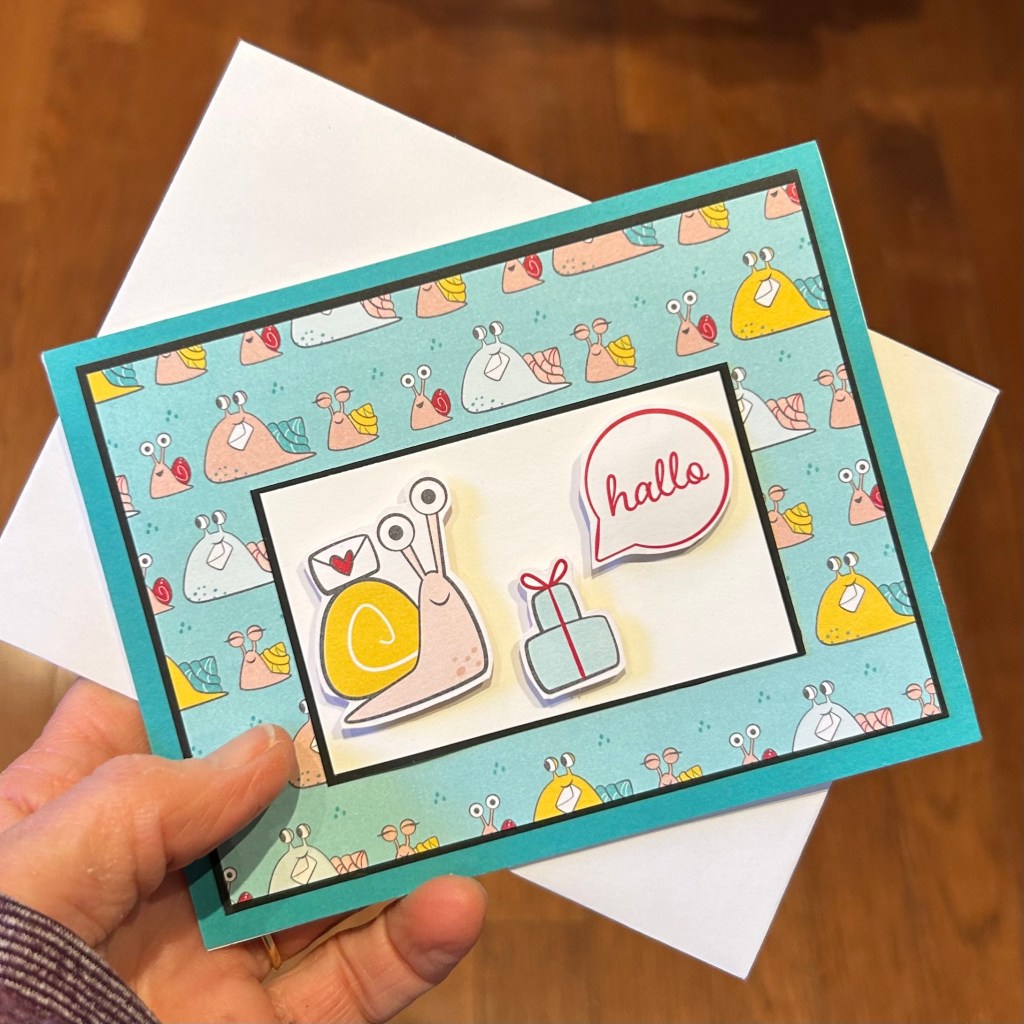
This wide assortment of decorative boxes that I have been accumulating for years came in handy to hold the sixty-five 15 or 16 piece puzzle sections. Karen will be able to make one section each day for the next 65 days. I told her she can’t open the wrapped box with the puzzle box until after she’s finished the puzzle. Such a wonderful collection of words representing so much of what we love about Karen.I had already sent Karen a birthday card in the mail so I used this card that I had on hand to wish her happy birthday again and to describe a bit about what the gifts were all about.These are the spring stems onto which Karen will be able to hang her word hearts each day.I’ll be able to reuse the envelopes in future card kits after Karen has finished assembling her Lego project. I adhered the hearts using repositionable tape.While the puzzle boxes are numbered, they actually don’t need to be done in order. The pieces within each box go together, but the sections don’t necessarily attached to each other in any specific order.The collection of birthday gifts that we delivered to Karen.
So, lots of craftiness but no progress on my 100DayProject yet today. Actually, I think I’ll count the envelopes I stamped as a 100DayProject activity because I’ll use some of them for envelopes for cards that I’ll make as part of the project (as well as using some for future card kits). I’m now going to watch a few lessons before I head to bed once I get this posted with a few photos.
Nothing to report on my Altenew courses and the assignments of making cards. Still busy working on a few totally different craft projects for a friend’s birthday which I can report on a bit later.
One of my crafty projects.Another of my crafty projects; putting a lot of accumulated decorative boxes that I’ve made to good use.
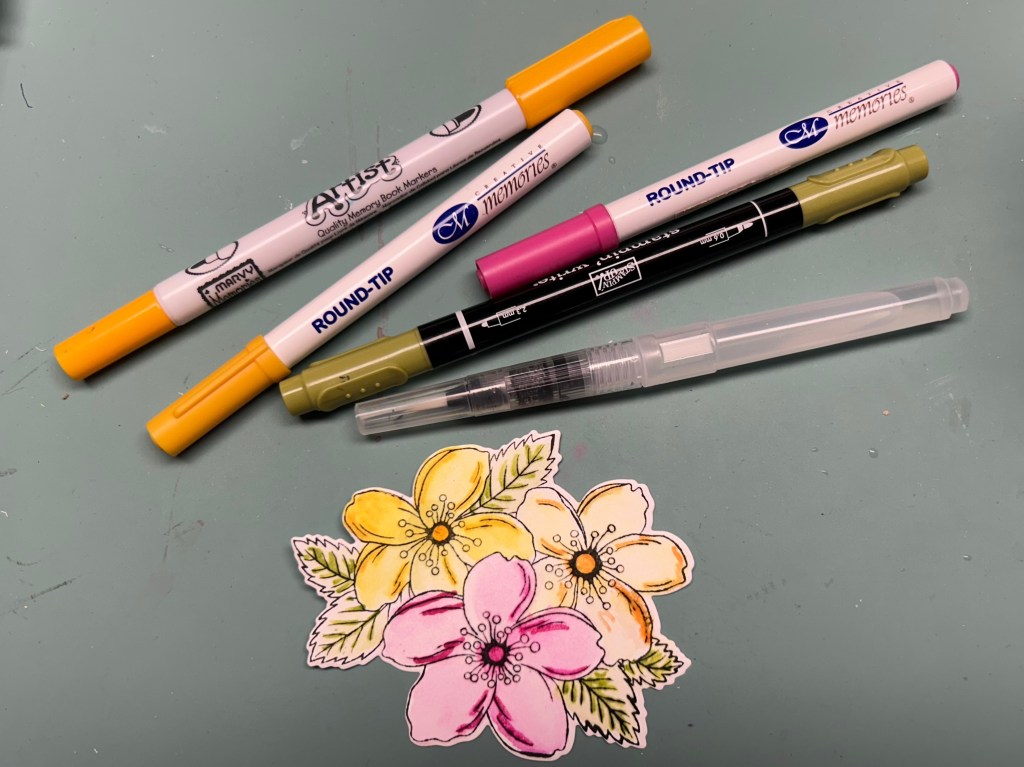
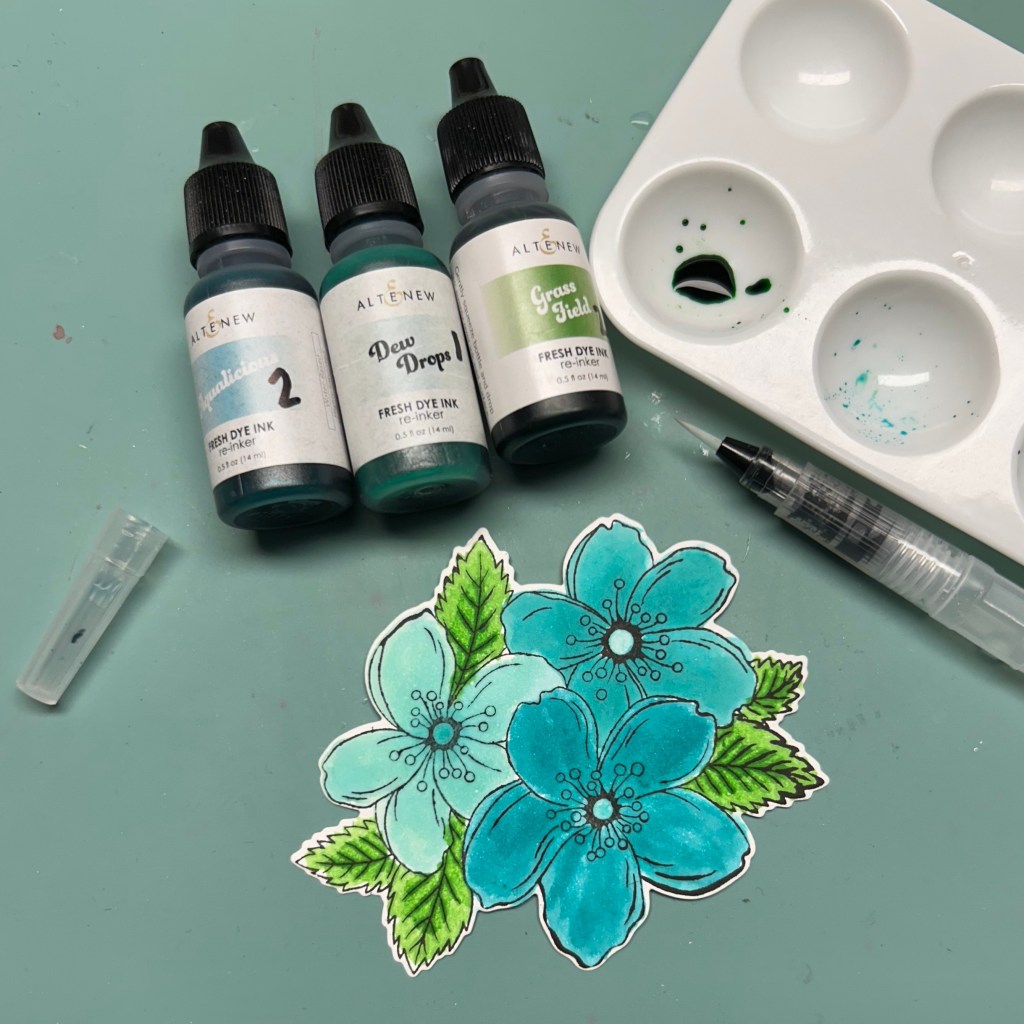
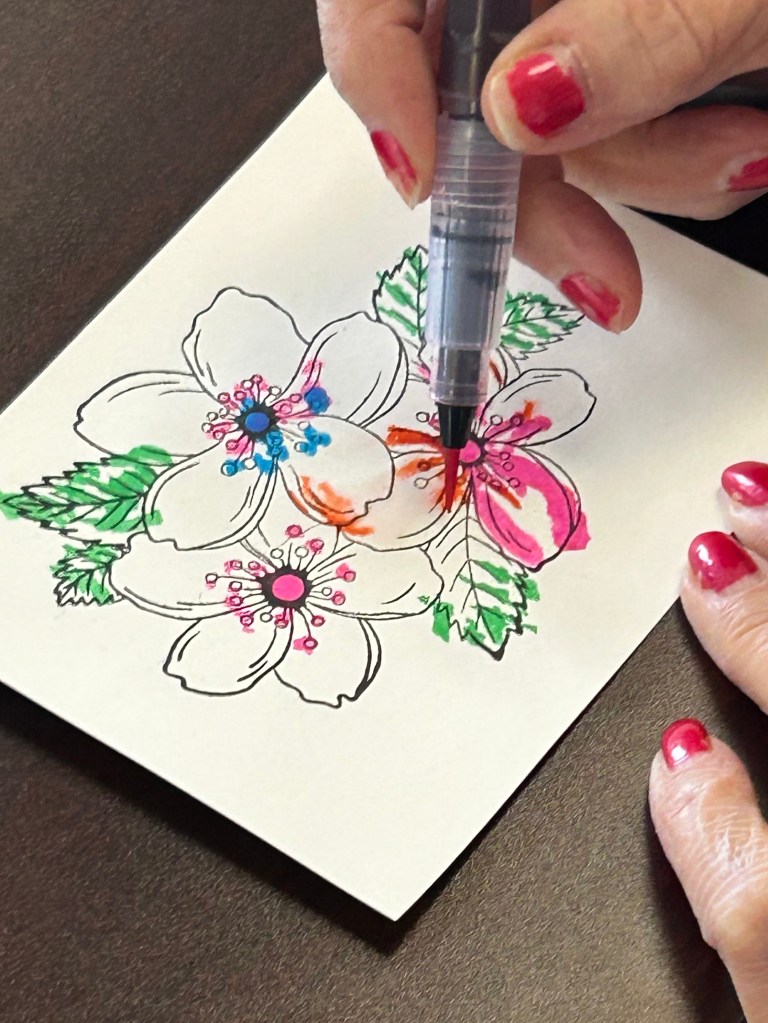
My idea for tips on Tuesday is to give some cardmaking tips for techniques and design but I don’t have many to pass along today. The class I gave did enjoy colouring with watercolour markers. One of the class participants mentioned that you can also use a regular marker along with a wet brush to blend out the ink from a regular marker. I will give that a try with some of my regular markers soon. Actually I couldn’t resist so I went down to try it out before posting this. I think it will work best with brush-tipped markers rather than fine tipped, but I guess it depends on how much colour you want to put down in a particular area. And the type of paper as well as the type of marker likely will make a big difference in the success of this technique. It definitely doesn’t work well if the markers are too dried out (I had to throw out a few markers from my stash). I will eventually try a few other brands of markers but so far I am still very taken with watercolour brush markers. Or I like to use a few drops of ink with a bit of water. Which I couldn’t resist going to try. This is what happens when I have a nap in the afternoon because I’m so tired. And have chocolate tuxedo cake for dessert. Fortunately I’ve already decided to skip pickleball in the morning to focus on a few crafty projects. And to bring Luna for her 10:50 mani-pedi appointment.
I prefer to just mix a few drops of ink with a few drops of water. These flowers and leaves are still wet; I’m curious how they’ll look in the morning when they are dry. I did try to apply a few layers in some spots to see if those areas come out a bit darker. I don’t think this paper is the best for trying to blend colours. I may try to blend a few different colours on watercolour paper,
I forgot to take some photos of the cards that the participants made in my class this afternoon or I would have shared some of their finished projects.
Tips on Tuesday
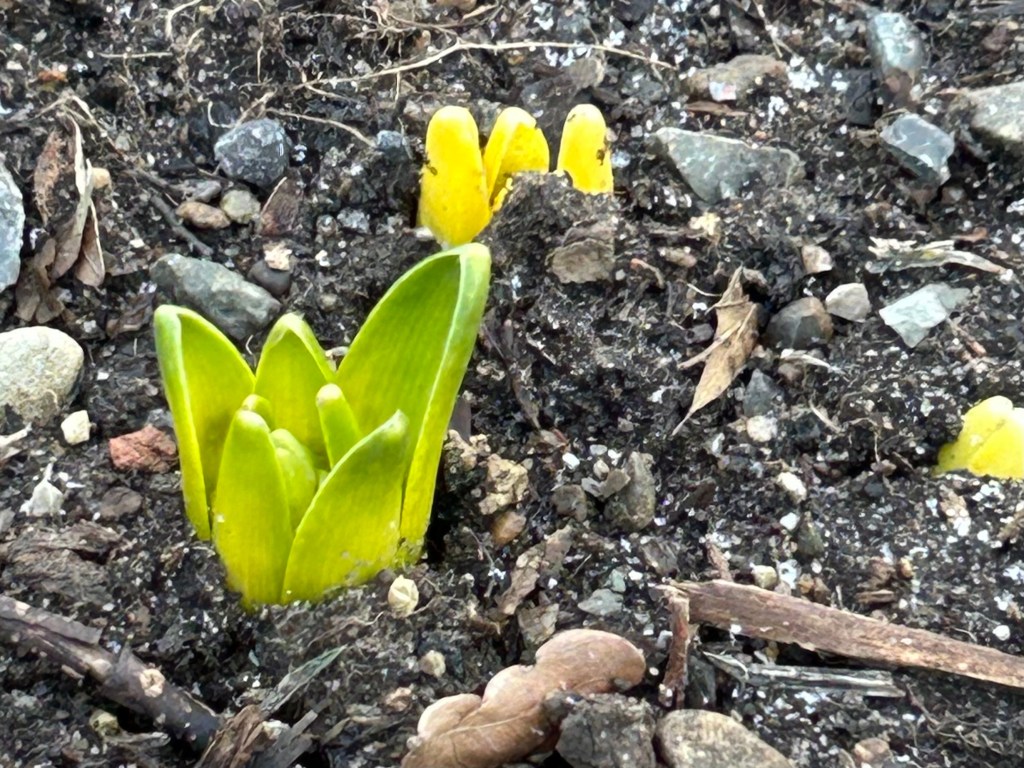
I was on the search for some evidence of spring bulbs starting to peek out from the frozen earth on my walk with Luna this morning. And a garden on the street behind our house didn’t disappoint. Sure enough, there were some leaves starting to poke their brave tips out. I expect it won’t be long before there are a few blooms popping up in gardens around the neighbourhood. My spring bulbs of choice are daffodils but every spring when I see the crocuses and other tiny flowers I think that I should try to add some of them into my garden as well.
I got in my morning swim with Flora this morning. Soon I’ll be heading out to Canadian Mental Health Association to lead a card making workshop in their 11:45 Arts for All program. A bit of further prep work is still required for that which I’m off to do now.
A fairly busy day. A quick walk with Luna before 8:00-10:00 Pickleball. It’s a good thing I deferred an originally planned walk with a friend I used to work with because I just had time to get myself organized for my afternoon Card Crew class at the Dementia Society. I arrive there for 1:00 although the program officially runs from 1:30-3:30 I like to there for when there are some early arrivals. There were 3 participants today and a good number of volunteers. Now that we are getting more regular volunteers the program coordinators may promote the program a bit more. I’ll include a few photos of the participants cards. One of the volunteers stayed after the program until 4:30 to help me prepare kits for the class that I’m doing at the Canadian Mental Health Association tomorrow; I thought that the design we did today worked quite well so we’ll be making more cards like that tomorrow.
I had a quick stop at Michael’s to pick up some more watercolour paper then just had time to each some of the soup I made yesterday for supper and walk over to the curling club for our 6:00 6-end game which finished just after 7:30 then drinks and here I am now at almost 9:00 with about 200 words written.
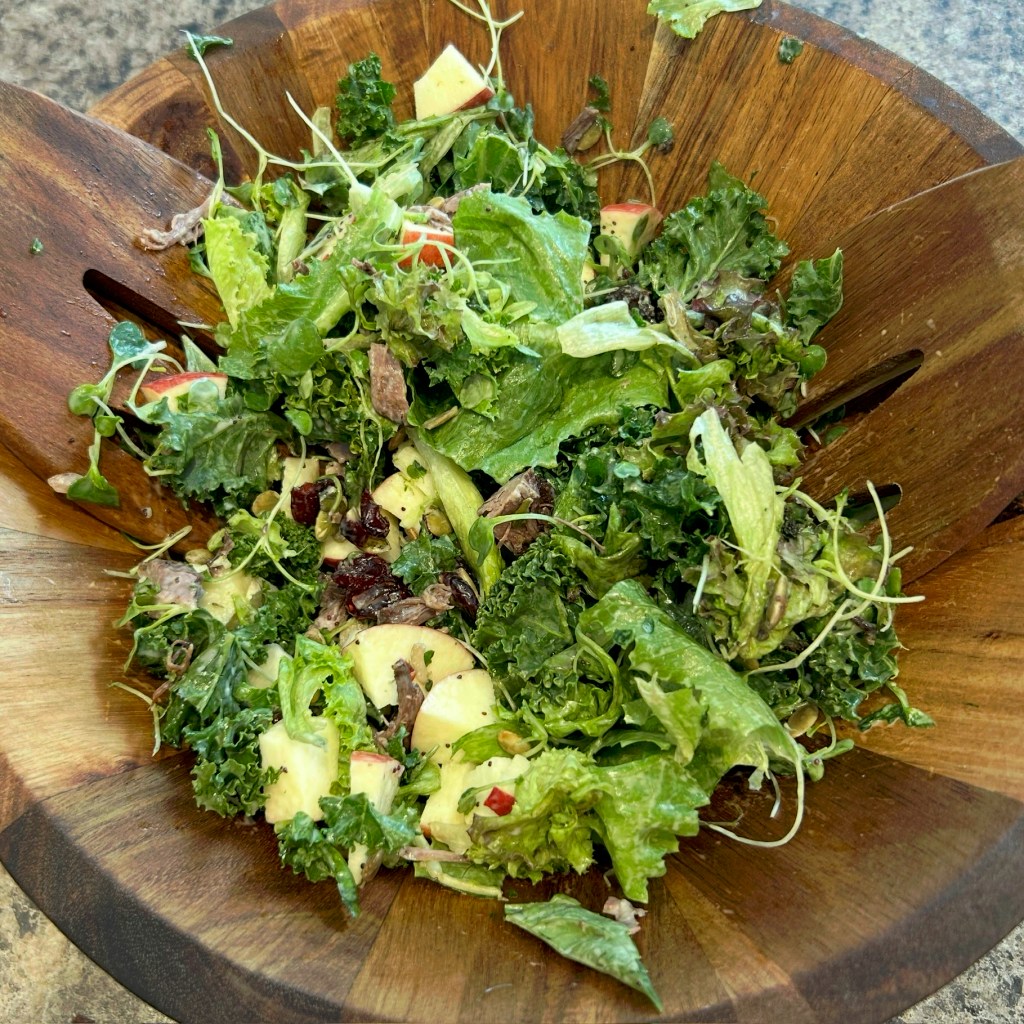
A yummy salad for lunch.
No theme for the day yet, but maybe it will come to me as I create a blog post by copying my daily writing from the 750words website into a post and add a few photos. I rarely get to 750 words but it’s nice to have it as a target. Update at 10:00 as I finalize this post: Mail it Monday is (and always should be) my theme for Mondays. I dug out 4 cards from my stash, addressed them and wrote a note in each one. They’ll get into the mail on Tuesday, but I’m counting them for this week’s Mail it Monday since I did get them all ready to go in the mail today. I hope you’re considering taking up the Mail it Monday challenge – and it doesn’t have to be a card that you mail – you could simply send an email or text message. The point is to reach out to someone. I’m sure that they will appreciate it.
Card Crew
Here are some of the cards that were made at the Dementia Society today during our Card Crew session.
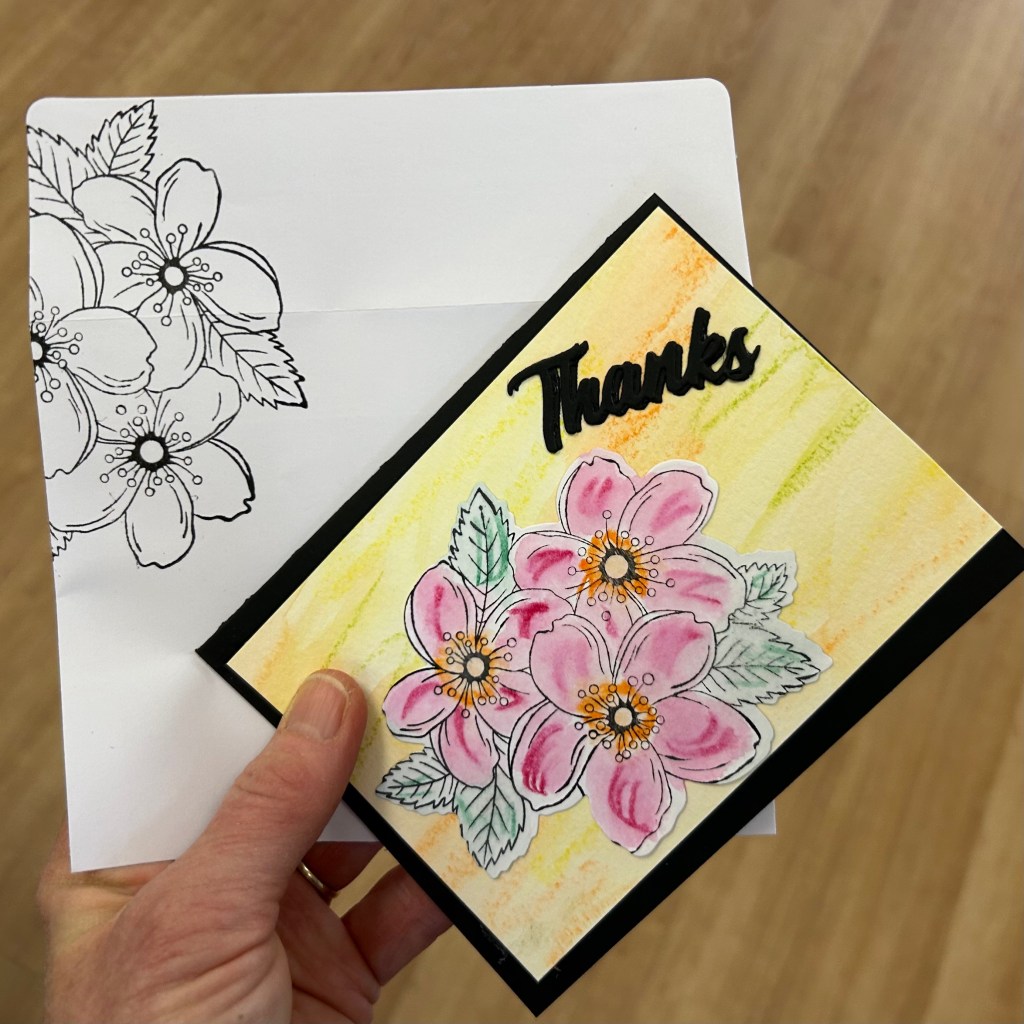
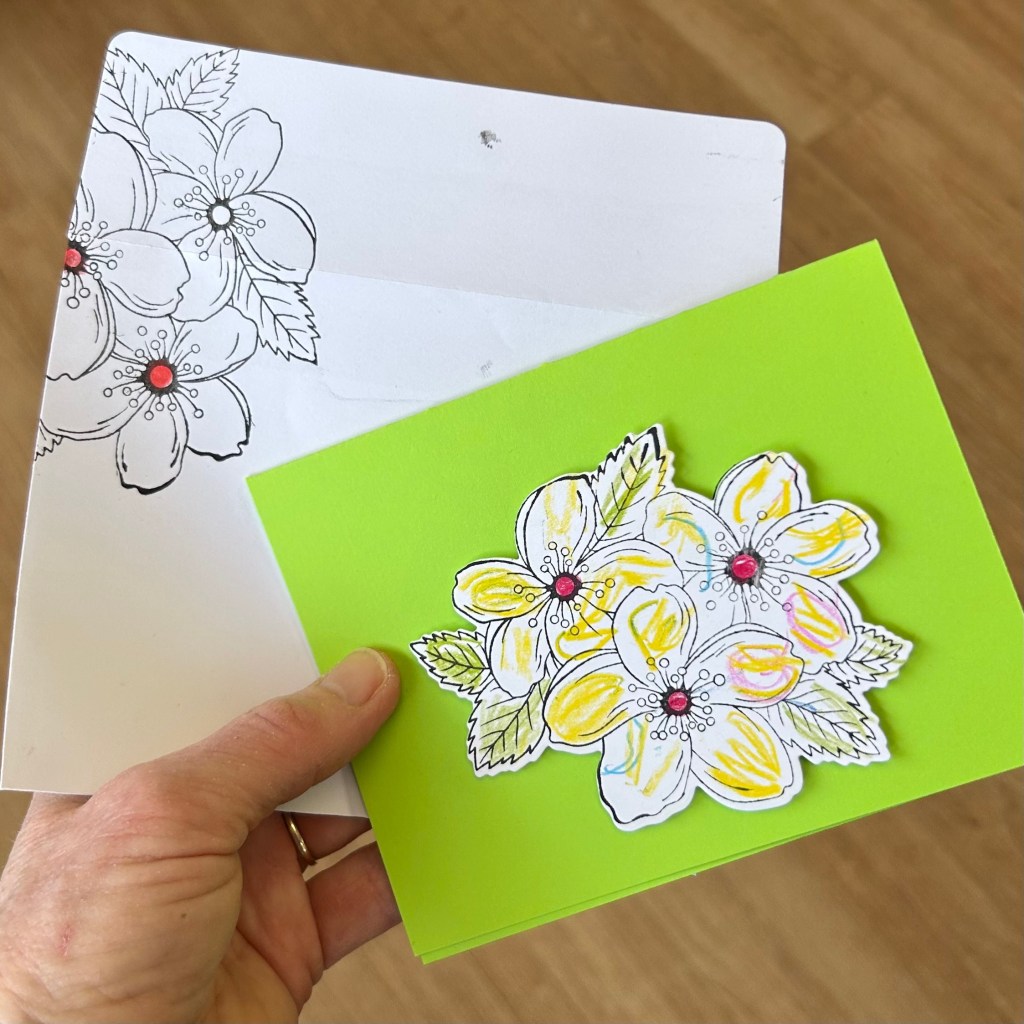
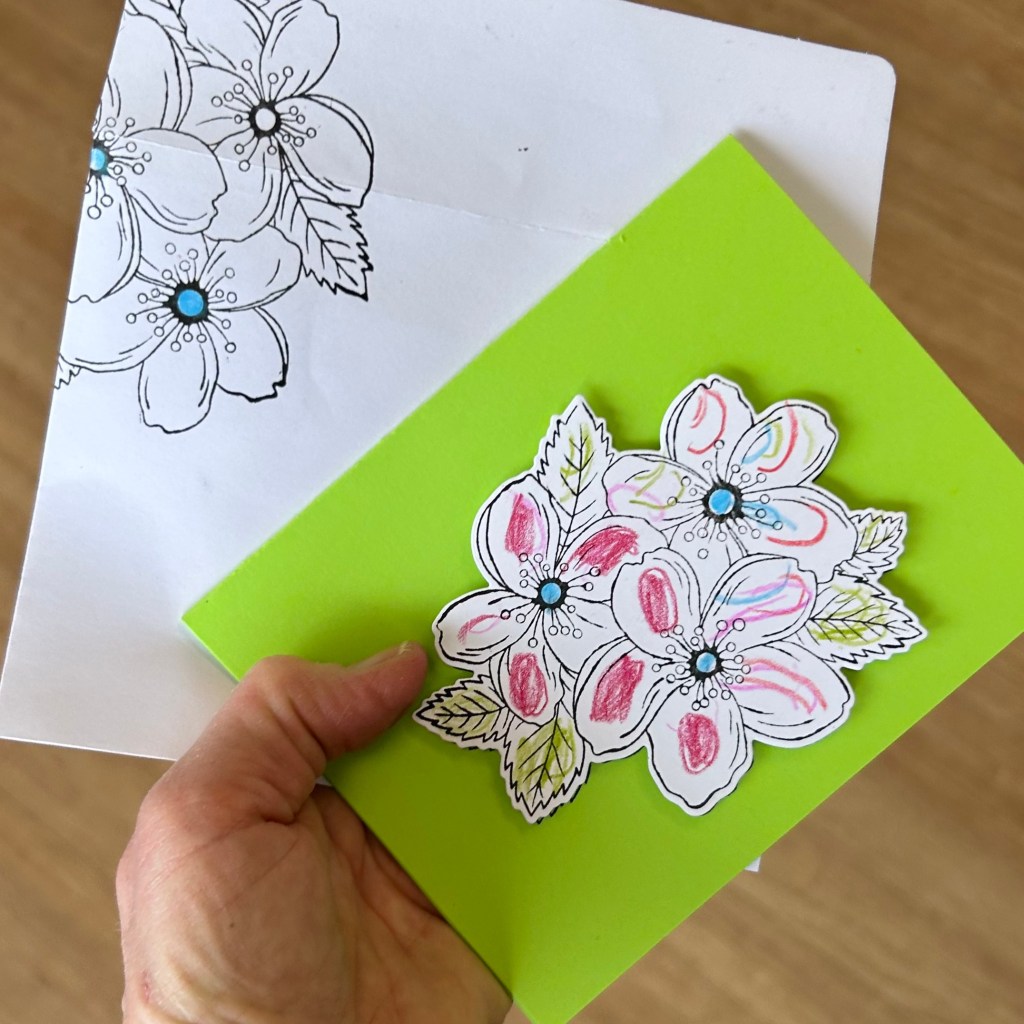
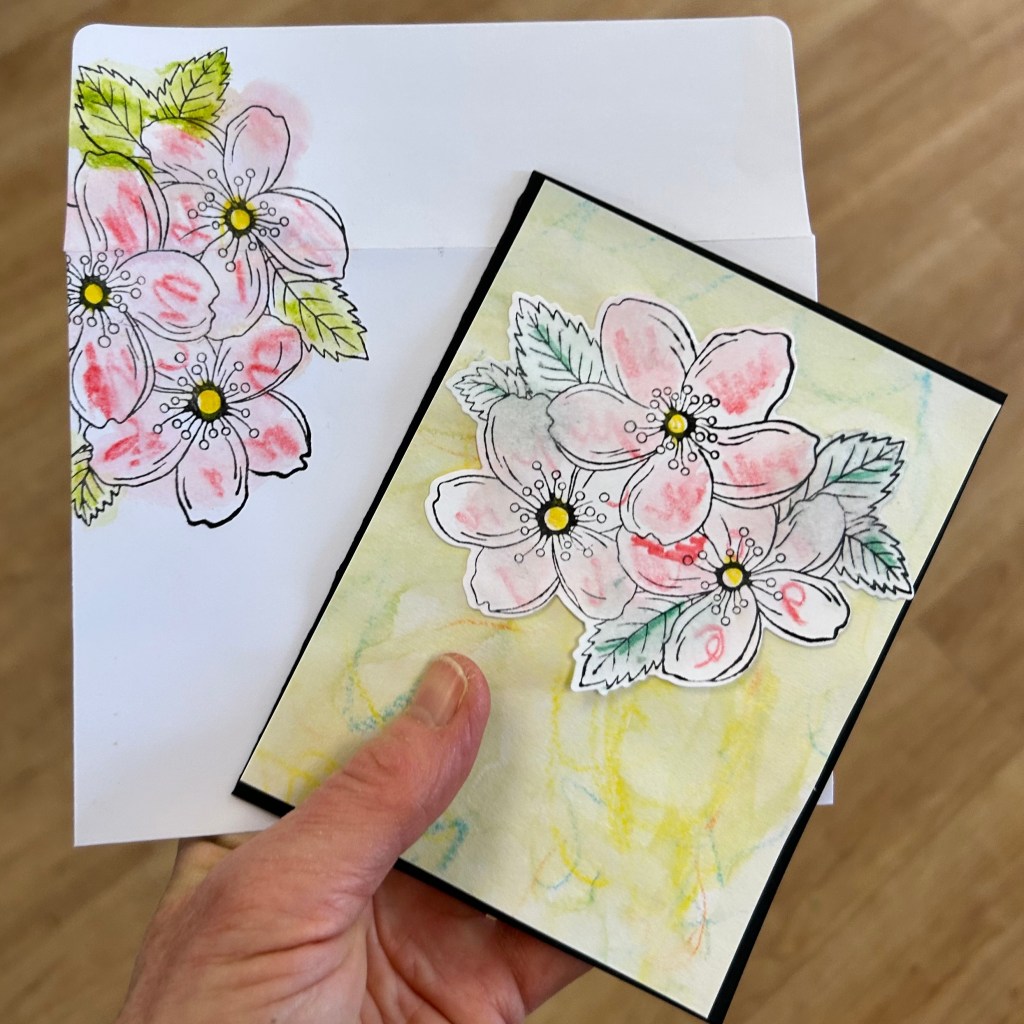
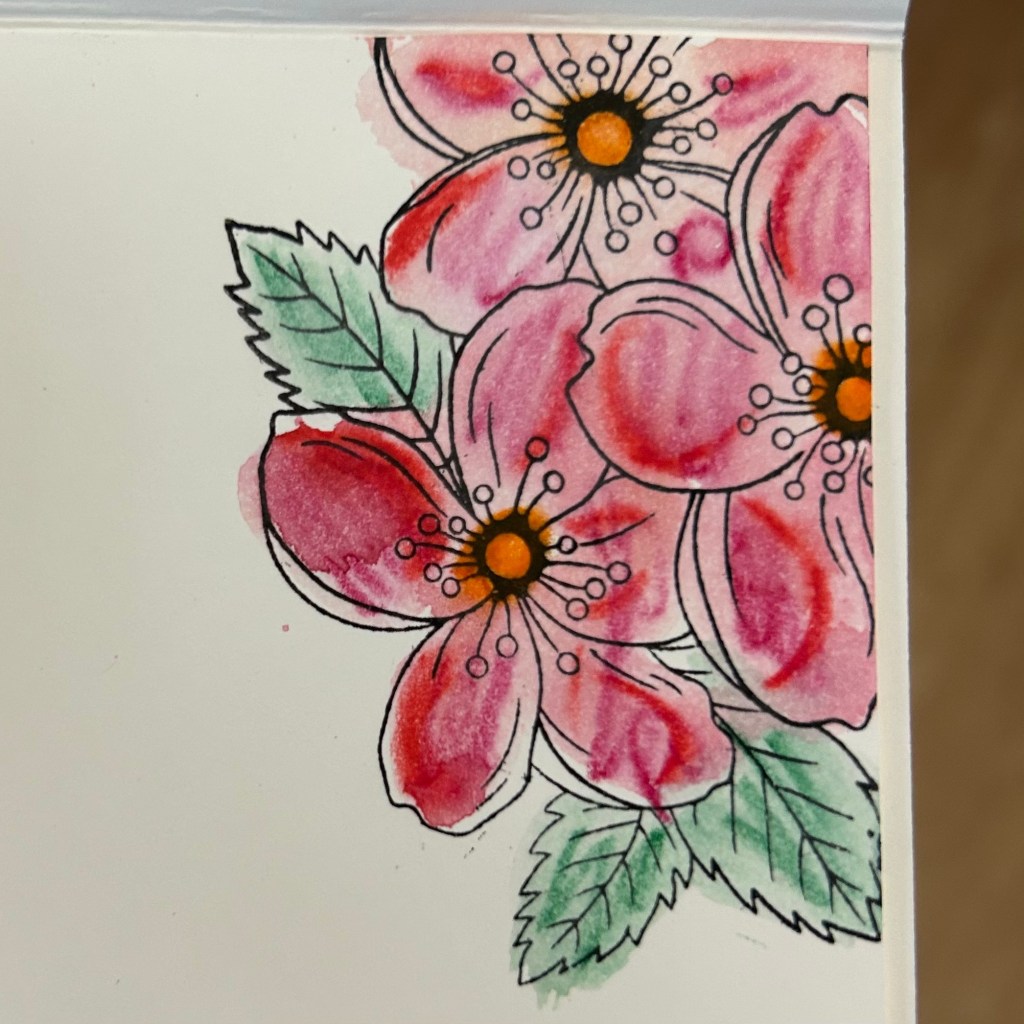
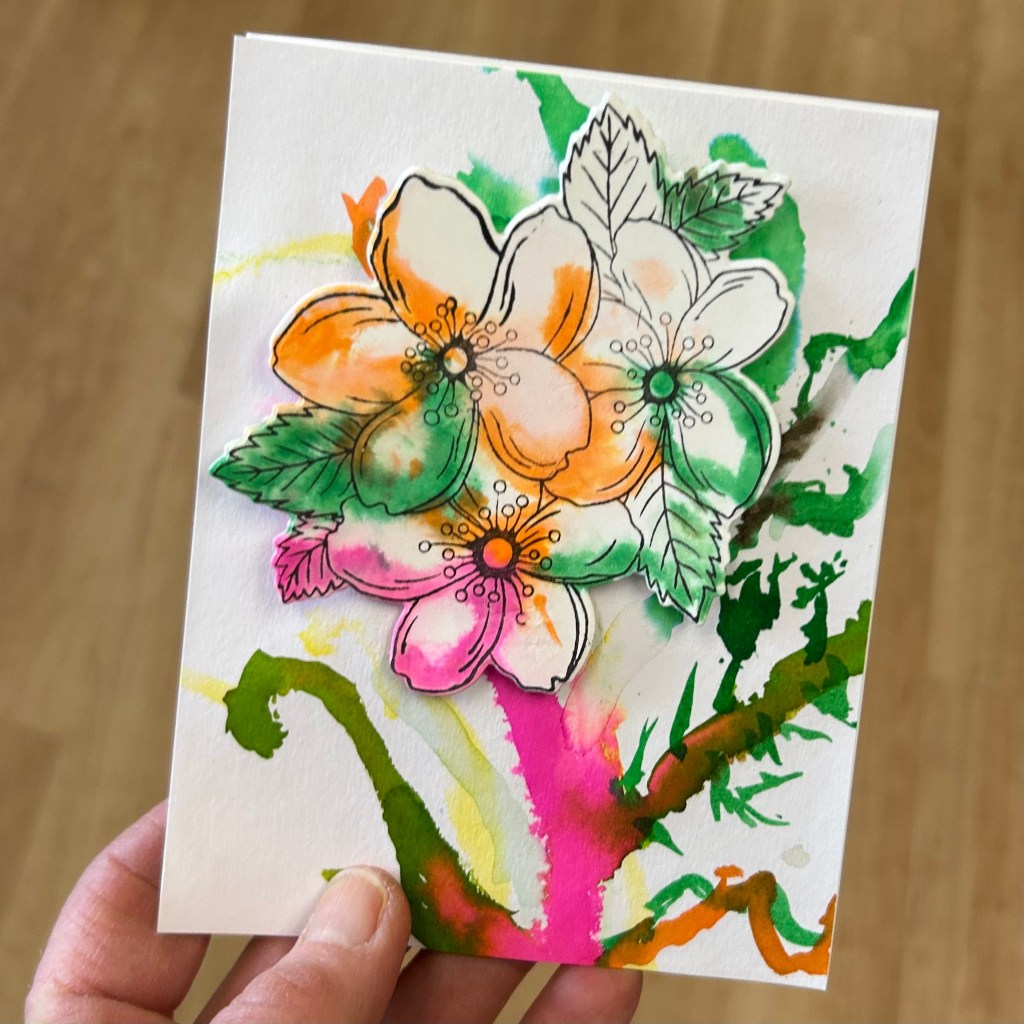
This one was coloured with water colour crayons which were then blended with a wet brush.The volunteers help guide participants in where they should add some colour and likely prompted this participant to match the centres colours on the card front and on the envelope.The bright green card base looked very cheerful and coordinated well with the green leaves.It’s nice when the envelope coordinates with the card.This one was coloured with watercolour crayons which were then wet to spread around the colour. The same technique was used to create the background layer.The inner layer adds a nice pop of colour to the inside of the card when the participants colour in the image.I love how this participant made a water colour drawing for her card front background rather than just making a random blended style of background. The watercolour markers give such fun, vibrant colours.The watercolour markers seem to work very well for some of the program participants.
Arts for All Program Preparation
This is part of the kits that I’m putting together for the monthly cardmaking class that I do at the Canadian Mental Health Association during their weekly Arts for All program.
These are the pieces that are in each kit that I’m putting together for tomorrow’s class: the cardbase with the image on the back. The image stamped for the front of the card which still needs to be die cut, the image on an inner layer and the image on the envelope. We also stamped sentiments as well as die cut some single word sentiments from black cardstock.
Mail it Monday
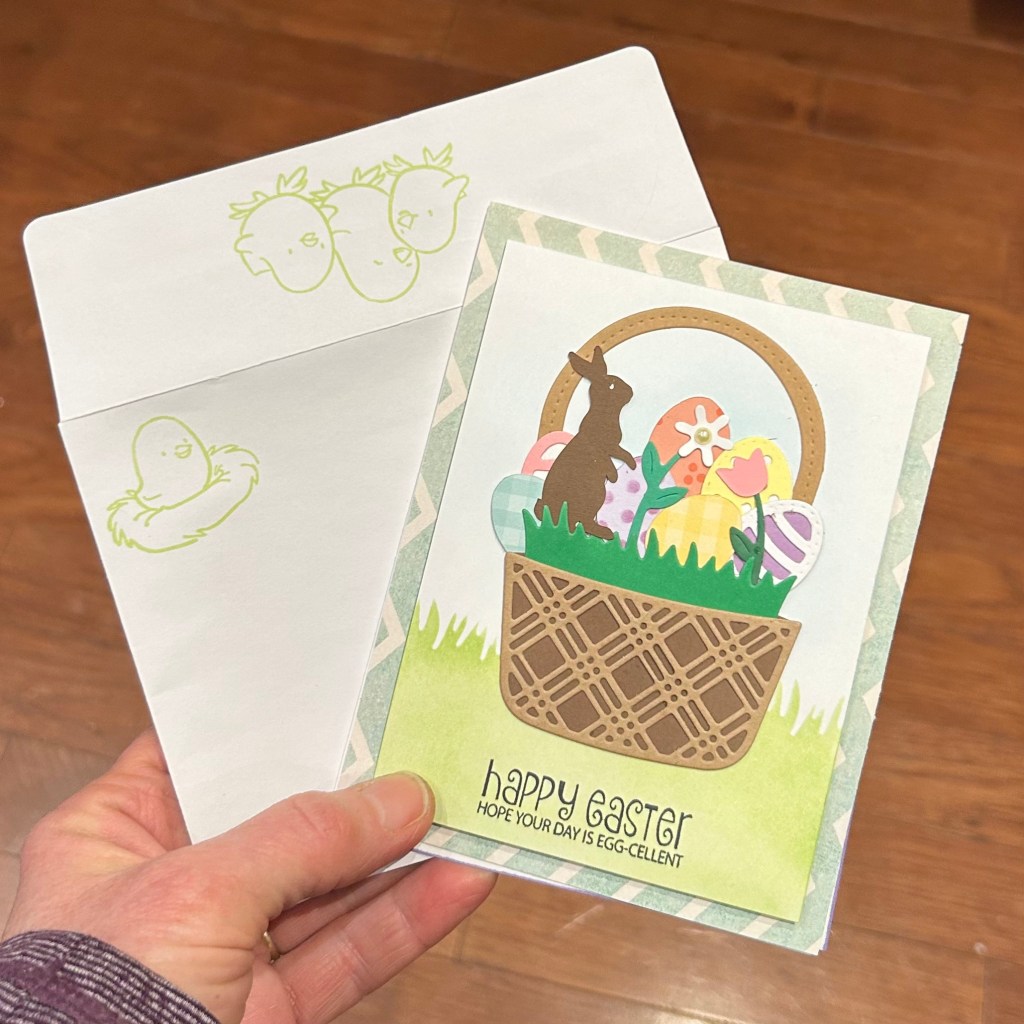
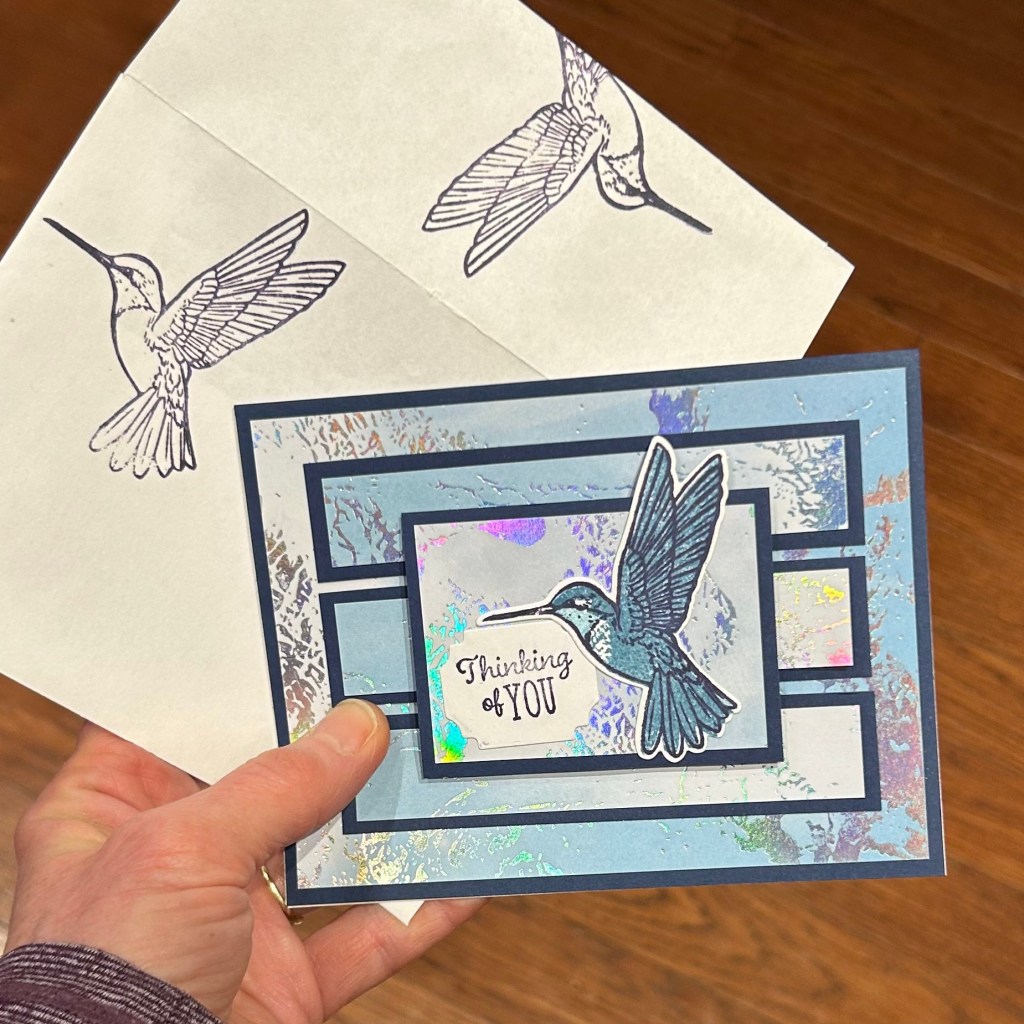
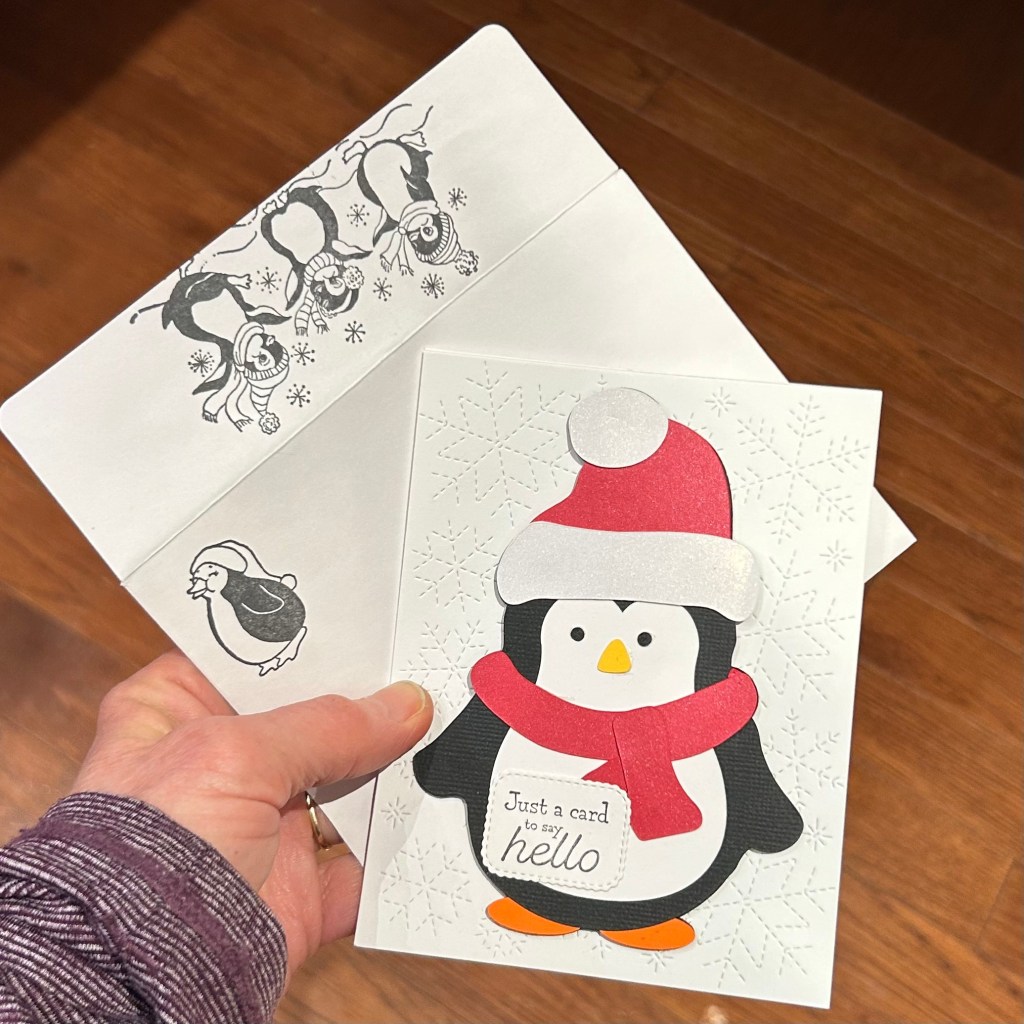
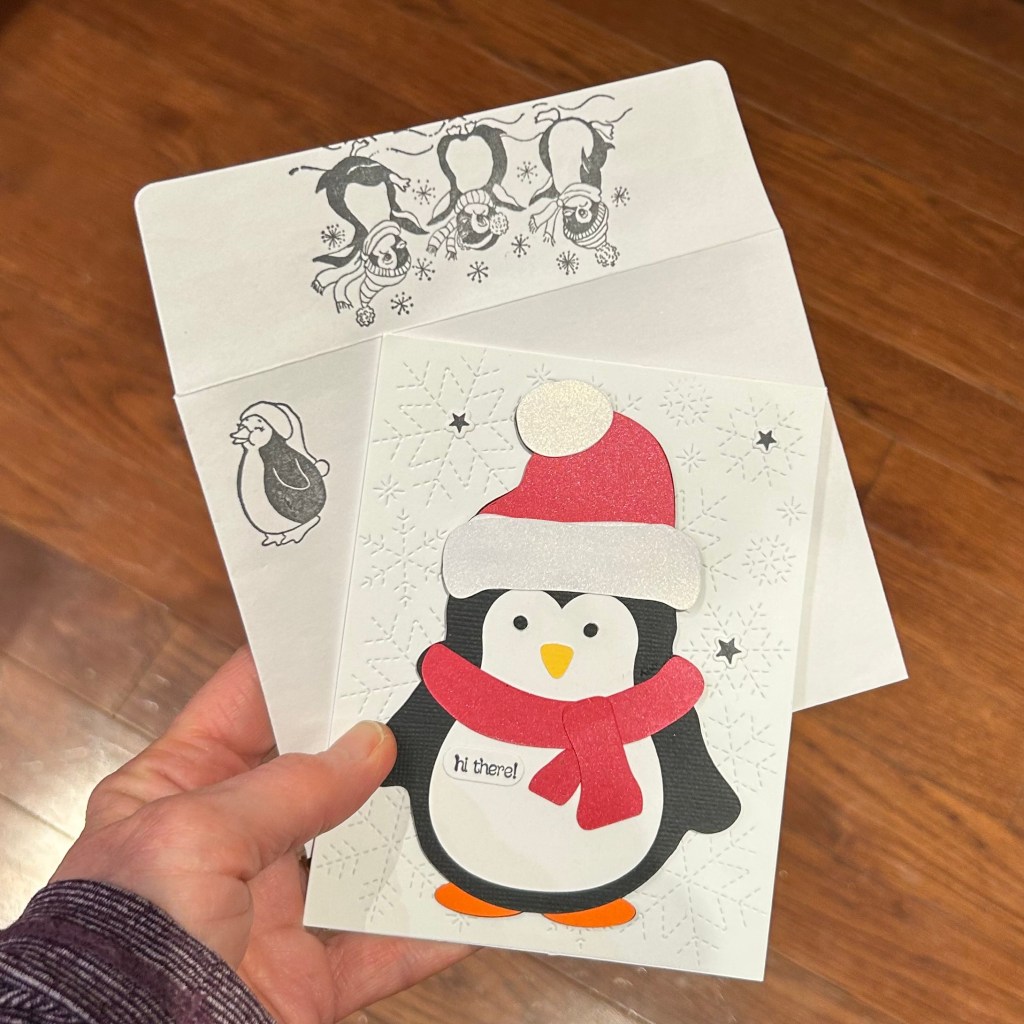
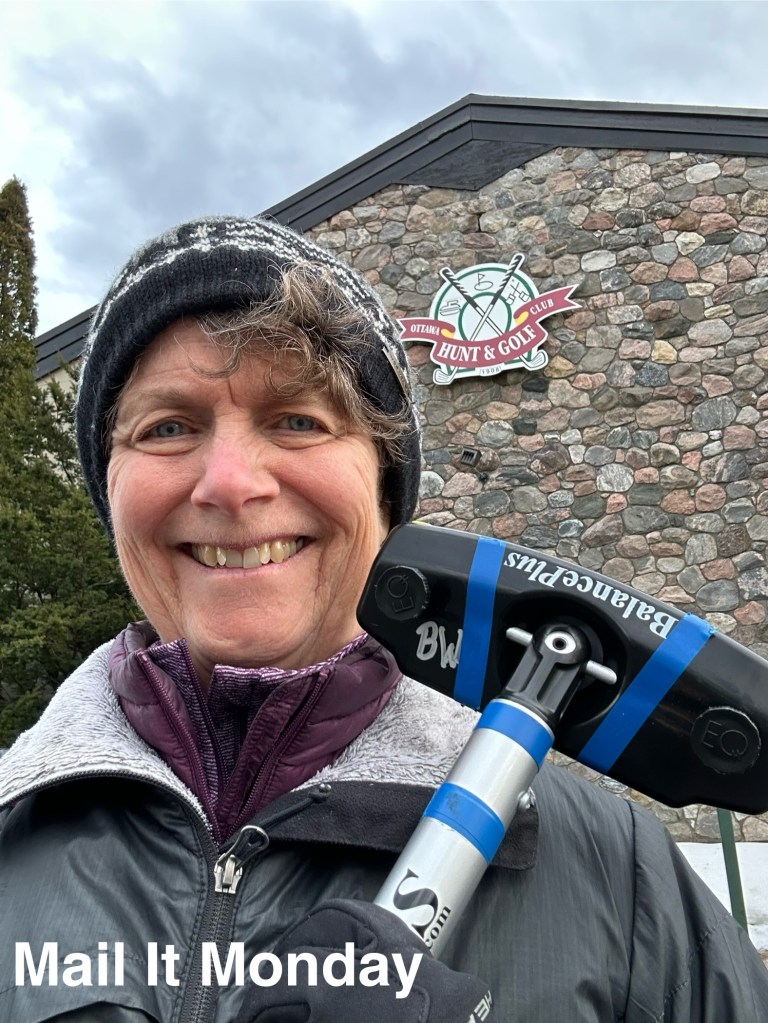
This was from a card kit that Vicki put together for my Dementia Society online Creative Cards and Crafts program last year. I have a pretty good stash of cards accumulated. This was a great design that I think would be worth creating again another year.Another card from a past Creative Cards and Crafts class with a kit that I put together using the beautiful hummingbird stamp that I got in a Scrapbook and Cards Today Crop and Create Cardmaking workshop class. I think it was a Hero Arts set.The pieces for this cute fellow were made using my Cricut. The Creative Cards and Crafts program also make larger versions of these penguins as a winter home decor item. I thought they were so cute (and can’t resist penguins – one of my favourite animals) so I decided to shrink down the size and make a card it using the images as well.This card is going out to a past Creative Card and Craft program participant. She’s pretty busy taking care of her husband so can no longer participate in class. We really miss having her and her husband in class with us on Tuesday mornings.I forgot to take a photo earlier today so I took this one on my way into curling tonight.
Back to taking photos of the beautiful bright red gerbia daisies.
100DayProject Day 29
I have mostly been working on a few other crafty projects today instead of either my 100DayProject or any kit assembly for my upcoming Dementia Society and Canadian Mental Health Association classes.
Part of my crafty project. I’ll share more about it in a few days.
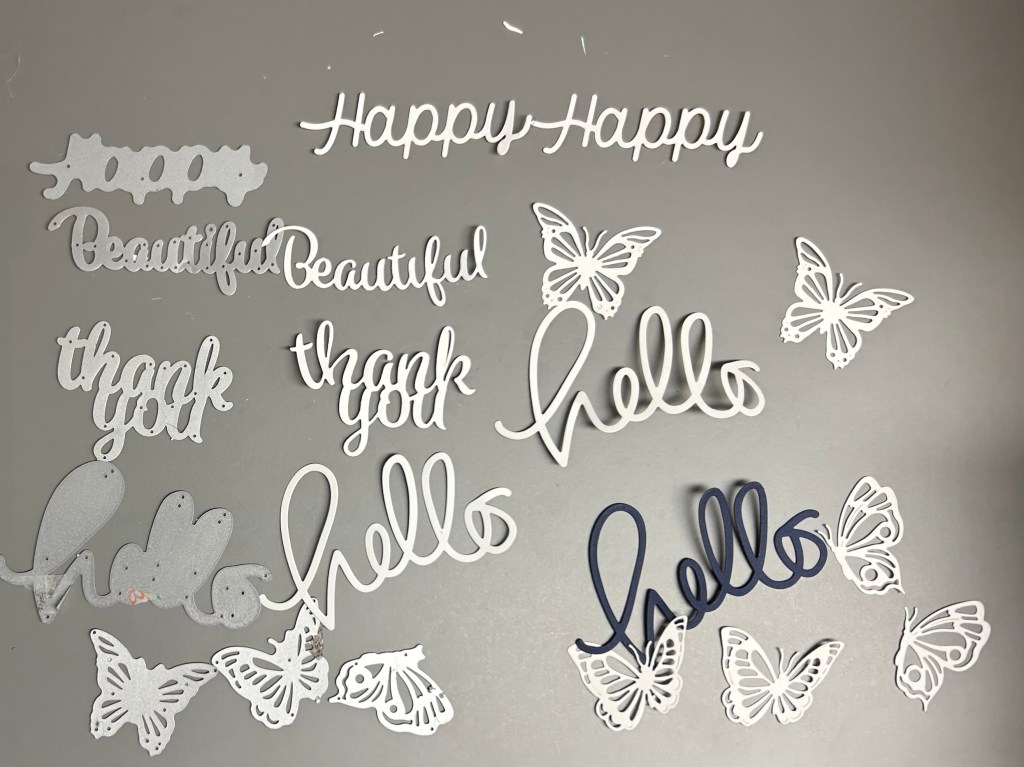
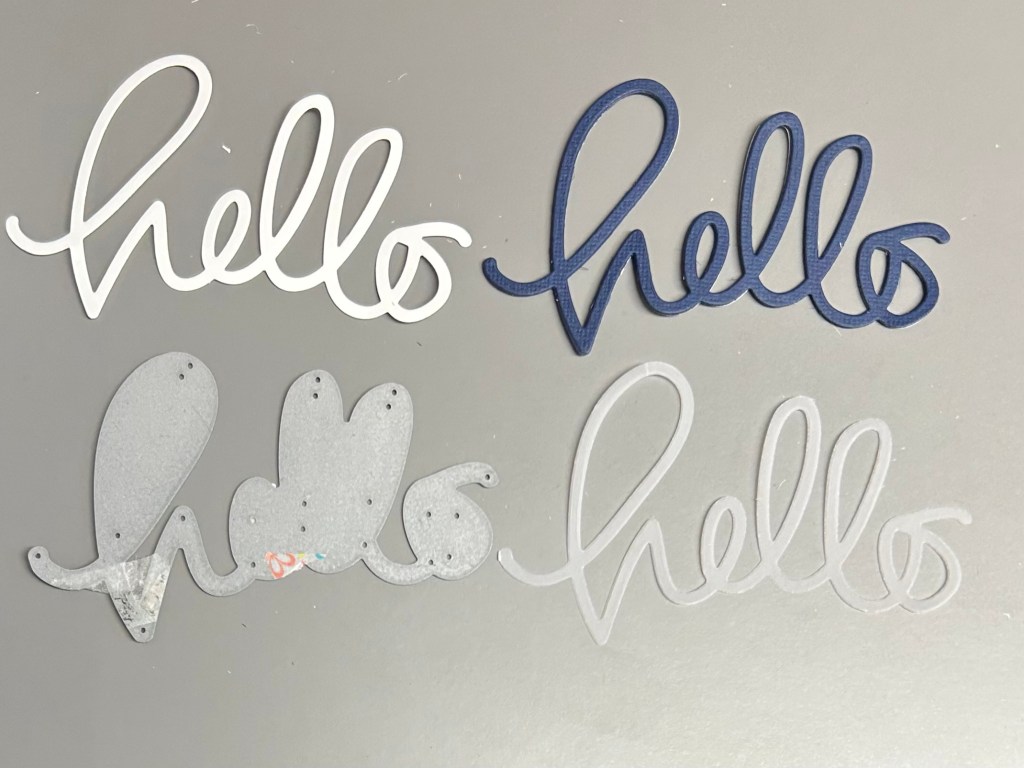
I did select a ‘hello’ die and created several layers of it which I glued together. Some I cut with adhesive-backed cardstock and the others I cut from 80 lb. cardstock. I glued the layers together and ran them through my die-cutter.
I started to cut out a few different die cuts, but finally got more realistic, put away the extras and focused on the hello die!
I tried a few different settings. I did a few trial runs through without inking the bottom vellum layer with ink. There was quite a bit of pressure required to make a good indentation. I eventually ran a few through after inking the bottom. I noticed that the layers shifted a bit from the pressure. I will have to investigate to see if they shifted under the adhesive-backed cardstock or under the glued layers; somehow I think it was the adhesive-backed layers that shifted.
Some of the layers that I cut out to build up a thick die cut image. I tried some from 80 lb white cardstock which I adhered together with glue. I also cut some from adhesive-backed cardstock. And the bottom layer is vellum which I adhered together with glue. I think the glue layers adhered better under the pressure of running them through the die cut machine for the faux letterpress effect.
Definitely some more experimentation required. I think it may work better onto thicker cardstock for a few reasons – the first being that it would be easier to make an indentation – and second being that the ink likely wouldn’t show through. However, I’m going to go ahead and finish the card that I started with 80 lb paper in which the ink shows through; perhaps I’ll add two inner layers – one on each side of the cardbase.
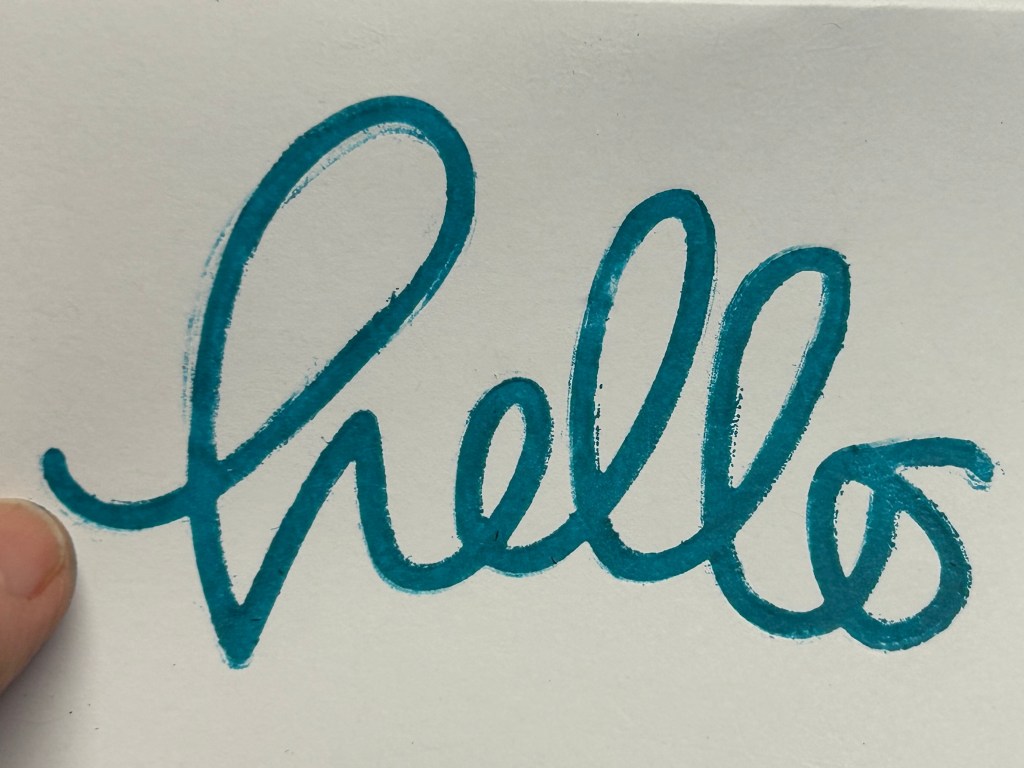
My first trial using ink on a scrap piece of paper. I may turn it into a card front. You can’t see the impression effect very well in the photo.
I think a few late nights combined with way too much recent experimentation with the foiling have left me with little energy or inclination to further experiment with the faux letterpress technique at this time. So I’ll move on and come back to it eventually.
I think I moved the stacked hello die cut a bit before or as I ran it through my diecutting machine. I don’t think this second impression came out as well as my first impression, although I do think I got better ink coverage on the vellum bottom layer.
There is special letterpress paper and apparently it works better with pigment than dye based inks so there is certainly a lot of things for me to try out. Maybe I’ll even find someone who has a for home use letterpress machine that will let me try it out. I will eventually research the real and faux techniques because the look is so nice.
I used too thin (80 lb) cardstock for this technique. You can see the impression from the inside of the card. i will add an inner layer on to cover it up. You can see how the layers of the stacked hello die cuts started to shift under the pressure of being run through my die cut machine. Further experimentation with the glue / adhesive as well as the number of layers of cardstock, and the weight and type of cardstock for the faux letterpress technique will happen sometime in the future. Hopefully tomorrow I’ll get the card finished and move onto the next lesson. This one is the fourth lesson in the Altenew Clean & Simple Boutique Cards class.
Soup on Sunday
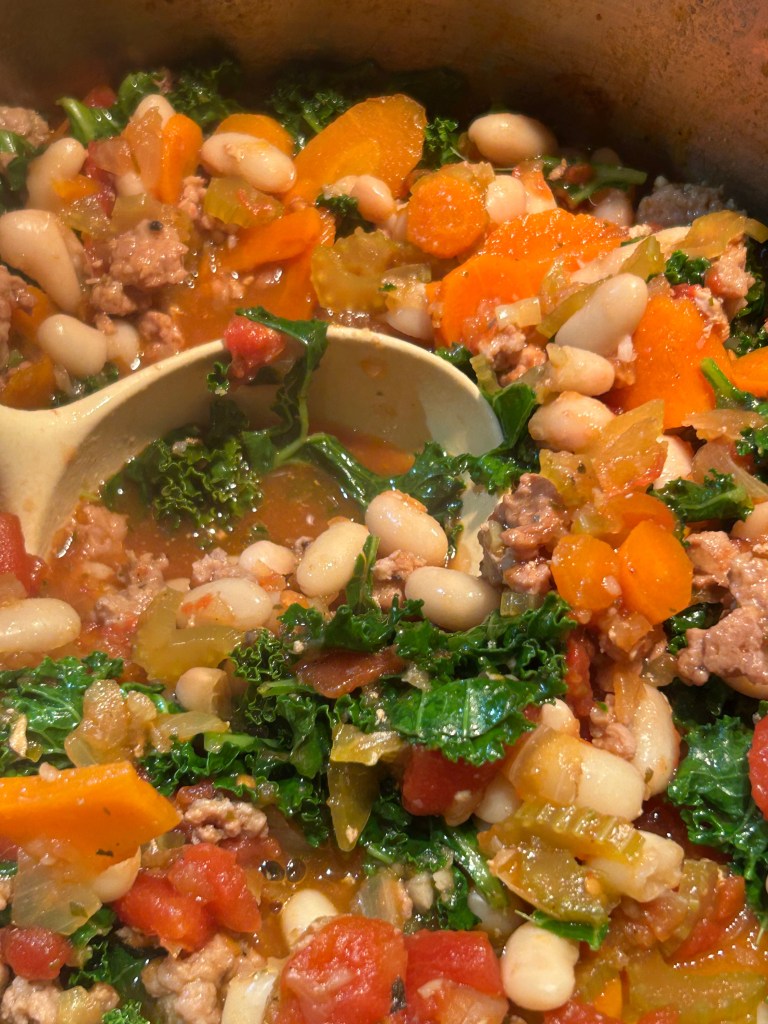
The soup I made on Sunday. But we’ll be eating soup for supper tomorrow instead of today.
I made a potroast for dinner. I recently found some horseradish in the fridge that I had bought quite a long time ago and developed a craving for roast beef. Wow, is it ever crazy expensive these days. So we bought a less expensive cut and made a pot roast with dumplings. It turned out reasonably well. It’s nice to have some leftovers. I also went grocery shopping for Heidi and made some soup. She’s trying to eat quite healthy this week in anticipation of ringette Nationals which start on Monday 31 March.
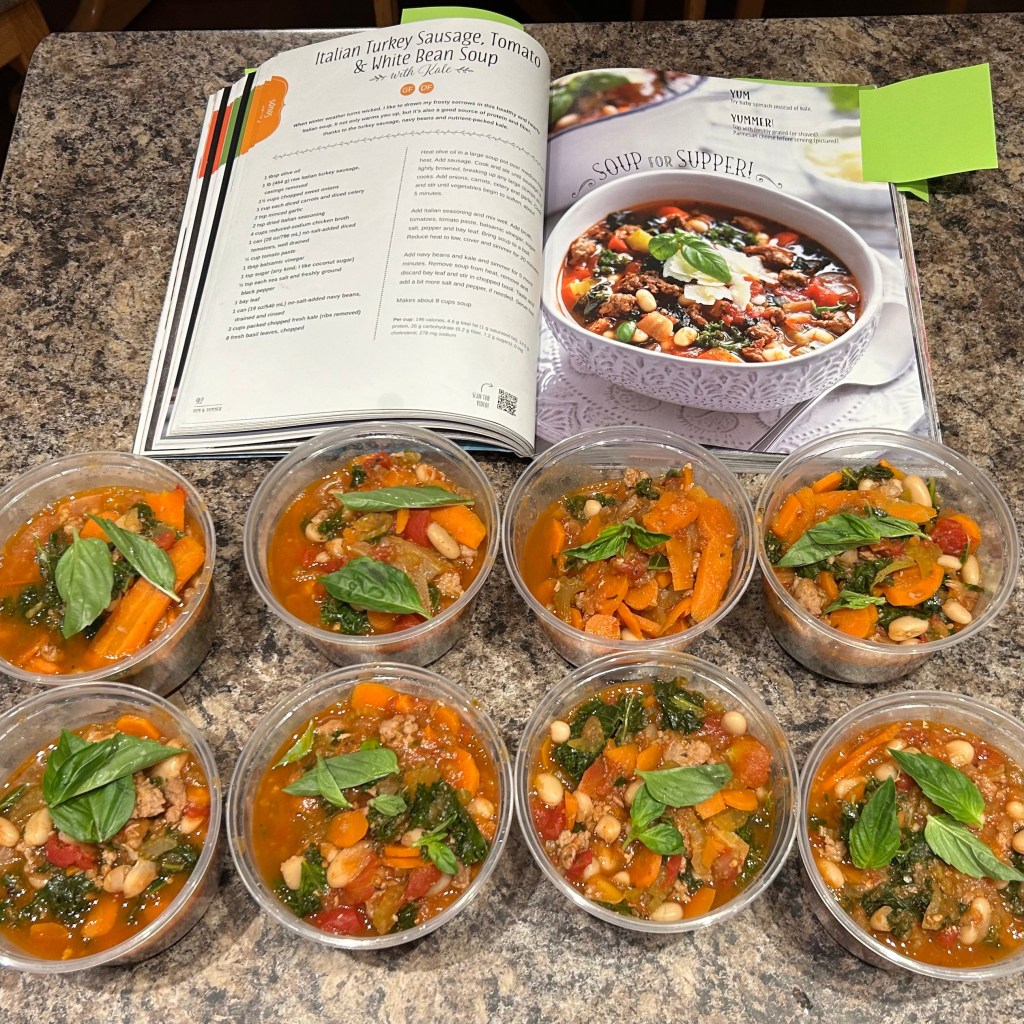
I used pork instead of turkey sausages but pretty much followed the rest of the recipe from the Yum and Yummer cookbook. I really like a lot of the recipes in the book and even bought an extra copy for the cottage. This is the first time trying this soup. It is easier to see what is in the clear containers that using sour cream and cottage cheese containers, but it’s still helpful to write a label on each.